Meizu MX Unboxed the XDA Way By XDA
Hi there Adam here this month, sexy developers, TV, is brought to you by the Samsung smart announced 2012 and jumper your chance to win your piece of over four million dollars in cash prizes by clicking the banner on top of co-developers comport by business, developer. samsung. com, you'd, better start brushing up on your job, and now I know I sure AM. Today we're going to do an exude unboxing of the Miku MX. So let's get started so here we have our Mizzou MX and this was jarred around a little during shipping. So if things aren't where they're supposed to be it's because I was already in here to kind of realign things, so it starts off.
We have a book here describing the Mizzou MX, a 220 power adapter, the Mizzou MX itself. You instruction both microUSB cable for those of you who are curious. This thing can handle anywhere between 100 and 240 volts, and it outputs 5 volts at 1.2 amps. So let's turn it on and of course, wouldn't you know it. So, let's turn it on, so now we'll turn this thing right back up all right.
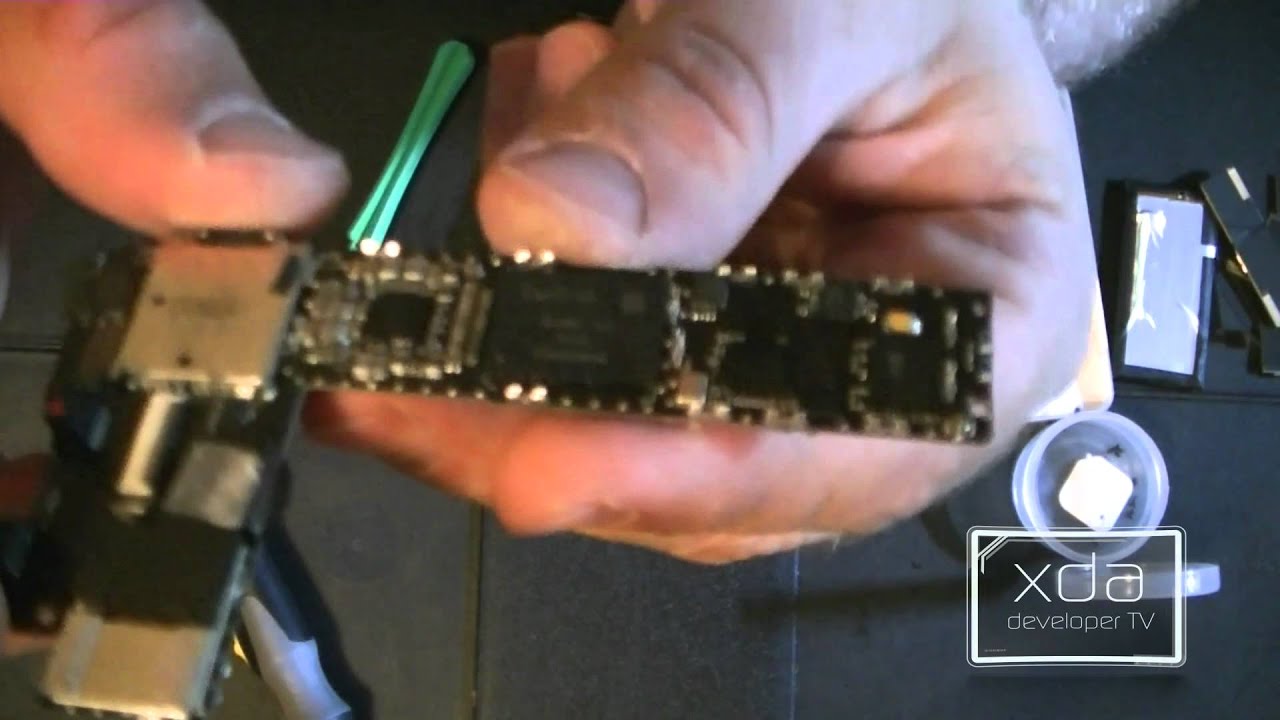
So, let's pop off the back panel, the way we'll do that it's use a little tool and that will remove one two, three, four five and six screws and two hidden screws here and here now we can disconnect the battery. Now we can remove some of these shields here, and we can disconnect the headphone camera and display, as well as this primary speaker, connector, and here we have the board, let's go ahead and remove these shields on the back to here's, get a close-up shot for you all. Now, first thing I noticed about this: is this board is extremely small. It also uses some pretty different sensors than what we normally see on the American Korean and all the other phones we usually get around here in the United States. They are using a package on package design for the system-on-a-chip, as well as an internal SD card.
There is conformal coating around all the larger chips on this device, which is a good thing. It makes working on them quite a bit easier and if I'm not mistaken, they provided several grounding points on the back as well as diagnostic ports along the side of the board. I'm going to go ahead and check out some of these diagnostic ports. I put the AMX under the microscope, quite literally, under the microscope, to look at the Enos 4412 processor. This is a quad-core processor, but not only did I look at the processor I also took a really close.
Look at the screen. Resolution on this I also took some time to probe around with some part as well packing around on this Museum of X with the bus pirate looking for PART output- and it seems I- have found some right here on these three pins. The furthest one to the right is the UAR TTX from the phone, and apparently we are running a version of you boot now the cleanest way come up with to hook up PART on this device was to place some connections on the battery there, there just glued in place, but they have wires that run over to this connection, points that I mentioned earlier. So apparently, Miku has patched up some of the vulnerabilities that allow us to gain root access before using some exploits, so they've. Also added this copyright notice that says any cracking to get root.
Privileges is prohibited without Mizzou, prior written consent, which may lead to infringement liability and blah blah blah that this is an America, and you know what in America we own our devices, and we can do whatever we want to it. So, let's get started on rooting, this sucker all right. So, let's go into mini-com with mini-com dash D, slash, dev, slash, GT y USB zero. So that way we communicate with the bus pirate and then once we get the most part initialize we will choose. The mode of you are at one: five, two: zero bits per.
Second, we want eight, none one, stop it default idle polarity and open drain communications will run all right. So let's open up another terminal, and we will do and, as you can see here, we've got a route terminal. Let's wait for this thing to slow down a little, though, all right, so we'll go ahead and issue a command to remount the system rewritable and that's /system all right now. We wouldn't have gate over to the place where I've stored, the SU binary and superuser APK all right. So now what we'll do is we'll do a DB push dot, slash SU /, SD card, alright and from this terminal here we have a root terminal and what we can do is cat slash, SD card / SU, and then we'll put that into u slash system, slash bin slash SU.
Now we can do a change mode on it, ch mod or seven. Five. Five slash system, slash bin, slash SU and now from this window we will do ADB, install so let's go ahead and check this out here we have chain fires, super SU, and it says binary needs to be updated. Install was successful and everything is working properly and that my friends is how we do an exude unboxing I'd like to thank you all for watching. Don't forget to subscribe to this YouTube channel and add me to your circles on Google+: go to plus a to Mallard calm until next time, hack on.
Source : XDA
Phones In This Article

Related Articles


Comments are disabled
Latest Articles


