Take PRO SHOTS with the Redmi 9T | 5 Tips & Tricks to get better FAST! By Umar Naqshbandi
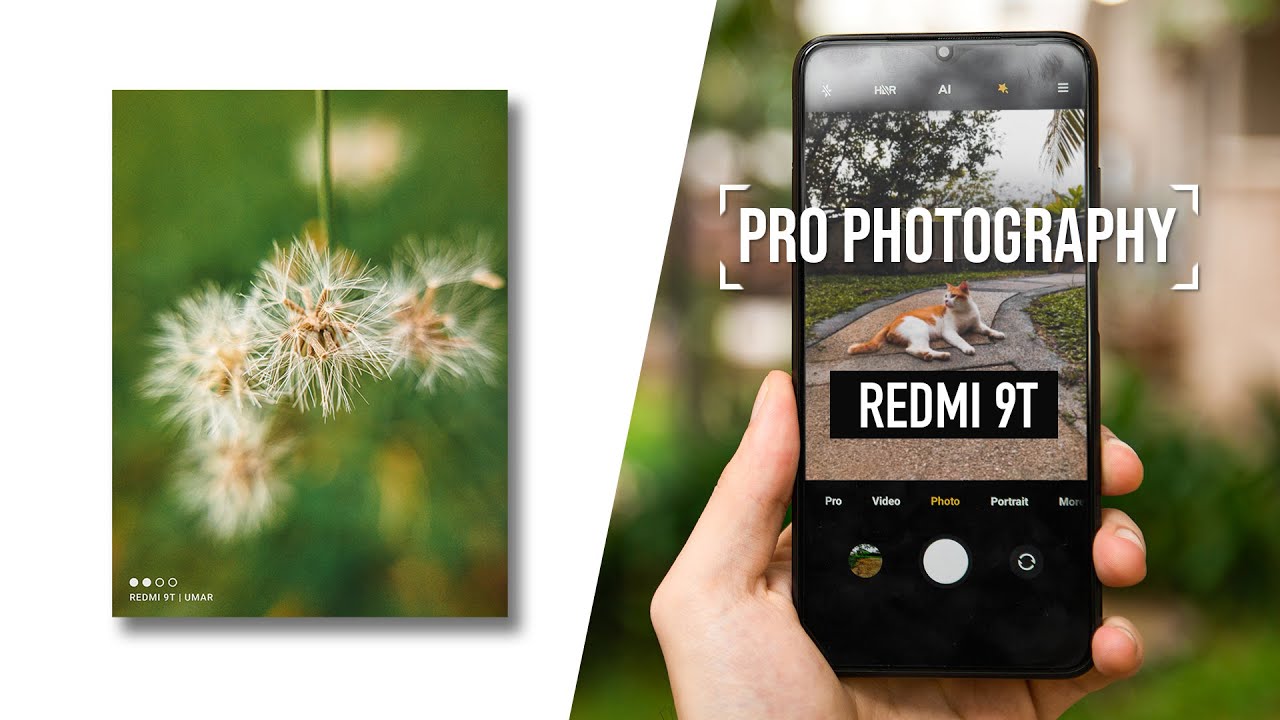
In this video, I'm teaching you guys how to take professional looking shots using literally any smartphone. You can think of now these tips and tricks work for pretty much any smartphone on the market. But for the sake of this video, I'm using the most budget smartphone I could find, which is the newly released Redmi 9t, this kind of showcases, that it doesn't really matter what the price of the phone is. If you know what you're doing so, let's get started. I've been taking pictures for the past 10 years now and for half of that period I didn't even own a professional camera. So what I really relied on for the most part, was whatever smartphone I had in my pocket at the time.
So throughout this period I learned a bunch of tips and tricks to get the best out of whatever smartphone I was using at the time. These are the exact tips that I'm going to be teaching you in this very video. The first tip is going to be bringing the subject in as close as possible to the length of the smartphone. This is the easiest way to fake professionalism. Now, I'm going to show you a couple of examples here: here's a picture of a dry leaf on a bench, pretty normal right, bring it in closer, and you get a much more pleasing shot with the subject being a lot more distinguished and looking a lot more professional same with this picture, just a general picture of a rock nothing special here, bring it in closer.
You get a nicer background, blur which looks a lot more professional and your subject is more distinguished, applying these same techniques for other pictures as well. You get a nicer blurrier, looking background, which is considered professional generally and a nicer image overall, the second tip is going to be using accessories. My favorite accessory personally is using a macro lens externally. This basically allows me to get the maximum focusing distance, as well as max resolution supported by the device for the Redmi 90. For example, it's a 48 megapixel camera, which is a lot of resolution.
If you focus that in and turn that ultra HD mode on you get so much more detail guys. This is absolutely insane using the max resolution with the closest focusing distance. You can get insane results. No one would know it's taken with the phone. If you do it correctly and that's what I recommend.
I've done a dedicated macro video for this. You guys should definitely check that out. If you're interested in that aspect of it, I'm going to link it up. The next and probably one of the most important tips is going to be using the pro mode as well as the lowest ISO possible. The ISO is basically the sensitivity of your phone sensor to light the lower.
It is the less noise you will have and a clearer image overall, with better dynamic range. I used the lowest ISO, which was 100 on the Redmi 90 for pretty much all of these images. You also get to control things like your shutter speed to control motion sensitivity as well as focus speaking to make sure you're focusing is 100 accurate. It shows red lines around it, for example, this picture of the cat. I was able to get it perfectly tack sharp as well as not any motion blur included because of the right settings.
Tip number four is angles and angles. Everything you take. Pictures off in the world of photography depends on your composition and your angles. Whatever lens you use, whatever perspective you're using has to be well-thought-out before you take a picture, always look at different perspectives and angles to figure out what works the best. For example, if you're taking a picture of a nice little scene there, and you want to draw attention to a specific subject, just moving your angle.
A little gets you a lot more of a dramatic shot, with a lot more focus on your subject as well as making it look a lot more dramatic. So this picture, for example, if I took it this way pretty nice. But if I want to bring focus to the sand little thing built at the bottom, we can make it a lot more focus based and look a lot nicer. Your composition really pretty much defines how your image turns out. The angles that you choose can really change the dramatic effect and make the image look a lot more professional overall, giving you a lot more balanced images and look a lot more professional.
The final tip is gonna, be your lighting is your best friend and the more light you have. The better images turn out. Smartphone camera sensors are generally really tiny. So the more light you give it the better. Most of the pictures I shot in this video are at sunset or in direct sunlight, always use that to your advantage.
So that's about it. That's how you can take professional, looking shots using the Redmi 9t or pretty much any other smartphone for that matter. Use these tips and tricks to improve on your photography, and you'll, be taking those dope ass, Instagram shots in no time. Thank you guys for watching. If you want to see more content like this, where I break down how to take professional looking videos or how to edit your pictures and videos make sure you subscribe to the channel as well, and I'll see you again in the next video.
Source : Umar Naqshbandi
Phones In This Article


Related Articles


Comments are disabled
Latest Articles


