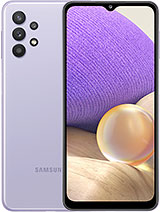
Samsung Galaxy A32 5G - How To Take Apart - Glass Screen Repair - LCD By Jose Morales

Welcome guys to a new video on today's video, we have the Samsung a32 5g. We have a phone with a broken screen, and also we got the brand-new screen. Let's begin this repair, if you are new to the channel, don't forget to subscribe and click the bell icon, so you don't miss any notification for the new videos. Thank you, alright, guys. So to start this video we're going to remove the back cover of this phone. It's made out of like hard plastic, as you guys can see we're going to use our heating mat for that.
So I have it right here. If you don't have this type of equipment, as I say before, you can use a hair, dryer or a heat gun, whatever you have on handy, so we're gonna, let the phone rest here for a few minutes, not maybe like one or two minutes top, and we're going to be right back all right. I think that's good enough! Uh first thing I'm going to use. I'm going to use my flat tool just to remove that back cover. You can also use many people use like suction cups, a razor blade like these uh.
Actually, this time, I'm going to use a razor blade like this. Okay, if you're going to use a heat gun or any other type of like uh heating element, make sure don't hit this up too much on this back covers are made of plastic, it can take weird shapes, and you're going to have to replace it, and I always start from the side, because it's the like weakest point of the adhesive, so we're going to start by just lifting that back, so you guys can see. I just want to uh like to create a little opening right there and from then I can take uh the cover with a playing card like this. There you go. My playing card is in there, so I just remove the razor blade.
I don't keep doing any damage, and I'm going to go my way around this one right here. Usually when they're back like the back is uh plastic, it's not as difficult to remove it. Uh like when is uh glass for some reason. Okay, so let's just go all the way around. Oh, that came out pretty quick.
I know there is no fingerprint on the back, so just uh. To be sure we don't break anything. I just take a little look inside. Okay, there is nothing in there and boom. That's how you remove the back cover, make sure when you order the part, take a look at the model number or go inside the settings about the device, and you're going to find the right model all right for the next step.
We are going to remove 16 screws that are holding the plastic cover, that is holding the charging port and the motherboard. Let's do that, and that is the last one. So all right, all the screws are out of the way we are going to remove the sim tray. There we go now. We are ready to remove the middle frame all the way around.
It's just hold by a few clips. Here we have the power button and the power button is actually a little flex that goes right there. So please make sure you unclip that little power button before removing this frame. Another way you can rip off that cable, then you can safely remove the whole middle frame. Okay, let's put that on the side.
Also, what we're going to do is unplug the battery. We have our new screen. You always test the screen before installation, especially when is a model like this. We have to glue the screen. Okay to test the screen.
We see the big cable in the middle, that is, the LCD and charging port cable, because this comes with a little connection for the charting port, which is pretty smart. Alright guys, this part of the video is being recorded one week after we start this video and here's the reason why, because the part I ordered it was the wrong part, it was made for the international version of this phone, which I had to order now. I ordered the US version model LCD for this phone. If I connect this LCD onto this one uh, it will not turn on it will uh. You will not see any image on the phone, so I had to stop and order the right one you can always identify which one is the one you need.
You can go to the cable, and you're going to see a three two six, and this is the important detail, the letter after the six. This is you, so you guys can see in the new LCD. I ordered a three two: six! U all right! That's perfect! On the other one, then I ordered previously a326b, so this is not compatible. So I made this mistake, so you don't have to okay pay attention on this simple detail at the moment of ordering the screen. Okay.
That being said, let's continue with the video all right so to test this uh LCD is a little complicated. Why? Because we don't have actually uh the power button, so we can turn on this phone uh. We don't have to install the LCD and I don't want to remove it just in case this is bad. I can continue to use my phone all right. How we going to do this.
Okay, on the frame we have the power button. This power button is hold back a little bracket right here. All we got to do is grab uh some tools and just lift the little bracket. It's gonna lift! It's going to come out like this all right just put that on the side: don't lose it, and then we can just push the bottom in, and it will fall apart like that, all right now we have our power button. Now we can test the LCD before we install it all right.
I heard some vibration and voil? okay perfect. Now we see the phone is alive. We can touch the screen just to confirm that we have a good uh touch, uh sensitivity. You can go as far as typing something just if you uh are not comfortable if you're, not 100, sure. If this is working or not, we can always go to the browser.
Even if the browser has no internet connectivity uh, we are gonna, be able to uh access the keyboard, and maybe we can touch letter by letter number by number. After confirming our LCD is fine. We're going to proceed for the installation we have our phone already sitting on a heating mat all right when the phone reaches a temperature. That is hard for you to keep your hand on top of it. If you, if you're using a hairdryer or a heat gun, if you start to see jello in you, can stop there and don't overheat it more than that, because that means you already apply too much heat.
Okay, the front is pretty hot. All right just make sure it's hot, and we are going to grab our razor blade. I always use a razor blade because they are really strong and very thin to go in between the frame and the glass, so we're going to start from there. If you see the screen, it's having a hard time lifting you can always like overheat, a little more, you can see the adhesive giving up and let the screen be free. There we go, maybe heating up a little more, the bottom.
Of course, it's just. If your screen is cracked, awful, it's going to be a little more difficult. So take your time all right see. Remember we have two cables on this screen, so we have to be uh, make sure we unplug the LCD cable to the motherboard and the LCD cable to the um charging port. All right, we're just going to slide.
This there we go and that's how you remove we're going to shut this down. That's how you remove the screen. We have a few uh pieces of glass still attached to this frame, so we have to make sure that it's not one single piece of glass in there. If you are not glass, proof like I am always used, glove or other type of protection and just brush the whole phone just like. So this is just to make sure that there are no pieces of glasses just trapped in between there.
We don't want any accident. Now is the moment to apply the glue we have. This glue is e800. We are going to apply the glue, don't apply any glue in the middle. Don't make that mistake that can also harm your LCD instead of doing any good.
So all right, we have applied glue all around. We didn't miss a single spot, make sure you put um on the whole frame, all right, we're going to grab our new LCD, make sure you don't leave any of those speakers, safety sticker that they put, and you don't want anything in between. There is sometimes there is a little plastic like this. You see, don't leave it in make sure you remove it, because that can block your camera and can a front camera, and it's going to look blurry at the moment of taking pictures. It's a little detail that make the difference all right.
We're going to slide that cable in between the frame and also make sure the other cable also goes in there. All right both of the cables are in and now oh, don't let it go we're just going to align the new LCD and put it to rest there. We go. That's it from here now we're going to put some clamps to hold it. This is just to prevent the LCD moving while we uh waiting for it for the glue to dry.
We don't want that LCD to go anywhere. We want that LCD to dry and stick very nicely to the frame there. Furthermore, we go. That's good enough. Okay, here's uh a choice.
You can leave it uh for to dry for like 10 minutes, 20 minutes. Believe me if you're, not using your phone, or you want to get a nicely done job the longer, the better I'll be right back all right. This phone is ready. Okay, now, first thing, I'm going to do is um check again, I'm going to plug in the LCD cable for the charging port and the LCD cable and the LCD cable for the motherboard. All right, that's it! I'm going to grab the power button.
Grab the power button again place it into the frame, that's where we find it and put the little holder back all right. You see this little holder, it's just like a little a Lego type piece gonna, just like slide it in there from one side and same thing. On the other side, it just falls on place by itself, as you guys can see, and you can test. If you did it. If everything is fine, you can press it.
Can you hear the click very strong click, so that is working good? So all right, let's move on um now. Basically, everything in here is already uh being uh plugged in it's not many things that we have to plug in one two: three cable with the battery so just plug in the body, because we are about to put the middle frame and just like so the middle frame is installed, or the power button is the last one we're going to plug in just press it down there. We go now it's time to put back all the screws. Let's do that, all right guys, all the screws are back into the frame. All we have left from here is uh install the back cover we're going to use our e 8000, and we're also going to apply a little all over.
That's good enough, uh. Let's just put it back right there, just, just lay it on top, just make sure it's not in between and just let it rest like so, and at this point we can also put some clamps just like that, just to help uh the back cover to really like cure and don't move, you know there, you go as you guys can see. Uh we have right here. The uh sim tray, put it in just uh slide it into the phone just like that, and we're going to uh turn on this phone in a few minutes when these back covers have dried I'll, be right back all right, it's been a few minutes. Let me remove this and allow me to press the power there.
We go as you guys can see. We have our 832 fixed here we have the old screen, that's how it looks. Oh, we can hear the sound now. Okay, so we can see the phone is working great uh. It's went back to original form of uh performing, so here we have the old screen uh.
That's it for this video guys uh! Thank you so much for watching. I hope this video helped you to fix uh your broken 32. That being said, I'll see you guys in the next video, don't forget to subscribe and leave your thumb up bye. You.
Source : Jose Morales
Phones In This Article
Related Articles


Comments are disabled
Latest Articles


