How to replace iPhone 7 Plus Battery. Full guide. By infohut
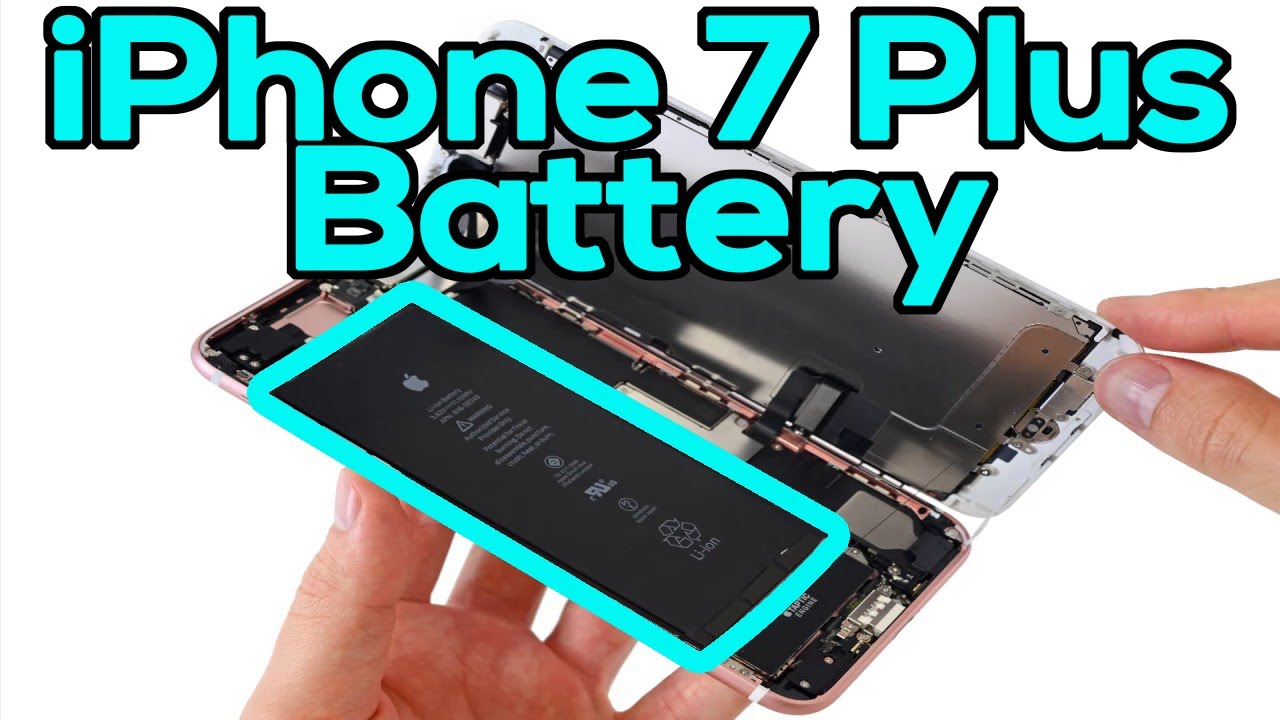
Today's tutorial is on an iPhone 7 plus battery replacement tools. You need are located in the description below. Let's begin, okay using a pantalone screwdriver at the bottom of the iPhone, take the two screws out you now using a pry open tool and a heat gun. First, you need to heat the screen now, just heated enough, where you can still touch it almost as hot as a warm coffee cup, once you've done that you can get your prior open tool and move around the side, as you can see, I'm only putting the actual pry open tool, a few millimeters in just to unstick the seals once you've done that you can slowly lift the screen up, I like to lift from the bottom and then from the left, and then you flip it over like so, and now we have the battery exposed, and we need to take the plate holding the battery clip down. So using your TRI point, screw with a screwdriver use the actual screwdriver to remove the four screws, as you can see, remove the plate using your fingers. It comes off fairly easy now, you'll see that's where the actual battery clip is so just lift that up once you've done that you can move on to the tactic engine, which is essentially the vibration part I'm just heating the bottom up, so it can just warm up the adhesive.
You can do that after you take off the actual tactic engine now using a Phillips head, screwdriver, remove the three screws holding down the tactic engine and then flip it over now. Just be careful, you don't cut the cable, as you can see there. It's still stuck down now using a heat gun on the other side of the actual rear case I just like to heat it up. Once again, you want to go too hot. You just want to heat it up enough, where your hand can still touch it, and it feels as hot as a warm coffee mug once you've done, that you've got the little tabs at the bottom.
These tabs help remove the adhesive I'm just slowly lifting them up just so you can see it. Usually, you can just lift them up with your fingers and pull them out, but to actually make it. You know visually available for you to see. I was just lifted, and you just slowly pull them out like I've sped up the video here, but you can actually just pull them out fairly slowly, and then they'll come out. You lift the battery up.
If there's any remaining adhesive just remove that now everything in Reverse or what we do is we get double-sided tape. I've got a link below in the description on the tape I use now most kits nowadays do come with double-sided adhesive, and you can use that you put the battery in, and you clip it down. Then we flip back over the tactic engine. Once again, it's everything in Reverse we put down the three screws using a Phillips head screwdriver and the plate using a TRI point screwdriver put in those four screws. This obviously secures the LCD cables and the battery cable down.
We fold everything back over secure everything in place and finally use the pantalone screws to screw it in, and once that's done, you obviously test your battery. Please like please subscribe and thank you once again.
Source : infohut
Phones In This Article

Related Articles


Comments are disabled
Latest Articles


