iPhone Xs Max Camera.. Black Screen of Death! By William Varghese
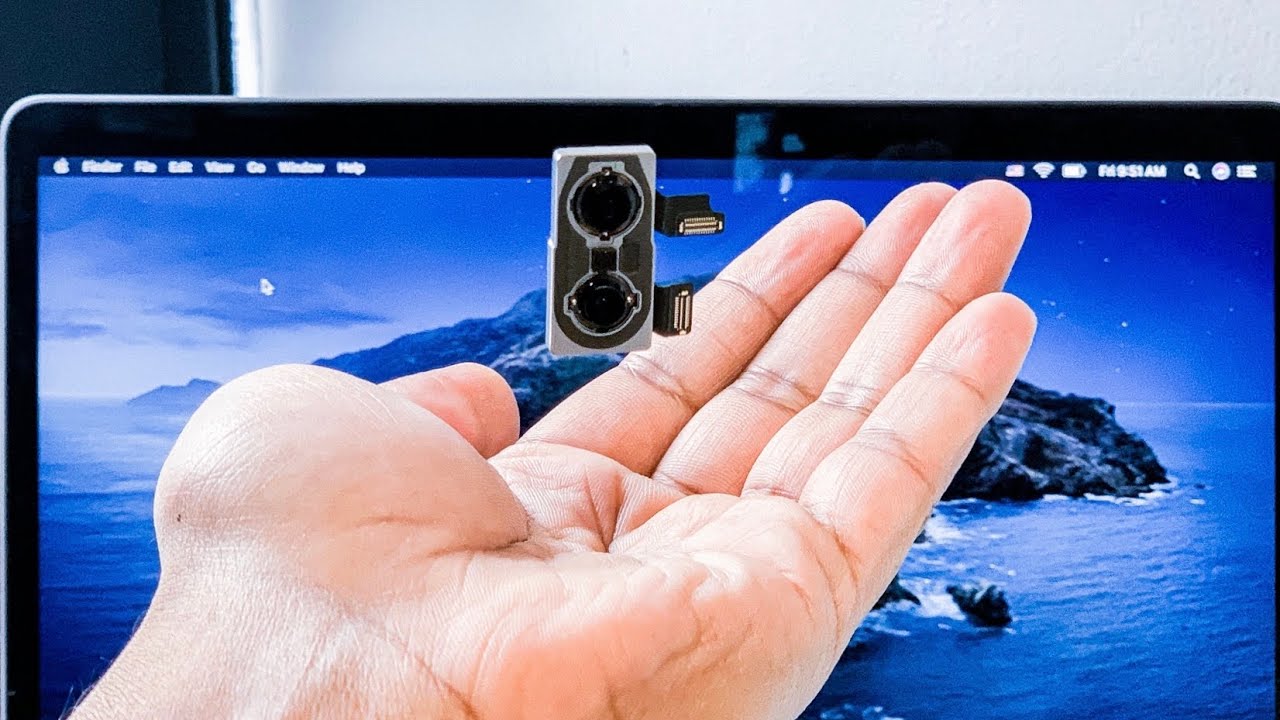
Hey guys welcome back to my channel, and today I'm going to be replacing an iPhone XS max rear camera that has been damaged, I'm going to be using an original camera from an icon, locked iPhone access max that I purchased as parts only most likely phones are sold, as-is reports only, which is why I can use a camera from this iPhone as a replacement. The phone on the right is the one that needs the camera. The X is Mac's rear. Camera is made of two units, one wide-angle camera and one telephoto camera, the iPhone X s and the X's max use the same camera when buying a replacement camera. You want to get a genuine camera. You can get one of these from eBay or an online vendor such as mobile Center, for about $50 I will post the link down below for the website.
They wholesale a bunch of different parts for all types of for models. The toolkit I'm going to be using is the fixity essential toolkit you can get on a website for about $25. The camera was damaged due to a fall, even though there was no visible physical damage to the phone. The internals, such as the camera, can be damaged the phone as dropped from a table height, as you saw earlier, when I was testing, the phone I opened up the camera application and the screen was black. This is common on iPhone cameras that are damaged I'm, going to start here by taking off the screen, we're going to be very careful here because you can easily damage the OLED screen by going in too deep.
Now, if your screen is cracked, and you need a general replacement screen, you can buy one for mobile Center. They have already known all LED screens as I'm going along the edges of the screen. The waterproof seal is coming off as well, so I'm going to need to replace it when I reinstall the screen. There are two face plates covering the connectors that I'm going to disconnect I'm going to start with the lower one which covers the digitizer connector after that is removed, I'm going to remove the top face plate covering the battery connector, o LED connector, and the face ID connector. Before disconnecting any cables, you need to disconnect the battery.
If you take the connectors out without disconnecting the battery, then you might risk shorting a circular logic board. It's very important to disconnect the battery I'm going to use my nail to remove the connectors. You can get a better feel for them rather than using a spider. However, using a spider is also fun: I'm, always going to be holding the screen in a book style manner because of the connectors. If the screen folds too far back the base, IDE connector might tear when removing the piece IDE connector, you want to remove it slowly because it is attached with an adhesive to the front camera assembly.
If you pull too hard, you might tear the cable over the front facing camera after the screen is removed. I'm coaching role of the bracket, coupling the camera held down by two screws. This is pretty easy to take out. The camera has two flex cables attached to it, one for each camera. I'm going to use my nail again to disconnect the cable the same way I did earlier.
As for taking out the camera assembly, I want to use my finger and a spider. You can pry it up on each side, and it will slowly come out of the housing underneath the camera is a flash which has his own connector I did not remove it, as there was no need make sure to be gentle with a replacement camera if you hit it or drop it and my damage one of the cameras inside the unit. The rear camera on this device is 12 megapixels and can also shoot 4k at 24 frames per second 4k at 30 frames per second and 4k at 60 frames per second we're going to reconnect the screen and do a test I'm going to reconnect the screen and do a test when I'm reconnecting the connectors I'm going to do it slow and make sure the connector fits in properly because you can easily damage or, as you can see, I'm still holding the screen in a book style matter when I'm reconnecting the cables. Without fully installing the screen I'm going to power off the phone and open up the camera to see if it's working properly, it would be annoying to find out that the replacement camera is not working or has any sort of issues after the phone lines reassembly. This is why I always test beforehand.
As you can see, the new camera is working. There are no marks or lines or dots of any sort in the image. Now that I confirmed it's working, I'm going to reassemble the device back together, first I will be powering on the device and disconnect the screen I'm going to remove the old waterproof adhesive as it comes off pretty easily. If you go around the edges with your finger or a tweezer, if you're using a tweezer go very slow but be careful on the front camera and the face idea assembly after the old sailors removed we're going to install a new seal, you can get the new seal mobile Center or if you purchase a new screen, it will already come with it. This waterproof seal is important as it will keep it dust out, but not so sure about water.
Apple's, waterproof seal always tends to wear down after some time, and so the phone is not fully water resistant as it once was when it was new. The seal works out faster, as the device is exposed to hot temperatures, which causes the seal to expand, but that expanded seal water can get through much easier. Now you usually want to replace the seal once you remove the screen for any reason, a lot of smoke, so that is still intact on the housing and if it isn't one down, you are doing a screen replacement, make sure you transfer it over the water indicators on the old screen to the new screen. Actually, the old seal is completely removed. We're going to clean out any debris, look around the edges, so it doesn't get caught onto the new seal I'm, going to make sure the seal is fully aligned and stuck to the corners of the housing.
You can use first aid alcohol to clean up the frame from any dirt after fully cleaning the housing I'm going to go ahead and install the camera bracket along with the screws holding it down now, this bracket keeps the camera in place if the phone never takes a horror fall and also prevents any damage from happening to the camera after the screws are in I'm, going to install the new seal with properly aligning it I'm going to take my spider and run down the sides and corners of it to make sure it sticks properly. Some parts may still come up, so you might have to go over it twice and make sure properly six. Now, if you didn't install the seal after it's a time, a lot of dust and dirt would get inside your phone, and it would be heavily dirty if you never have to open up your phone. You do not have to worry about this I'm going to be posting a video about it later, on so be sure to subscribe. Now, with the seal fully installed and go ahead and connect.
The old LED display back home I'm, going to put the connectors and install the face plates covering I'm, going to make sure the screen is fitted properly and all the screws are in the correct place. You do not want to misplace any screws. The gold color is actually my favorite of the excess and the iPhone X only came in silver and gray. The gold bezel in the back class really contrast will for a smartphone camera. The excess Max is an excellent phone to take cinematic videos on, as you can shoot in 4k and in 1080p with a slow motion feature you can use the 4k and in 1080p with the front-facing camera as well.
Now, when this device came out, Apple added a wide angle sensor, which is about 30% bigger than the iPhone X, which means the camera can attract more light naturally without having to edit. That's it guys, I hope you enjoyed this video and be sure to like the video subscribe to my channel to stay tuned for upcoming videos.
Source : William Varghese
Phones In This Article

Related Articles
![Realme C11 | Unboxing and Review | NAYA BUDGET KING? [English Subtitles]](https://img.youtube.com/vi/sApnT8jcUU0/maxresdefault.jpg )


Comments are disabled
Latest Articles


