iPhone SE battery replacement in 3 minutes fix By JerryRigEverything
Today I’m going to show you how to replace the battery in the iPhone SE. It looks very similar to the iPhone 5S but the batteries are not interchangeable. Remember if you are under warranty, or your phone has insurance check those routes first. But if you need to replace it yourself you are in the right spot. There are 2 pentalobe screws down at the bottom. I will link all the tools and replacement parts and replacement batteries down in the video description below.
Take your suction cup and your pry tool and lift on the bottom left edge of the screen. There’s a little groove there that you can slide your thin metal pry tool in-between the plastic frame of the screen and the metal frame of the phone. There’s a tricky little ribbon cable down here at the bottom as well. Lift up the little metal latch, then unclasp the ribbon like a little Lego. Once that ribbon is unclasped you can lift up the screen 90 degrees.
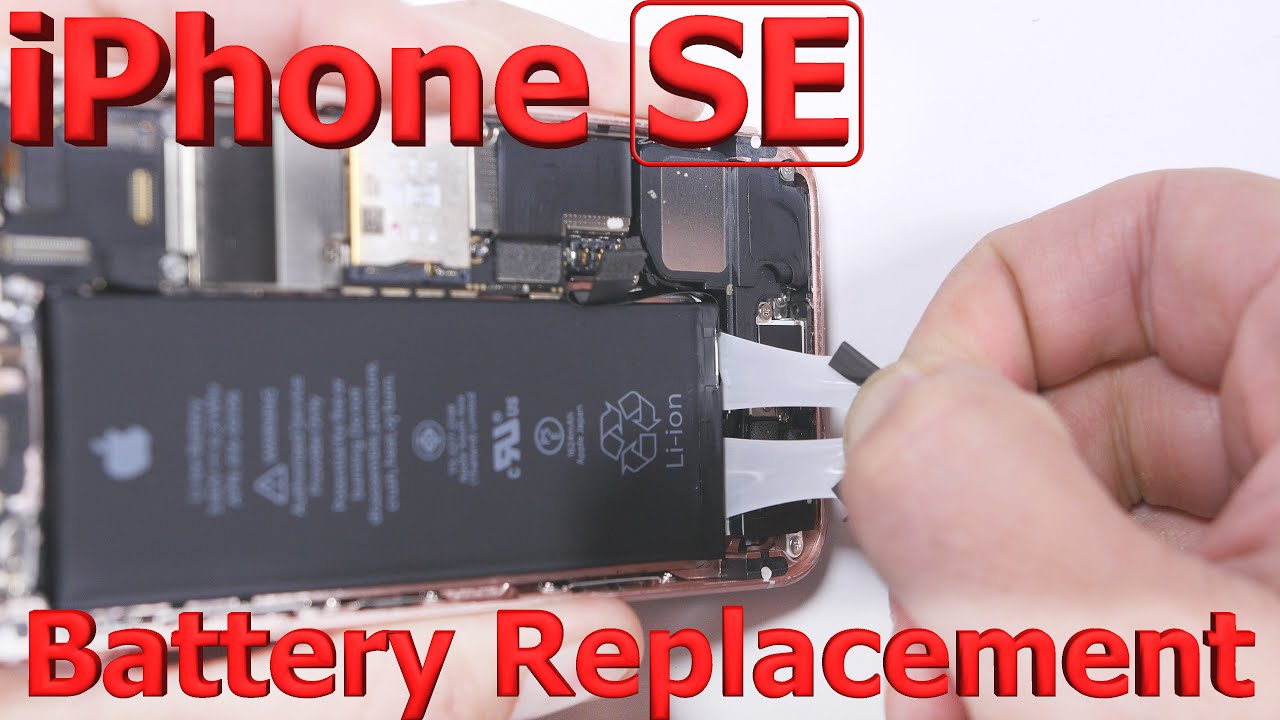
Then there are 6 screws you have to remove. These are normal Philips head screws. Remove the 2 plates and then unclip the battery from the main board. This will stop all the power from running through the board and make the repair safer. There are 3 ribbon cables attached to the screen.
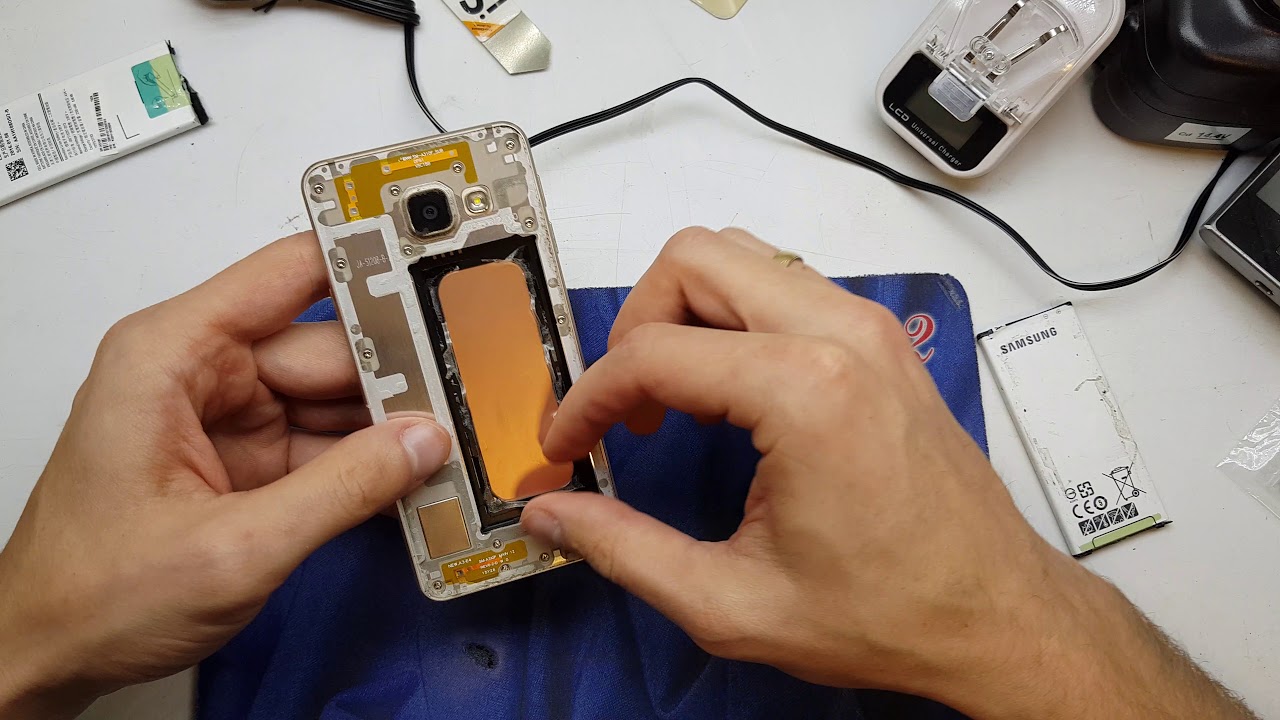
Lift those off; just unsnap them like little Legos. And then there is some magical adhesive underneath the battery. Grab the little black pull tab down at the base of the battery and lift up. You’ll see 2 white strands of sticky stuff. As you stretch the sticky stuff it becomes not-sticky stuff.
And it will pull the adhesive out from underneath the battery without you having to use any effort. Now this is great in theory but these are also extremely fragile so be very very careful as you pull. I’ll show you what happens when they break. If the adhesive does not break you’ll be able to pull it out completely from underneath the battery and the battery will just fall out of the phone, very very easy. If the adhesive does break you’ll need to pry the battery up just a tiny bit.
Do not bend or kink or puncture the battery in any way. That is where the dangerous part of this repair comes in. Lift it up just barely enough to grab the rest of the adhesive and then pull it out the rest of the way and the battery will come loose from the phone. I will link this professional adhesive down in the video description. At the time of this repair I do not have the adhesive so I’m going to use the regular double sided sticky tape to put the battery back into place.
Remember that all of the replacement parts and tools will be found in the video description right below this video. If I’ve helped you out so far make sure you’re subscribed to my YouTube channel. It is free and it does help me out a lot. Before I clip the battery into the motherboard I’m going to connect the screen. Then I will connect the battery and test the screen before I screw everything in place.
If your screen is gray or has lines running through it there’s a good chance that the screen is not connected correctly to the motherboard and you should re-seat those Lego like connections. If everything is working perfectly like mine, you can take those metal plates, put them back in place, and get those 6 metal screws pinned down. Now the fingerprint scanner ribbon cable does clip into the bottom near the charging port. Then get that metal latch back into place. If you’ve lost this, I will link these down in the video description below as well.
They are tiny little guys and it is very difficult to clip them down. Once that is done you can take the top of the screen and line it up inside of the frame of the phone and then take your hands and press firmly down along the edge of the screen, be careful not to break it, moving your way down towards the charging port. Everything is working. If you have any questions leave them down in the comments below. Go ahead and check out my screen replacement video for all the different parts on that, as well as the charging port replacement if this battery repair did not solve whatever issue you were having.
Thanks a ton for watching! Hope to see you around.
Source : JerryRigEverything
Phones In This Article

Related Articles

![Redmi K40 Gaming Edition Unboxing and First Look! [English]](https://img.youtube.com/vi/mQGTTOvhdio/maxresdefault.jpg )


Comments are disabled
Latest Articles


