How to Easy replace Samsung Galaxy A20 LCD Display Screen- Samsung A20S A20 A20e By Lenz Walters
Hi guys lens here, and I have a Samsung, Galaxy, 820, and I am going to do a screen replacement. So the first thing that I am going to do. I am going to remove the screen, as you can see that the screen is in a very, very bad state. It is damaged beyond repair. I am going to show you how to replace your screen. Do we have this phone is situated? If you look at it, you can notice that it is a built-in battery with a fingerprint sensor and all of that which I just want to.
Let you know that the back of your phone can come off. There is a partition that you have to look for right here. Alright I'm, actually using my finger, need to remove this, but first you will want to remove your SIM card tray. So let's go on and do that right now, and you can use any plastic tool basically to remove the back cover of your phone. Also, you want to do so carefully and the reason I'm saying this is that there's a ribbon at the back for the fingerprint scanner.
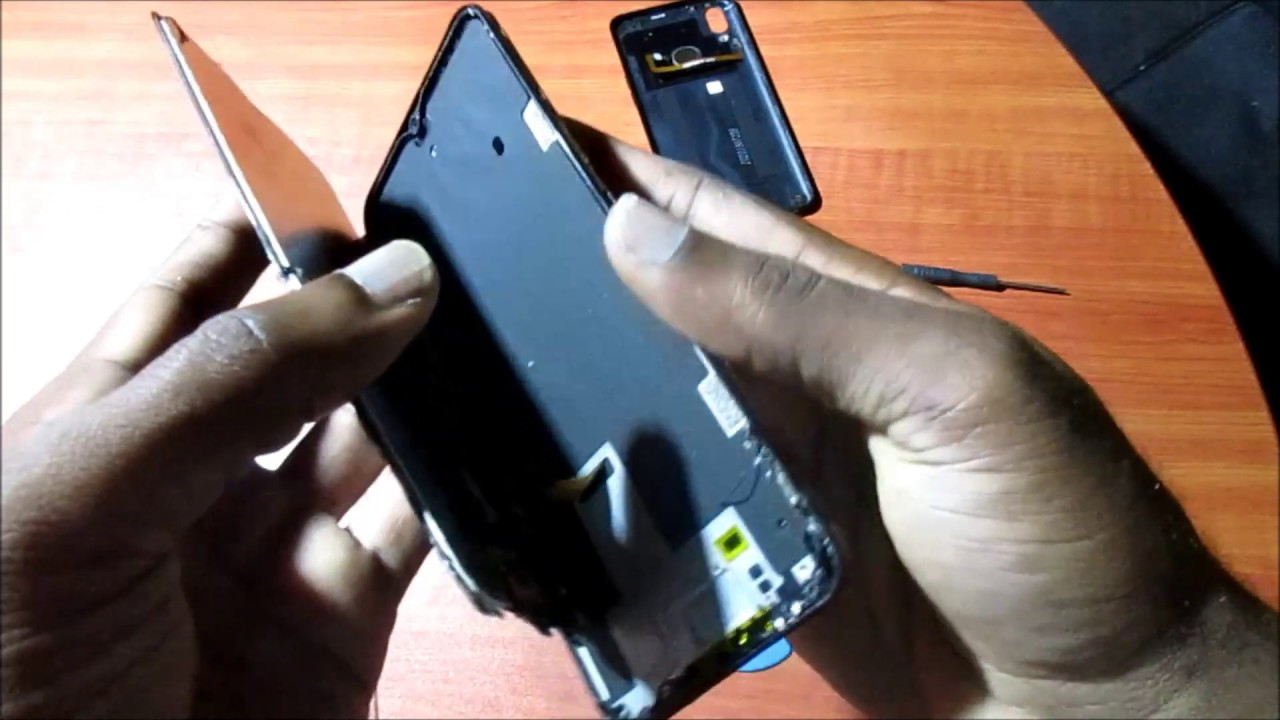
So this is the back cover here. You can grade it, and we can take off the connection for the fingerprint scanner, so the back cover is off. This is the back of the phone and the next thing in which we have to do. We have to remove this metal piece here. This is holding down the ribbon for the screen as well.
So let me go ahead and take off that metal piece. There's another screw here as well. So oh yeah, that's one screw day! That's two! That's three! So we can then go ahead and remove this metal piece. That metal piece is covering of the different connection parts here. So we have the connection from this board here which have the charging port.
You can see the connection here connected, and this is the connection for the screen. What we are going to do as well. We are going to unplug the battery connection for now and what we are going to do. We are going to remove the screen now seen that the screen is already damaged. It can be quite easy to remove, and you can use a plastic tool normally when I remove phone screens, I normally eat up the screen, so you can see the back on the screen.
So let's just go on remove the screen, so we are also considering the ribbon for the screen. You can see where the ribbon is there. We just removed the screen successfully and definitely guys we have to remove the battery and remove the ribbon completely from the phone. So we are going to replace this so guys. What I'm going to do here, I'm going to remove the battery, and I'm going to do so using pure plastic tools, so we need to remove the battery in order to get access to the cable I'm going to try and get this underneath like this and try and get The Bachelor approach.
This thing is very seen you down glued. If you can get the battery move, I suggest that you heat the front part of the middle frame, try and get the battery up. So you remove the battery successfully, and here you can see that we have all the speeds to work. So what I am going today, I'm going to remove the pieces of glass from around the edges, and then we are going to apply the new screen. You have to ensure that you remove all the pieces of glass and also adhesives, so it will not be an obstacle in the way.
So definitely we need to remove all those, so before we stick anything down what we want to do. We just want to do a test run to ensure that our new screen is working perfectly, so I am going to do a test run before sticking the screen down, so it's gray and connecting Raven, and we just need to connect the battery now, all right guys. Let's run this up this way, let's connect the battery. We are going to do a test just to ensure that everything is working perfectly. So this isn't going to plug up the charger.
You can see that the screen lights up, and it is at 0%. So now that we tested the screen, we are going to put adhesive around the screen, the corners of the screen- that's what we are going to do, and I'll be using this adhesive to do so as a brand new one. These are used for cell phone screens, so I'm going to put the adhesive around, and you want to make sure that you don't put any in the middle way that clamor is to go here. So you want to start here, and you want to start here as well. Also, you want to make sure that you put a little at this area here, right, I notice, with the original screens.
We have a black tip here right, so we could put the CIA among that we put a wrong the screen due to the black tip. This is actually the original screen that we have, but due to this screen, you can see that we don't have any tip here. So you'll want to put minimum adhesive here. The best thing to use actually is the adhesive tip. But if you notice this is an aftermarket screen, and they did not send this with any adhesive tape.
We are going to use and easy blue. So what I'm going to do, I'm going to put some in the corners of the screen as well, yeah yeah so time for us to stick the screen. This is what we're going to do like this, starting from the top. We are going down for landing down for London, and then we need to make that we have all of this outwards. Let's go down so yeah yeah everything looks great guys and the ribbon is way it's supposed to be as well, so we're good to go.
We are ready, let's connect the ribbon for the screen, so let's connect the battery there we go there. You want to make sure that everything is okay. So let's go ahead. Do a test make sure everything is good. We are going to put back this metal piece in place, and we are going to put back in the tree screws.
So let's go that's one! That's too, and this is tree, so we need to put back on the back cover. First, we need to connect the cable for the sensor, which is the connection is right here. So I just want you to see. The connection is right here, and we are going to put on the connection. The connection is back on, and we are going to put back on the back cover once you hear it clip.
That means that everything is done properly and just ensure and everything is done and for the symmetry people buy this in perfect position as well, and this should be it guys. We are finished and let's go and turn the phone on for the first time after replacing the screen. Let's ensure everything is working. This is a brand-new screen and also there is a plastic on the screen. We can pull this plastic off anytime, we desire.
So this is it guys, and it says that we must connect our charger, which I am going to do just making sure everything is touching, and that everything is working perfectly. As you can see, everything is working perfectly guys if this video was helpful to you do like share subscribe and all of that good stuff. My name is lens, and I'm out I'll see you soon.
Source : Lenz Walters
Phones In This Article

Related Articles


Comments are disabled
Latest Articles


