Google Pixel XL camera walkthrough plus manual RAW support By sony365
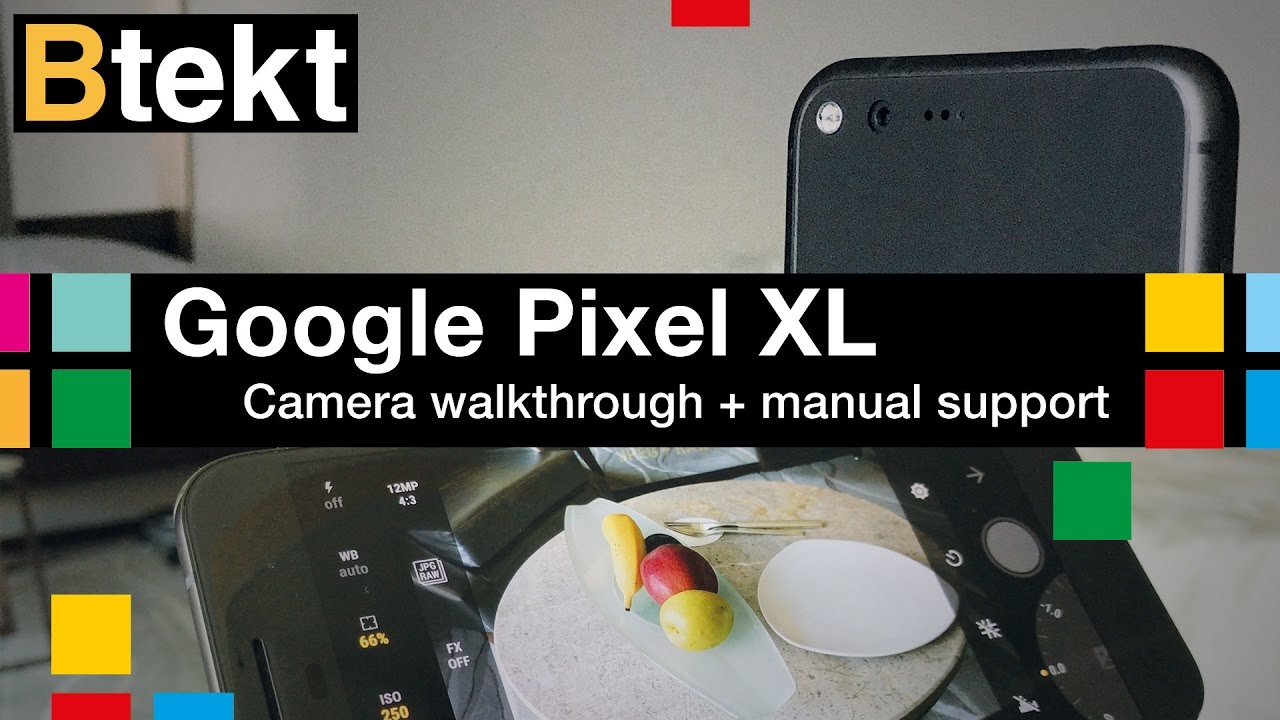
Hey guys you're watching beat X. My name is puzzle, and this video is all about the camera on the Google Pixel XL, specifically the camera user interface. We're also going to talk about the manual camera as well and how you can interplay with other applications and whether it shoots raw all that type of stuff, but Before we jump into that. Let's talk about the camera itself, twelve point three megapixels: it's got: 1.5 micron, pixel sizes, really nice and big wide open, f/2, aperture lens you just tap on a point of the screen, and you take your picture. You're pretty guaranteed it's going to be a good picture, says: processing HDR! It's also got a really aggressive, HDR mode on there, so you're not going to likely be getting overblown areas. I've been using this a fair bit.
In my travels you can check out a sample video I posted online, but this video is really just the tutorial and an overview of what the camera interface will give you and support for third-party apps. So, first off you can see in the top we've got timer that's up to a ten-second timer in inputs of three or ten seconds. We've also got HDR+, HDR+, HDR, auto, etc. Now HDR+ is what Google was really digging up at the launch event where it doesn't just composite three pictures. It actually does more than that, and it's just a bit smarter at getting you completely weld non blown out pictures and when they're really, really high contrast scenarios, you can also see you've got our multiple sizes of grid, 3x3, 4x4 or the golden ratio, and if I jump into the grid, I can turn them off and jump into white balance.
So that's nice side of the box. You've got color temperature control and, while that's really, really nice that over the presets there, unfortunately there is no manual color temperature. You also got flash, also flash off or flash on wooden reminder to fill flash varying degrees or just control for a video light or photo light. But hey it's kept things nice and simple. As you can see, it's touched to expose and touch to focus, although you can override exposure using the toggle on the right slide swipe across, and you can see video shooting mode crops in a little.
I've got it set to 4k, video and swipe over to pull out of that tap through. On the left hand, side you can see, you've got slow motion panorama photo sphere, lens blur and settings jump into slow motion, and it's very, very simple. You have a range of shooting modes, 240 or 120 frames per second, if I press X to jump out of that, I can open up the menu again to pull into panorama, and this is like a photosphere. It's just going to take the panoramic shot by the length ways width ways or every which way. Just a big picture.
I've actually taken a little of upper jump into the gallery, taking a photosphere which didn't work either. Well, it's not like having a 360-degree camera, but at the same time it's not totally shabby you can see where it cut off. My friends head right there, but that's to be expected when you're doing a photosphere in a busy environment with lots of people around right, jumping out of photosphere, and you can see you've got lens blur as well, so this emulates what you've got with a Huawei p9 and the iPhone 7 plus, for example, which gives you a background blur kind of effect. As it's quite an interesting one, I'm going to give you a what I'm going to try and give you an illustration as to how it works, it's a take. A picture and I slowly raise the device, while taking the picture, give it a little of perspective information and, as you can see, it's blurred out the background, and it's done it pretty.
Well, when you have stationary objects in a nice high contrast, it actually does the job really, really well, as you can see, but it isn't as fail safe or as quick to do as the iPhone at seven plus right. That's pretty much the stock shooting modes. Now, let's take a look at some of these settings that control them. So you have saved location volume, key acts as a shot button. You can shortcut to your camera by double tapping the power button.
You can also see you've got control over the rear camera resolution from 0.9 megapixels right through to 12.3 and the front camera from point all right through to 8 megapixels. Furthermore, you can also see burst settings and panorama resolution as well. It doesn't give you specifics. It just gives you low medium high around the back. You've got it set to 4k right now, but you can go as low as at 720p.
While on the front you can go as low as standard definition. If I scroll down you can see, you can toggle video stabilization on. It is electric video stabilization. It is not optical and, as a result, it's great for video for photos in low light. Furthermore, it's not quite as fantastical now we're done with a stock camera app, let's jump into manual camera and one of the burning questions you guys had been: can it shoot RAW you'll, be very glad to know JPG JPEG gospel, JPG, JPEG, plus raw? You can also add for control other manual things such as manual focus, etc.
The closest focal distance is around all four five. All that's really. It looks good and is around five centimeters between five and ten centimeters, and as for the slowest shutter speed that we can control, you can have it open as much as 0.6 seconds, not fantastical, nothing like the 10-second exposure or whatever on the sand and Galaxy S7, nothing like 20, plus, second exposure on the Huawei p9, but at the same time it is better than nothing so. Hopefully, you've enjoyed this insight into the Google Pixel XL camera and its capabilities with third-party applications like manual camera. If you did click that thumbs up button, if you like the channel subscribe, it's how you're going to stay on top of everything that we do here at beat X thanks for watching.
Source : sony365
Phones In This Article
Related Articles


Comments are disabled
Latest Articles


