7 iPhone Camera Hacks For Taking Stunning Photos By iPhone Photography School
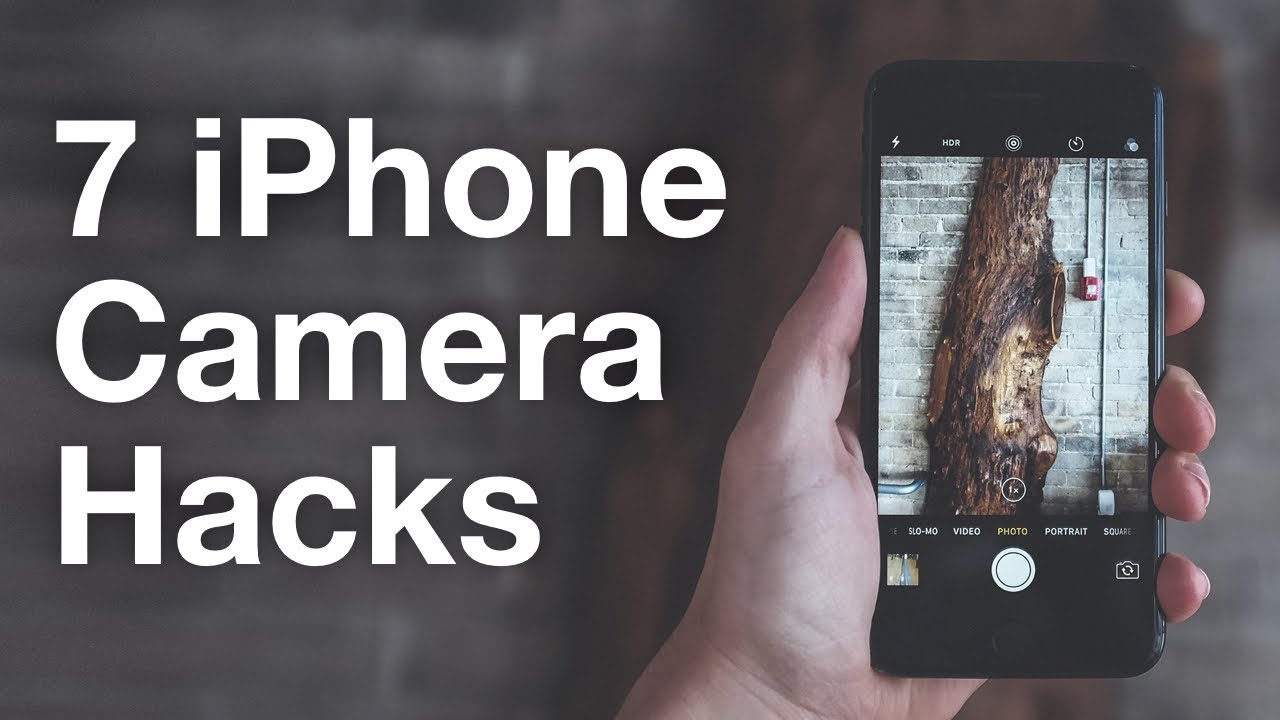
Hi, this is Emil Pakarklis, the founder of iPhone Photography School. And in this video, you're going to discover seven hidden iPhone camera features that every photographer should know. Now, you probably already know how to use the camera of your iPhone. And it's really easy to take a quick snapshot. But if you want to take your iPhone photography to the next level you have to go beyond taking quick snapshots and learn how to take full control of the camera of your iPhone. And as you are about to see in this video, the most essential controls of your iPhone camera are actually completely hidden and most people don't even know about them.
But before we get started, I want you to know that I wasn't always the guy teaching thousands of people how to take outstanding photos with the iPhone. I didn't always have 93,000 followers on Instagram. And honestly, not too long ago I didn't even know how to take interesting photos myself. But as I kept working to improve my iPhone photography, I discovered seven essential camera features that Apple has pretty much hidden from casual iPhone users. So that only the best photographers will be able to find these hidden features and use them for taking incredible photos that leave everyone else speechless.
So the first hidden iPhone camera feature we're going to discuss is swiping your finger left in order to open the camera app from the lock screen. So right now you are looking at the lock screen of my iPhone and from here if we wanted to open the camera app you would first have to unlock your iPhone. And you can do this using the Touch ID which sometimes works and other times it doesn't work so well or you could enter your passcode. But either of these options is somewhat unreliable and both take time. So a better way to start taking photos immediately is to simply swipe your finger across the screen from right to left and you'll see that the camera app opens immediately.
And by using this feature, you can literally go from taking your iPhone out of the pocket to the first photo in two seconds or less. And this feature is absolutely critical because if you are using it, you can often capture the kind of moments you wouldn't be able to capture otherwise. Simply because there wouldn't be enough time for you to get your iPhone out and start taking photos. Now, if you're using an older version of iOS which is the operating system running on your iPhone, this feature might not work for you. But what you have to do then is locate the camera icon at the bottom right hand corner of the lock screen.
And simply hold your finger on that camera icon at bottom right and gently swipe your finger up. And you will also be able to open the camera app very quickly. And you'll be able to go from taking your iPhone from out of your pocket until the first photo in two seconds or less. Now, this feature is very simple. But it's very, very important.
It literally helped me take hundreds if not thousands of photos. I would have not otherwise been able to take, all because I'm using this feature to quickly open the camera app of my iPhone. So the photo you're looking at now is actually one of the iPhone photos that I took last year. And of course, all the photos you're going to see in this video were shot and edited on iPhone. And this particular photo, I didn't know this was about to happen, but what happened there is that a car just drove past me really fast, and I saw all this dust coming from the car.
And I immediately recognized this was a unique photo opportunity because cars don't go on this road very often. So I grabbed my iPhone, swiped the camera icon up, and I was able to capture this photo. And because of this, I ended up with actually what is one of my favorite photos. This photo did really well on Instagram. I think it had almost 2,000 likes.
And there's even a huge print of this in our office. But had I not used the swipe up from the lock screen feature, I would have probably missed this photo while I'm typing in the passcode. So that's why I'm such a big fan of this feature. Now the second hidden iPhone camera feature we're going to talk about is a little bit more technical. And this is setting focus and exposure.
So right now, I am once again going to pick up my iPhone and I'm going to show you exactly what I mean by setting focus and exposure. Okay, so right now you're looking at some flowers on the tripod in our office at iPhone Photography School. And what you can see here is that the flowers are in the foreground and they're much brighter than the office in the background. And you know I can take some photos but the thing is in this situation, I don't really know where the iPhone has set focus and whether the right parts of the flowers are going to be in focus. And I also don't have any control over exposure until I actually started adjusting it manually.
And just to make sure that you always get your photos sharp and you get the kind of results you're looking for predictably, I strongly recommend that you get in the habit of setting focus and exposure in your iPhone photos. So how do you set focus? Well actually it's really simple. All you have to do is tap your finger on the part of the image that you want to be in focus and the iPhone will automatically set focus on that point. So right now you can see I have tapped my finger at my coworker's feet actually and you can see the iPhone has focused on this part of the Image. And you will now see that the flowers in the foreground are out of focus.
So I took a photo now. And you'll see that the iPhone has refocused. And once again, I don't know where the iPhone has focused this time. But it's probably not exactly right. So if I want to adjust focus here, I definitely have to do it manually.
And I can experiment with a few different options here. For example I can focus on my coworker's feet, or I can focus on this flower here on the right, and each of these points is going to give me a totally different focus and different image. So, it's quite important to figure out which part of the photo you want to be really sharp, and set focus on that part of the image. So right now you can see I've even set focus on the trees outside the window, and that's possible, too. And obviously, the flowers in foreground are totally blurred out.
But what you might not know is that when you set focus with the iPhone, you're also setting exposure. So right now I've tapped on the window and essentially the exposure is set on the window. And this essentially determines how light or dark the image is. So right now I'm gonna tap my finger on the flower in the foreground again, and you're going to see that the image will immediately become a little bit darker. Simply because by setting focus on the flower on the foreground, I'm also setting exposure on that point.
Now what's also interesting about exposure on iPhone is that you can adjust it. So all you have to do to adjust exposure is to touch the screen with your finger and either slide your finger down as I'm doing right now. And if you do that, the image is going to become darker and you are reducing exposure. Or you can slide your finger up, and in that case, the image is going to become brighter and that way you're increasing exposure. And this is another way you can control how dark or light your image is going to become.
Okay so right now, just to demonstrate how exposure works on the iPhone, I'm going to set focus and exposure on the chair of my coworker, which is relatively dark. And the consequence, the entire image becomes a little bit brighter, and you can now see that the flowers in the foreground are brighter than they were before. So if I wanted to correct for that, I could. So I could actually make sure that the flowers are correctly exposed, even though the focus is not set on flowers. And in that case, all I have to do now is simply swipe my finger down the screen and you will see that the image gets darker.
And now the flowers are once again properly exposed but they are not in focus at the moment. Now, obviously this is not what we want here because the flowers are the most important part of the image. So I have to pick one flower and make sure that this one flower is in perfect focus. So I'm going to pick the flower at top left. And once I have set focus on the flower, I'm going to slightly adjust exposure.
And the general guideline with exposure is that if you're not sure, you want to expose your image to be just a tiny bit darker because if an image is darker, you can always correct that through post processing. But if you have any white over exposed areas as we did before on the flowers, what is going to happen is that, no information will be saved in these parts of the image. And as a consequence there is no way you can recover detail from over exposed areas so they're simply white. So to make sure that doesn't happen, and also to kind of make the background stand out less, in this image it makes more sense decrease exposure, which is what we've done now. And now that I'm happy with exposure, I'm going to go ahead and take a photo and you'll see what this looks like in just a moment.
Okay, so right now you're looking at the first photo we took in the previous video demonstration. And you'll see that here we have set focus on my coworker's feet and as a consequence the flowers in the foreground are out of focus. And here is the same photo, but this time the focus is set correctly and also, we've reduced exposure a tiny bit, and you'll see that the flower is perfectly in focus. It's extremely sharp, and also the rest of the image is darker, meaning that the flowers stand out more against the dark background. And by the way, these are just flowers in our office.
Yes, they do look really nice but a point I'm trying to make here is that you don't have to travel to exotic places to do photography. If you have some flowers at home, that's all you need to get started with iPhone photography. But now let me show you one more example of what kind of difference exposure can make in your photos. So the photo you're looking at now is a beautiful winter photo I took recently. And the thing with this photo is that I actually had to manually adjust exposure or else it simply would not work.
So right now we're looking at these two photos side by side. And in photo on the left what I did was, set focus on the tree but then I manually increased exposure by swiping my finger up. Whereas the photo on the right, in this case I did not adjust exposure. And you can see that the difference is huge and certainly the photo on the left looks a lot more pleasing. And here the snow which is white in real life, actually looks white on photo, whereas the photo on the right is totally blue.
And if you've seen snow, you know that snow does not have that color. So this is another example of why it's important that you take control. Not just the focus, but also of exposure to make sure that you get sharp and well lit iPhone photos. Now the third hidden camera feature we're going to talk about is locking focus and exposure. So you just learned how to set focus and exposure.
But it turns out that the native camera app of your iPhone also allows you to lock focus and exposure and that's what we're going to look at next. Okay, so right now we're looking at the same flowers in our office and I'm going to quickly set focus and exposure for this photo. And now that I'm happy with the result I'm going to take a photo. And what happens as I take a photo is that the iPhone automatically resets focus and exposure. So you can that there were some changes on the screen and now all the focus and exposure that I had set is gone simply because I took a photo.
And this, obviously, is not perfect. Because I like those focus and exposure settings, and perhaps I want to take another photo, but now I have to spend a lot of time getting the settings right again. And the way you can prevent this is by locking focus and exposure. So how do you lock focus and exposure? Well, actually it's really simple. All you have to do, is tap your finger on the screen of the iPhone, where you want to set focus.
But instead of releasing your finger. You have to hold it down on the screen, for just a couple of seconds as I'm doing it right now. And what you'll see is that, this text AE/AF lock is going to appear at the top of your screen. And that means you've successfully fully locked focus and exposure. So right now, you can go ahead and adjust exposure by swiping your finger up and down the screen.
Which is what I'm doing now. And once you're happy with the exposure, you can go ahead and take a photo. And what you'll see right now is that, you can take a photo and after the photo is taken, the iPhone will not reset focus and exposure. What'€™s also interesting here is that, no matter what you do, the iPhone will not reset focus. So, you effectively disabled the autofocus function of the iPhone.
And as I move my hand in front of the screen, you will see that nothing happens and the focus and exposure stay just the way they were before. What I can also do is even pick up my iPhone, try to take some other photo or go somewhere else. But no matter what I do, the focus and exposure will remain unchanged. So now I've placed my iPhone back where it was before. And you'll see that still we have focus and exposure set on the flower just the way we wanted to.
Now if you want to get out of this, it's pretty easy to do that. All you have to do is simply tap your finger on the screen and the focus and exposure lock will be turned off. So this is how you set and lock focus and exposure on the iPhone. This functions is particularly important whenever you have a lot of movement or action in the scene and you don't want the iPhone to reset focus and exposure simply because something in the scene moved. Let's say you have people like I have in this example and we also have some birds here.
And for this photo it was really important for me to actually set focus manually. Because if I don't do that the iPhone might accidentally set focus on the reflection, which is much closer than the actual subjects. So I wanted to make sure that the focus is correctly set on the actual subjects. And in terms of exposure I wanted to make sure that the subjects are silhouetted as they are in this case. And to do this while everything is moving in this scene I actually had to lock focus and exposure.
And that's exactly what I did in this photo. And that's why it worked out so well. And by the way, this photo was taken with iPhone 4S a few years ago, and no, you don't need the latest iPhone to take great photos. And here's another photo where I had to use the same technique. So here we have a cyclist, a person I don't know, cycling through the scene.
And to make sure that everything was sharp and in focus and that the exposure doesnt get messed up simply because someone is cycling through the scene. What I had to do was actually set focus and exposure in advance and then wait for the person to go through the scene. And then I was already ready to capture the perfect photo without having to worry about focus and exposure while the person is cycling through the photo. Now the next technique I want to talk about is taking HDR photos. HDR stands for High Dynamic Range.
And it's a camera technique that allows you to take photos where both the highlights or the bright parts of the image and the shadows or the dark parts of the image are well exposed. So let me show you how this technique works with a quick video demonstration. Okay so right now, you're looking at my iPhone again. And here we have the forest, which is quite dark. And we also have a relatively bright sky at the top.
And bright sand at the bottom of the screen. So in terms of exposure, this is kind of a challenging situation because we can not expose everything correctly. So either the sky and sand are going to be really bright, or the forest is going to be really dark. So a solution for this is enabling HDR. Now if you look at the left hand side of the screen, towards the bottom, you'll see the letters HDR.
And if you tap your finger there you'll see that by default the HDR is set to auto. And you don't want to keep the HDR on auto, because essentially that means that the iPhone will decide whether you're using HDR or not. And that is not ideal. Instead you want to be doing this yourself. And you want to consciously decide if HDR should be on or off.
Now for landscape photos, and challenging photo situations where some parts of the image are much brighter than others, I recommend leaving HDR on, but for all other situations you can pretty much leave it off. But for this we're going to turn HDR on, and right now I'm just going to take a photo and it just so happens that there's a bird flying through the scene, so let me take a couple of more photos. And now let me open the photos we just took by tapping my finger at the bottom right hand corner of the screen. So right now you can see that this photo we just took has the HDR icon next to it at top left, and that's how we know that this is the HDR version of the photo. Now, if we go to the left, you will see another photo which is pretty much identical, but this is not the HDR version.
So, my iPhone is setup so that every time I take a photo, it saves two versions of the same photo. One with HDR and one without and that's what I recommend doing and in the moment I'll show you how to set that up. Okay, so now, as I keep going to the left you can you see that I have another HDR photo, and here is the non HDR version of that same photo. And what you can also see is that if we zoom in a little bit and get closer on the HDR photo, you'll see that the forest is properly exposed, and as you zoom in you can see more detail on the forest. You can see that the trees are green, which is how they should look, as opposed to being completely black, and in general you can just see a lot more details in the forest, and the forest is exposed properly.
Whereas if we go to the other photo which is not HDR, you'll see that the forest is much darker and as you zoom-in there, there is less detail and in general you can see that the forest is under exposed, but in the HDR version, both the forest and the sand in the foreground are exposed correctly. So as I said before, HDR is really useful in landscape photography. For example, here you can see an example of a landscape photo. This one does not have HDR on, and if you look at the sky you'll see that there's quite some overexposed areas in the sky which are essentially areas that are completely white and where we don't see any detail anymore, which is not a good thing in photography. But now look at the sky carefully as I'm switching to the HDR version of the same photo.
And you'll see that the HDR version is exposed properly, and we don't have any issues with exposure. And in general you can just say that this photo is better exposed thanks to HDR. So here's another example. This is the non-HDR version of the photo. And here is the HDR version of the photo, and as I said before, HDR is probably best used for landscape photography, but there are some drawbacks to using HDR.
And if you look at the grass in the foreground now, you'll see that it does not have as much detail and contrast as the non-HDR version had. So if you look at the photo closely now, paying attention to the grass on the left. I'm switching to the non-HDR again, and you'll see that the non-HDR version this time has more detail and more contrast in the foreground. Which could actually be a good thing, but at the same time the sky is blown out, meaning that it's totally white at the top left and that is not a good thing. So, here you'd have to make a creative choice about which version of the photos you'd prefer, but no matter which version you like better, what you want to do is make sure that the iPhone always saves both the HDR, and the non-HDR versions of the images for you.
And to do that what you need to do is open the settings on your iPhone, scroll down until you find Photos & Camera, and then go all the way down and in the bottom of the screen you'll find the option to keep the normal photo. And you want to make sure that this slider is turned on and if it's on, your iPhone will save both the HDR and the regular version of the photos that you take using HDR mode of your iPhone camera. Now the next hidden iPhone camera feature I want to talk about is burst mode. And this is really, really awesome. It's actually one of my favorite hidden iPhone camera features.
So let me pick up my iPhone and let me show you how burst mode works. So, right now what you're looking at is a beach scene and you can see that I've already set and locked focus exposure on the sand where I know that a person is approaching from the left. And what you can now see that our subject, which is a person I don't actually know, is walking through the scene from left to right. And I'm trying to take some photos of the person, but the person will be gone pretty soon and I will have missed the opportunity to take this photo. And with human subjects who are walking through the scene, there's quite a big difference in terms of when you press the shutter.
Now what you want to do in photos like this is to press the shutter when the legs of your subjects are wide apart. Because for some reason that just looks a lot more pleasing to the human eyes. Where as if the legs are overlapping, that just doesn't look so good. And to do this it's pretty hard to press shutter at the exact right moment, especially since this person will be gone from the scene really soon, and then I won't have time to take this photo again. So what I'm doing in situations like this, when it's important to get the exact right moment and when there's some kind of movement in the scene is, I'm using the burst mode.
So to activate the burst mode, what you want to do is tap and hold your finger down on the shutter button which is what I'm doing now. And you'll see that a whole bunch of photos are quickly being taken, and you'll see the number next to the shutter button that shows how many photos you've already taken. So as you can see I just took 34 photos in a matter of seconds. And now let me open the camera roll and let's take a look at these photos. So at first you might think "Oh no 34 photos! How am I gonna go through that?" But actually it's really easy to do that.
So, here you can see that this is a burst photo that consists of actually 34 separate photos. And at the top you can select the select option, and once you do that this allows you to select your favorites, so you don't have to keep all 34 photos. And at the bottom of the screen. You can slide through these photos really quickly, until you find the ones you like. You'll find that, there's one photo, where the iPhone has already placed a dot under the photo.
And this will typically be the sharpest photo that the iPhone thinks is the best photo. But obviously the iPhone doesn't understand which photo actually looks best, so it simply picks the photo that it knows is the sharpest one, and what you can now do is select the photos you want to keep. So right now I just tap my finger at the bottom right of this photo and you'll see that blue check mark appear, and that means that I'm going to keep this photo. And this way you can go through all of the photos and keep any of the ones you want to actually keep and then discard everything else. So I'm looking for photos where the subject's legs are wide apart, because I think those look better visually.
So I'm going to select these photos that I like and discard everything else. So once I find a photo that I'm happy with, I'm just going to tap the okay check mark, and everything else will be discarded the moment I press done. So here, I'm just making my final choices And before I discard everything, I just want to make sure that I've kept the ones I like. And once I'm confident about that, I'm going to tap done at the top right. And I'm going to keep only the five favorites.
And right now, everything else just got deleted, and I only have five photos and everything else is gone. So you don't have to worry that your iPhone will be full of photos just because you took a burst mode photo. But now let me show you some examples of iPhone photos that I have taken using the burst mode feature. So here this first photo is actually taken at the same beach and once again we have a subject that I don't know walking through the scene. And here I wanted to make sure that the subject is right in front of that road because that looks better visually and I wanted to make sure that the subject is in full stride.
And this is such a short moment and if I mess this up, I'll have to wait for a long time until someone else appears on the scene and because of that here I used burst mode. And I took a whole bunch of photos and I could then pinpoint to the one photo, where the composition is perfect, and where subject's legs are wide apart which looks really nice in a photo like this. So here's another example of a photo I took using burst mode, and obviously, any kind of action shots, sports events, or anything where there's a lot of movement, is perfect for using the burst mode. And finally, here's an interesting burst mode photo that I took just recently. And here, a guy was apparently trying to take some jumping photos with his girlfriend and unfortunately the girlfriend, and I don't know these people, but the girlfriend did not know about the burst mode, and the guy had to keep jumping for 20 times because the girlfriend could never get the shot exactly right.
And I saw that this keeps happening and then I decided to actually take a photo of them taking these jumping photos, and since I was using a burst mode I could actually get the exact right moment the first time I was taking photos whereas they had to keep practicing this until they got the exact right shot. So, if you're doing any kind of jumping shots. You definitely want to use burst mode, and that way your subject won't have to jump another ten times until you get the shutter pressed at the exact right moment. Now, the next hidden iPhone camera feature I'm gonna talk about is taking photos with the volume buttons. So, let me show you what that looks like on a quick video.
So, here you can see that I'm standing on the balcony of our office and I'm just going to take some photos to demonstrate to you, how the volume button shutter release works. So, the good thing about this is that I get to hold my iPhone just like I would hold a regular camera, which is really convenient. And what I can do is simply use the volume buttons on the side of the iPhone as the shutter release, and as I press down the volume buttons, the photo is automatically taken. Now what I can also do is get really close to the surface, as you can see me doing right now, and if I now rotate my hands I can still capture a photo, and press the shutter easily, but the iPhone is not really close to the surface. And now if you just look at my arms carefully you'll see that I'm once again, using the volume button shutter release to take photos.
And this way I can more easily press the shutter while my iPhone is actually really close to the surface. Now in case you're wondering why I'm holding my iPhone so close to the surface, this is the reason why I'm doing that. As you can see, I was able to create a pretty interesting and creative photo on the balcony for our office building so you don't have to go too far, or you don't have to go to famous places in order to take photos. As long as you know what you're doing you can take great photos with your iPhone no matter where you are even if you're at your office, which is where I'm recording this video. So, as you can see by now, placing my iPhone close to wet surfaces is one of my favorite photography techniques, but to do this right, you definitely have to lock focus and exposure, or else the iPhone will set focus on the surface itself and everything in the background will be out of focus.
So you want to make sure that you lock focus and exposure, as I showed you earlier, but if you do this, you can take some really extraordinary photos. For example, this photo I took with my iPhone 4S several years ago. This is still one of my favorite photos to this day, and the reason I'm showing you this is that, as long as you know what you're doing, you don't need a fancy camera or even the latest iPhone in order to take great photos. And finally, the last technique I want to show you is taking photos with your headphones. So let me take you behind the scenes in our office and show you how this feature works.
Okay, so for feature number seven, I actually want to take you behind the scenes, and show you the set up we had for recording some of the earlier demonstrations. So you'll see here that we have two studio lights. We have our flower, as the subject. And because we have these lights so close to the flower, the flower's brightly illuminated, which makes the photo sharper, and which also allows me to demonstrate effective exposure for you. And here we have the iPhone on a tripod.
So that when I record the video the iPhone doesn't shake too much, and of course when you're using a tripod you're also going to get a sharper photo. Now one of the problems you have when you're shooting with a tripod is that, when you actually touch the screen to take a photo, the iPhone moves a little bit, or if you are going to use these volume buttons right here, then the iPhone is going to move even more. And your goal in photography is try to reduce the movement of your iPhone as much, as possible so that you can get the sharpest photos possible. And the solution for this is to actually plug in your Apple headphones. So these are the white headphones that come when you first buy the iPhone.
If you just plug them in and open the camera app. What you can then do is actually take photos using these volume buttons on the headphones of your iPhone. So right now, so that I don't have to touch the screen of my iPhone, I can just press the volume buttons, either volume up or volume down, and a photo is taken every time I do that. And this is particularly useful when you're working on a tripod, or if you're doing street photography and you want to remain unnoticed so that other people don't even know you're taking a photo. Okay, so here's a quick example of a street photo I took using the volume buttons of my Apple headphones.
I was actually pretending I'm listening to music and I don't even know these people. They are strangers in New York City, but I saw that this moment was potentially very interesting which is why I got out my iPhone. And, as I was pretending to be listening to music, I could actually take a photo of these people without them even noticing that I'm taking a photo. And that's the reason why you can see candid emotions on the faces of these people. And here's another example of the same thing.
Here you can see a photographer selling photos on the streets of San Francisco. And I was able to get actually pretty close to him, and he didn't even notice that I was taking a photo even though he is a photographer and that's because I was pretending to be listening to music on my headphones, while I was actually taking a photo of this man using my Apple headphones. I hope you enjoyed the hidden camera features we talked about in this video. This techniques have helped me take some of my best iPhone photos. And now that you know these techniques, you too can use them for taking outstanding photos with your iPhone.
With that said, this is just the beginning. There's only so much I can share with you in this short video. And while I didn't hold anything back, there's so many other techniques I didn't have time to share with you today. And actually there's something even more important than any of the techniques we talked about. You see, the techniques we covered today are extremely powerful.
But the only way to really take your iPhone photos to the next level, is by changing the way you look at the world around you. Some people say they have nothing to take photos of where they live, or that the iPhone can't take great photos, but of course, none of that is actually true. There are amazing photo opportunities everywhere you go. You just have to know how to use them. And that's exactly why I created iPhone Photo Academy, which is the only online course that will help you take incredible iPhone photos that everyone adores, and that you'll be proud to look at years later.
Now, I have to warn you that iPhone Photo Academy always sells out quickly, and the registration will only stay open for a few more days. So, if you want to find out more about this course, you should do it now while the registration is still open. So go ahead and click on that big yellow, funny looking button below this video and it will take you to the next page, where you can learn more about iPhone Photo Academy, and see if this course is a good fit for you before the registration closes in just a few days. So go ahead and click on that button below, and I'll see you on the next page.
Source : iPhone Photography School
Phones In This Article

Related Articles


Comments are disabled
Latest Articles


