How to use the iPhone 12 Camera - Complete Beginners Guide By AppFind
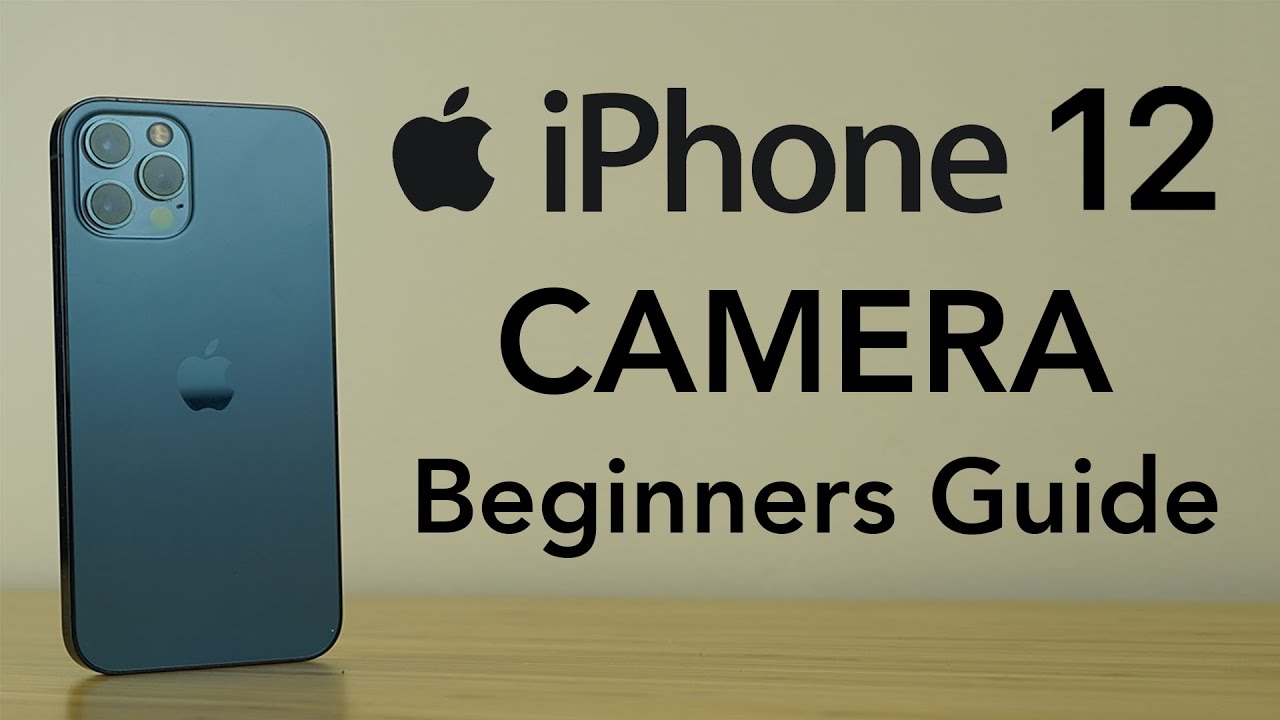
Today we're going to be showing you how to properly use the camera on your iPhone, 12 12 mini 12 pro and iPhone 12 Pro max to the best of its ability. This is going to be a complete beginner's guide on how to use the phone's camera like a pro we're going to be going through. All of your cameras features how to best configure its settings and ultimately how to make sure you're getting the absolute most out of your brand new iPhone 12. Let's get started with today's complete beginner's guide on using your iPhone 12's camera. Now before we get started on everything, I want to quickly show you the four different ways that we can access our camera from our lock screen. So the first way is this button right here, this camera icon.
Now it looks as if you could just click it, and it will open up your camera, but unfortunately, you have to hold down on that button to get to the camera. You can't just press it. You need to press and hold for a second, and then it will bring you to your camera. App. The fastest way of getting to your camera.
App right from your lock screen is just take a finger and swipe over to the right, and immediately you're going to be taken to the camera another way of accomplishing this is swipe down to your control center, and then you can click this camera icon here, and it will bring you right into your camera again or if said, you can't use your hands for whatever reason you can just ask: Siri, hey, Siri, take a photo and Siri will bring you right into your photo application. Let's get started by quickly going over all the basics for using our iPhone camera so to take any photo or video you'll need to click. This shutter button right here when you click it, it's going to immediately capture a photo or in video mode. When you press it, it will begin recording once you start recording a video you'll notice that this red timer will be activated on the top center of your phone screen. This is what tells you how long you've been recording for and your phone's going to keep recording a movie until you end it by once again pressing the same button here, which will conclude a video if you ever need to access your front-facing camera, which is this small lens right here on the top of your phone? All you do, is you press this circular arrow icon in the bottom right corner of your screen, and that will flip your camera to face you and when you want to switch it back, you just press that button again, and it will bring you back to this camera lens here now in the bottom left corner of your screen, you're, going to notice a preview of the most recent photo that you last took, so I'll take a photo now, and now it's going to appear right there.
If I ever want to check out my recent shots, I can click this icon here, which is going to open up my recent photos from here. I can access the actual photo application to see my entire library of photos by clicking this all photos button here, which will transport me to the photo application. But if I want to go back to my camera to continue taking new photos and videos, all you need to do is just swipe down anywhere on the screen, and you'll be taken right back here. Let's start off by opening up our camera application, and you're going to see we have all of these different modes on our camera. We have portrait mode panoramic, photo video, a slow motion mode and a time-lapse feature to go in and out of these different modes.
You can either just click directly on their name, and it will take you to whichever one you select, or you can just take a finger and swipe across your screen in and out of the different modes. Let's start off on photo because I want to show you this little arrow on the top center of your screen. You'll see that when you click this arrow, it's going to bring up this menu right beneath your camera frame in this menu. This gives you control of all of your cameras, key settings right from the camera application. You can turn on and off flash enable the live photo mode, adjust your aspect ratio, your exposure set up a self-timer, and you can even play around with these different live filters.
That apple has given us access to. So to start off this lightning bolt symbol here is going to be where you turn on and off your flash so give that a click, and you'll see you can either have it set to automatic on or off when you have. Your flash turned on you'll see that the flash icon in the top left corner of your screen is going to become yellow. This is how you know that flash is enabled when it's shut completely off the color is going to go away and there's going to be a slash through the icon. That's how you know your flash is completely turned off when it's set to automatic it'll be colorless, it will remain white, but that slash will go away to indicate that if you need to use flash, it should automatically become enabled in those lighting situations the next one is going to be live photo.
So the same rules apply that you just click this second symbol here, and you can toggle between automatic on and off, except this time, it's the icon in the right corner of your screen, top right corner, that's going to become yellow when live photo is on it's going to become white, with a line through it when completely off and white, with no slash running through it when set to automatic what live photo. Does when turned on? Is it your camera picks up any movement that happens right before and right after a photo is taken? Let me show you what I mean by this by just moving my fingers in the background of this photo, as I take one, so you'll see when I open this photo up that this is the picture that was captured right when I clicked that shutter button, but since I had the live, photo mode enabled you'll see that when I hold down on it, you'll see it captured all of that movement that took place right before and right after that photo was taken. Now this feature is really powerful because say you're taking a photo of somebody, and they blinked right when you clicked the take photo button. So now it looks like their eyes were closed in the photo. Thanks to this live photo feature, we can quickly fix that issue.
By going to this edit button here and assuming you had, the live photo feature turned on. You can click the icon right here, and you're going to see that it captured all of these different shots from before and after I actually clicked that shutter button so find, whichever photo you prefer or like the most, and you'll see once you pick one this uh make key photo button will show up so find, whichever one you like and then click make key photo and then just click done and now that's going to be the photo that's stored in my photo library. As my key photo, it's a really great feature. I suggest you either leave it on automatic or just turned on the entire time, because it can really come in handy for certain situations. The next one here is going to be your aspect ratio or how you adjust uh the size of your camera frame.
So the default one that your camera is automatically going to be set up under is 4x3. That's what we're looking at here, but you can also turn on 16x9, which I really enjoy, because it takes advantage of the size of your iPhone, almost filling the entire screen. But you can also turn on square mode, which is great for Instagram or anytime your you want your photo in this square format, so you can go around and just select whichever one you would like, and it's going to stay locked in whichever aspect rate ratio you select until you go back and change it. The next one here is going to be how you adjust your exposure. So just click this icon here, the plus and minus symbol, and you'll see this bar comes up where you can adjust the exposure to a photo.
If you want to darken it swipe to the left and if you want it brighter, you just bring it over to the right, and now you can leave the settings tab after customizing the exposure, and it will stay locked on that exposure. Until I go back and change. It is'll remind me that I have my exposure turned on to a certain metric by showing the amount right here in the top left corner of your screen. Right next to that flash symbol, it's going to stay on until I go back and shut that off. Just like that.
The next thing here is going to be where you can activate a self-timer. So if you click this timer icon, you'll see you have the option between no timer at all 3 seconds and a 10-second timer. This feature is really great because say: you're taking a group photo that you want to be a part of you can just set up this timer and get in the photo without having an actual photographer. So you just go ahead. I'll show you a quick example using the three-second timer, and when you take a picture, it's going to count down three two ones.
Before taking the picture, you can also do 10 second, but I would make sure you have this shut off most of the time, except for when you need it just to avoid any unwanted delays when taking a candid photo or anything out in the field. This last feature from this menu is going to be where we get access to all of these different filters. So you'll see apple gave us a lot of filters to choose from, but if there's one you like to go ahead and set that, and then you can leave this settings tab, and it will keep that filter locked on the way. I know that I have a filter on. Is this icon? This colorful icon in the top right corner of the screen, is going to show up I'm going to stay, even if I switch any of my other settings, it's going to keep that filter applied until I go back and shut it off, and you'll see once I turn the filter off, that icon will immediately disappear to show that I'm not currently using a filter.
So the next thing I want to show you guys is how you can quickly capture a video while in your photo mode on your camera, so instead of switching over to the video mode, if you quickly need to capture a video, all you need to do is hold down on the shutter button and if you hold it you'll see it automatically enables video recording mode. It's going to keep recording a video. Until I release my finger off of that button, say you realize you need to take a longer video, and you don't want to hold your finger there forever. You can turn on this video record mode, but then swipe your finger over to the right, and it's going to lock in recording mode. Until I hit that button to stop the video so again, you're in the photo mode press down on this shutter button, it's going to start recording, then you can swipe over to the right, and it's going to lock you into recording mode.
Now. You can also use this shutter button to quickly take a rapid burst of photos instead of holding down on the button or swiping to the right. What you're going to do is you're quickly going to click on the button and bring it over to the left. You'll see here that when I move the button to the left, it starts rapidly taking a burst of photos. Now you can also accomplish these two features by using your volume up in volume down button apple automatically set up that when you're in your photo mode on your camera.
If you hold down on this bottom button on the left side of your screen, which typically controls your volume down on your iPhone, if you hold that down while in photo mode you'll see, it starts automatically taking a video until I release off of that volume down button once again, you just press that, even if I'm in photo mode it'll start capturing a quick video now you can also set up your volume up button to do something, but Apple doesn't automatically set it up as a default setting. So what we need to do is we need to go into our settings. Application go to your camera settings, and you'll, see right here, there's an option for use volume up for burst, so I suggest you toggle that to on and now back in our camera setting there we go you'll notice that when I hold the top button on the left side of my iPhone, my volume up button what's going to happen, is it's going to automatically start taking a rapid burst of photos now that we've discussed how we can access all of our key camera settings right from the camera application? Let's discuss how we can zoom in and zoom out, while taking photo and video right on your camera frame. You're going to have these three preset buttons here that will zoom you inwards or outwards. The button on the left will take you further away from the subject and zoom out, and the button on the right is for zooming in which will bring you closer to a subject.
Now, of course, these three options aren't going to cover all of your zooming needs for various shots. So when you need more control over the amount of zoom, you can either just pinch on your screen, either inwards or outwards to zoom, closer or further away from a subject, or you can just press down and hold on any of those buttons, and this chart's going to appear with this chart. You just need to slide your finger, and you have full customization over the amount you want to zoom and once you find the right amount, just release your finger, and it's going to stay locked in on that zoom amount. You can go into your settings change anything you need to even your aspect ratio, and it's still going to stay locked on that zoom amount. Now it's important to note that you can zoom on everything except for portrait mode, so panoramic video, slow motion and time-lapse.
All the same rules apply. You can either use these buttons here pinch in or out on the screen, or you can use this sliding bar here for full control. Now, I'm going to show you how to properly configure your phone's settings to make sure you're getting the absolute most out of your iPhone's camera. So I'm going to go ahead and open up my settings application scroll down to where you find camera, and then you're going to see you have all of these different camera settings to play around with to start off for formats. You have two main options here.
You have high efficiency or most compatible if you're backing up your photos onto a Mac computer. Furthermore, you don't need to worry about this because you should just leave high efficiency turned on, but if you're using a non-apple computer like a windows or PC you're going to want to turn on most compatible next, let's look at these preserve settings, so you have four options here and the first one, camera mode is what it does is. If you're on the camera and say you are getting ready to take a video and all of a sudden, you need to leave your camera app for whatever reason, and you exit the application. When you go back to it, it's going to stay locked on that video mode. If I had this setting turned off, it would have taken me back to the default photo mode.
The next one are your creative controls. So this is, if you turn on a filter or adjust your aspect ratio, it's going to keep those settings locked when you leave your camera out. So let me show you that let's say I change my aspect: ratio to square and even put on one of these cool filters. You'll see that when I leave my camera app, I can even open up a whole new application. When I go back to my camera, it's going to keep all of those that filter and the aspect ratio locked to the settings that I had put it on just before these two settings work the same way except it's for your exposure.
So if you adjust your exposure, and you leave your camera and go back to it, it will keep that adjustment on and this is for live photos. So if you enable that live, photo mode and leave your camera application, when you go back to it, it will stay, enabled and turned on next. I definitely suggest you have the scan qr code setting turned on so your phone's able to scan qr codes if you ever need to, but when it's turned on it's not going to adjust like your photography or videography in any way, it's just going to be able to pick up a qr code if you ever do need to use that feature, so there's really no harm of leaving that turned on for composition. This grid mode is all preference, but when you have that activated- and you open up your camera you're going to see that these grid lines appear on your viewfinder, you know it's really great if you need help like centering a subject, but so that's what grid is, if you turn that on these lines will appear for mirror front camera, it's great if you're someone that takes a lot of selfies, because when you're using your front-facing camera- and you have this setting turned on, it- is going to make sure that whatever photo you take, looks exactly the same as it did in your viewfinder, whereas if it's turned off, it's going to actually uh be mirrored from what you're looking at in your viewfinder. This view outside the frame setting is, is pretty cool, so what it is, it will show you say: you're zooming in on a picture, it'll actually show you stuff that appears outside your camera frame.
So when I take a picture, it's not going to actually capture what's outside the frame here, but it does help you get some perspective on your environment. So you'll see you can see this guy's head here, but, as I take the photo, it's only going to capture what's in the frame, but it's still a great thing to leave on because it does. You know, in my opinion, help just gain perspective, uh of your environment while taking photos or videos. So that's a cool setting. I suggest you turn on.
I also suggest you keep scene detection turned on and this is your phone will attempt to identify different objects, you're taking a picture of and improve their quality based off of what you're taking a picture of so say, you're taking a picture of a building or a human. Your camera should be able to pick up on that object and then adjust accordingly on the rest of these, I would keep them all on, so I would turn on prioritize faster, shooting lens correction and smart HDR. Now we're going to take a deep dive into taking videos on our iPhone so right away, you'll notice that the carrot that is shown on v on photo mode is not showing on the video mode to open up that settings menu. So, when you're in video mode, if you need to customize any of your settings instead of pressing that icon, that's on photo mode, you actually just swipe up on your screen, and it's going to open up the menu here. You'll see right away that there's a lot less options for customizable settings on video mode compared to the photo mode, but we still have control over our flash and exposure.
It's important to note that when you have flash turned on video, it's actually going to leave that flashlight on the entire time, while you're recording, and before you actually hit that recording button. So I would make sure you have that toggle to auto or off, when you're not actively using flash, because if you have that light running in the background, it's going to take up a lot of your phone's battery exposure works the same way as it does for photo just click on that icon, and you can adjust your exposure accordingly. Once you have it set it's going to stay locked there until you go back and change it for focusing. If you want to keep something focused for the entirety of a video instead of just pressing down like that, actually press and hold where you want it to focus, and it's going to stay locked right there once I have a focus locked, I can even go in and change my exposure just by sliding up and down to the right of that box. Once you have all those settings set up, it's time to start recording so to start a video.
You just press this red button here, and you'll notice that this timer turns red to indicate that we're actively recording a video, the timer will start to count to indicate how long we've been recording for and once you want to end that video you'll press that red button. Here again, the other thing is, while you're recording a video, you can still capture photos by pressing the shutter button in the bottom right corner. So as you're recording a video, you can still capture photos, and it's not going to stop recording, but it's still going to capture those still photos. Now, once you record a video, it will still show up in this previews tab. Just like photos do right in the bottom left corner here, and you can also go in and edit videos just like photos for videos.
We have the ability to crop them and shorten them up by sliding in either the end or the start of a video, and you can trim it that way. You have access to all of these settings here. You can apply different filters to your video, and we can even crop our videos. So if you want to focus in on something, you can go ahead and crop the video like so and once you're done making your edits, you have two options, so you can either save the video as an entirely new clip which will save both the original and the new clip, or you can have this replace your old video by clicking. Save video.
Don't worry, though, if you ever want to go back and revert this to the original, and you didn't save it as a new clip. You can just click this edit button again and then just click revert to original. Now, I'm going to show you how you can access night mode on your iPhone camera night mode is a new feature, that's available on all iPhone 12 models, but it's a setting that only appears when you actually need it. So when I enter a dark environment, you'll notice that a new icon will appear on this drop down menu, that's how you know that you're in a situation where you can access night mode, when my lighting goes back up, that icon immediately disappears. So when you go into a dark environment, and you want to actually use night mode, you click this icon here and again.
You'll be indicated in the top left corner of your screen. That night mode is available so open up this menu click on this icon. Here and now you have control over turning it on leaving an automatic or shutting it completely off again. If it's completely off, you don't need to worry about it, because there's going to be this line running through the white icon, one on automatic, it's going to remain white, but that line will disappear. So if your phone picks up that it's dark enough, and you'll benefit from night mode, it will turn it on automatically when you capture a photo.
But if you want to make sure that it's on and running in the background, just turn this meter to the right, and it's going to indicate that it's going to take say a second to take that photo. If my environment is even darker than my environment now you'll see that timer will go up between all the way up to 10 seconds and that's how long that it's going to take an optimal night mode photo if you ever don't have time to wait the 5 or 10 seconds for it to process a photo in night mode. You can use this bar by opening up this icon again to shorten the amount of take the amount of time it takes to actually capture that photo once you have that all set up, you'll notice that when I take the picture, it takes a quick second to process, and now you can open it up, and now it's taking great shots in dark environments. Again, if you want to shut that mode off, just go here, and you can swipe it to the left and that will shut off night mode, but again as soon as I enter a brighter environment, that setting will disappear right away on its own. Next, I'm going to be showing you how you can use portrait mode on your phone's camera portrait mode is an incredible feature and what it does is it's able to isolate a subject in a photo and blur out the background around that subject.
So, if you open up your camera application and click, this portrait mode feature that's right. Next, to the photo mode right away. You'll see that you have a lot of different lighting options to choose from you, have a natural light, studio, light, contour, light stage, light stage, light mono and then even a high key light mono within these different lighting. You have the ability to adjust the lighting as well as the depth, so you can either click their two icons right here or you can open up this drop down menu and now the two options are going to appear here. So the lighting option is how you control the amount of light.
That's shining onto your subject, the farther right. You bring this bar, the more lighting that will appear on your subject and the farther left you bring it the less light. The other one here is how you control the depth, and this is really what controls, how blurred out your background is going to become when you take an image, if you bring it all the way over to the right here, it's really not going to blur out the background that much and if you want it to be more blurred out and more focused on your subject, bring this bar over to the left. So once you have all of that set up, you can go ahead and take a picture and the great thing about this portrait mode. Are you don't need to worry too much about what settings you have it on right now, because we can go back and edit it in after taking that photo? So I'm going to open up this preview here, and you'll see.
This is how the portrait mode photo came out that I just took now, and I can click this edit button and once I click that you'll see that it's indicated that I took a portrait mode photo and because of that, I now have the option to switch any of switch between any of the different lighting options. So I can switch it to just the studio light. I had it on stage light, but I can bring it to stage light mono and you. I can also go in and still change the depth and I can change the lighting and ultimately, you just have full control over adjusting this portrait mode image. Even after I take it once you're done, making your edits just go ahead and click done and then at any point you can go back in and change the settings on that photo and switch it to whatever lighting you would like and make sure you're always getting the perfect shots.
I hope you found today's video valuable. This was a complete beginner's guide on how to use the camera on your iPhone, 12 12 mini 12 pro and iPhone 12 Pro max. Let us know down in the comments what your favorite part of this video was, and please give us a like and a thumbs up. If you did find this video valuable, be sure to subscribe for the new great content we have coming out soon, and I also want to encourage you to sign up for our free email newsletter, app find VIP using the link in the description without find VIP, we're going to be sending you our favorite mobile games and mobile apps right to your email inbox each week. Thank you for tuning in today, and I hope you have a great rest of your day.
Source : AppFind
Phones In This Article
Related Articles


Comments are disabled
Latest Articles


