20 Galaxy S20 SETTINGS To Change NOW! (Galaxy S20, S20+ and S20 Ultra) By Jimmy is Promo
Everybody welcome back to Jamila's promo, and today we will be talking about the settings to change immediately. The moment you get yourself the galaxy s 20 now, as you watch this video you'll notice that the majority of all of these settings changes will work with any other Samsung phone. Now, if you do use Samsung smart switch or the Google data recovery, and you transfer things from your old phone to your new phone, you might notice that some of these setting changes will move along with it, but just a double check. You can still watch this video now if you are brand new here at the channel of Jamie spur MO and you own, a Samsung, Galaxy device make sure you hit on that subscribe button, as well as the Bell for notification. So you get notified for future videos and make sure you hit on that all option. So you don't miss out on any future tips and tricks.
Now the first setting that I usually change at the very beginning when I first get the phone as I go on the very top I pull it down twice head inside all the settings and I turn on dark mode. Now, there are two reasons why I turn on dark mode? The first reason is that it is a little easier on the eyes, and the second reason is that it does actually in fact save you a little of battery life. The reason why is that these Samsung phones are AMOLED, which means that anything that shows the color of black just means that each individual LED is turned off not using any battery. Now, when it's showing off all of this white bright light color, it is having all of these LEDs turned on, which is again taking a little of battery now heading over into the second thing: I, usually change, and that is the ability to pull down the notifications panel or quick settings just by swiping down on the screen, so go anywhere on your home screen press and hold that is empty and go into your home screen settings now. This is where you want to turn on to swipe down for notification panel now the reason why it's getting a little better to turn on this setting is because the phones are getting longer and longer and taller, which means that now has to go instead of going to the very top to pull down the little bar I could just swipe down anywhere on the screen.
So I can swipe down there swipe down here, swipe down there, and if you pull it down twice, it's going to pull up all of your quick settings. The next setting to change is one that's actually very important. You want to go inside your contacts, application. The moment you get a new phone, it doesn't know where to really store it, so it kind of maybe puts it into the phone storage itself doesn't really put it into Google, so it can't really be backed up so hit on your little menu button on the left hand, side and go to manage contacts now through manage contacts. This is where you go to default storage location.
So this way it doesn't always have to keep asking, and you can see that really nothing is set up here, so I'm going to put it inside my Google account. So this way now anytime, that I add a new phone number. It's always going to be saved and stored. The next setting I change is I, go right back inside the home screen settings so again go anywhere on the screen that is empty hit on the home screen settings and then over here I changed the grid for not only the home, but also my app tray. So, at the very beginning, with stock, it's going to have a lot of space in between each individual application, so you're gonna, add fewer apps and fewer widgets to each screen, but I love to go to this largest screen grid, so I can have more and more on each page, and so basically you just want to move these right on down.
Put them right, where you want them to go this way. You're going to have a little more room. So going to add more to the first page. You don't have to have really anything on your second now. The next thing you also want to do is do that same thing with your application tray here, so you can see that there's a lot of pages, there's actually three pages and I didn't really download all my applications just yet.
So this is where you'd want to go right back inside their go to the apps screen, and so now I'm going to change it right there. So it's the five by six, so you're going to see that, even though it is still using 30 screens, there's one more little small step to take on the top right-hand side hit on these little more options and go to clean up pages. Now, once you clean up the pages, it's actually going to put it all into one area instead of spreading them all out now. Maybe the very next thing that you might want to do is put these things in order. So after you hit on apply, you're going to get a little very top hit on sort.
We're going to put it in alphabetical order, and now everything just makes sense. So these are the first few things you want to do. The moment you get your phone. The next setting to change is how you navigate the phone. So if you like these icons here, here's your recent home in back or if you want to use the brand-new Android ten gestures just go inside your settings hit on display.
Then, as you scroll down you're gonna, see where it says navigation bar now, if you're left-handed, you might do this option here. So your back button is a little closer to your hand that is dominant, or you could put it on your right hand. Now, for me, I love the full screen gestures, that is a part of Android 10, I love the fact that I can just go anywhere on the bottom and when I swipe up it takes me right back home. Let's say: I was inside a web page or as inside, of an application. If I want to go back, I can simply just swipe either onto the screen, either from the right side or even from the left side, but really use any navigation that works best for you, the next setting to change this one's primarily really only for the galaxy s 20 and any other phone after this, and that is by going back inside your display settings and then changing how smooth you want your motion.
So do you want it to be at the 60 Hertz or the 120 Hertz? You can have regular standard refresh rate. If you want it there, it will actually save a little of battery, but if you want to keep it on that, really smooth, you know transition, that's smooth scrolling, the smooth gameplay. You can put it right back on that 120 Hertz. Now, when it comes to this one, when you have 120 Hertz it kind of defines, if you're, using your screen resolution, either at the Full HD plus or the who plus, if you put at the who plus, you only have the option of the 60 Hertz refresh rate, but if you want to have both, you can put it at the full, HD plus or again.60 Hertz at Full, HD plus, will give you the best battery life out of all of them, but I mean I'm happy with the full HD plus and 120. The next setting to change is dealing with your button over here it's as of right now, a multi-purpose button.
It's either Bixby or the power. When you do a press and hold right out of the box, it will be going inside of Bixby an easy way to change. This is by pulling down the notifications panel going inside your power little menu and then hit on this side. Key settings now inside here. This is where you can put in power off menu.
So this way it's something that you might be used to you if you're, using this more as a power button than a big speed button. This is your setup, so you have your menu right there again since we're inside this little menu. Here you also have the option for double press. You can either have it on or off. If you want it to be on, you can usually have it as quick camera launch, which is by stock and probably the best thing to do other that you can actually have it open any other application that you have downloaded on your phone, but I'm going to keep it as the camera.
So, instead of me trying to go into the camera, do whatever I'm doing, even if the screen is off a fast double press of the power button will now open up the camera. The next setting to change is dealing with your quick settings on the very top, so this is meant to be quick settings things that you want to change on the fly stuff that you use all the time. So you want to pull this down twice: click on your more options on the top and then hit on button order. Now inside the button order, you can move things to the top. If you don't want to use them at all, or you can actually move them where you need them to go so, let's say Samsung, kids, that's one that I don't really use as often we're going to move it over there dark mode.
Honestly, the moment it's on I don't need to turn it off, but I'm going to put it right there because I know it's the second to last one. So if I do need to change it, I can change it in immediately with the music share. This is something that I do want to use, so I'm gonna, put it right up over there same thing with you know: Dolby Atmos, quick share is also something I want to use, and you can see that I'm putting them right there, and it's because what's going to happen is anytime, that I take any of these. That I don't really need to use, and I move them over. They will take over the spot over here.
So, for example, power mode I don't need to have power mode over there, so I'm going to put it towards the back again before dark mode, and you can see that music share already moved over so Smart View. This will be something that I'll move over. Put it in front of dark mode location I mean the moment. That's already on I'm going to move it over there, and so now you can see that all three of those I wanted to move over here is already now sitting here now, once you have everything set up in the way that you want, so you have your Wi-Fi, your vibrate sound silence, your Bluetooth connections, auto-rotate Dolby Atmos! You have all of these set up. You just hit on done so now.
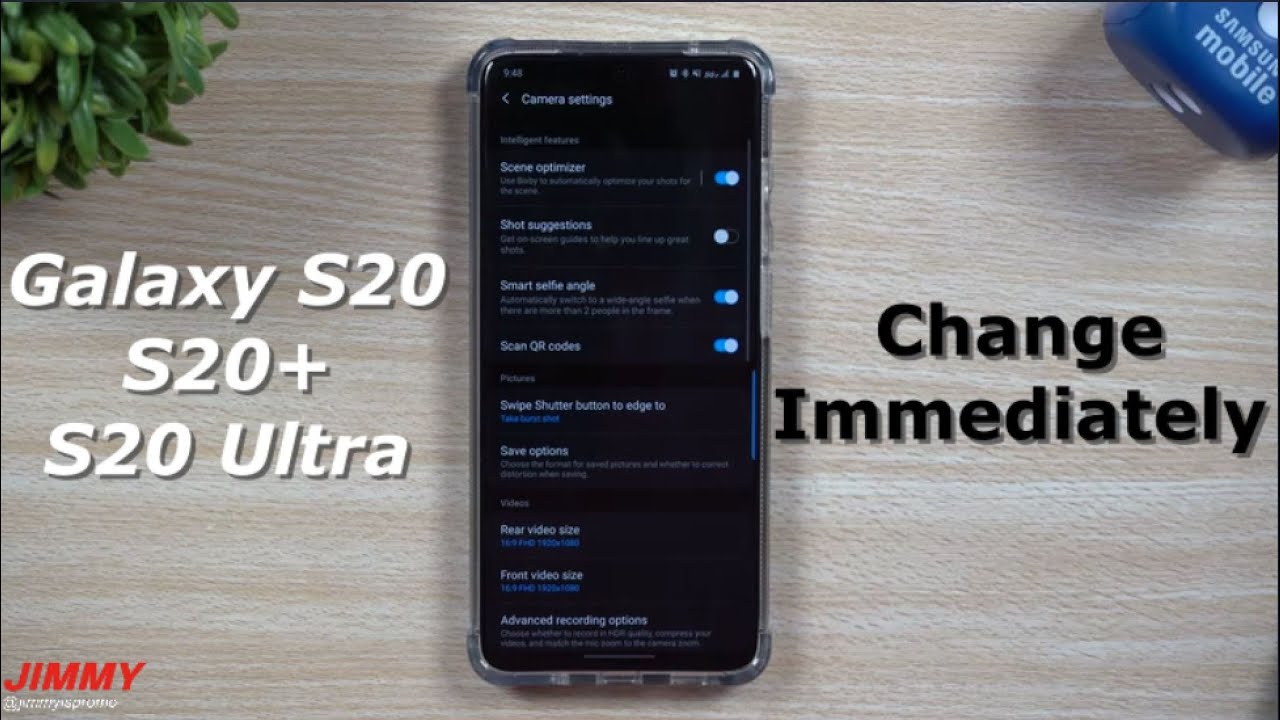
What's great about this, is when you swipe down the first six little settings you see on the very top is gonna, be probably the ones that you toggle the most. When you pull it down, you can have everything that you really technically use or need to change on a daily or weekly basis, and everything over here is something that's already set up. You might not use it even monthly or yearly. The next settings to change is going to be inside your camera. So you first open this up.
A few things might pop up because you've never used it before I, don't need my location tags. I! Don't need to have you know, location based with that now, if you're somebody else who takes pictures for a job, you might want to have your location on. So you knew exactly where you took the picture, but inside here you want to go through and change your modes, so you want to head over into more hit on that little edit button, and then this is where you can drag and drop and move things where you want them to go so live focus is something that I love to use, so I'm going to bring it on down and then once you have all of your shooting modes in the order that you would like to put it over into photo and now that we're still inside the camera on the top left hand, side go inside your settings and one of the things I would highly suggest to actually toggle off is gonna, be pictures as previewed. The reason why is because, if you have it toggled on what's going to happen, is that if you're wearing anything with words or lettering, it's going to be completely backwards, so it actually mirrors everything you're doing, because it's its saving it as previewed on your phone. So when you actually turn this off, if you're wearing something that says Nike or adidas, it's actually going to be able to be read, Nike and Adidas, instead of it being backwards since we're still inside the camera.
The next setting to change is really gonna, be a personal preference, but for me, I like to switch over to the sixteen by nine, if you're taking pictures, that's meant for a literally Instagram or Twitter, keep it on the ratio of three by four, but because I like to have a full image. You know something that's set up like a regular TV screen or a monitor, or even cell phone I switch it over into 9 by 16. Now it's still inside the photo when you switch it over to the front-facing, you have to switch it there as well. So again, I'm going to go the very top 9 by 16 header back over into the regular photo when you go inside a video. This is where you can do the exact same thing: ? set up as the 9 by 16 already again set up like a regular monitor.
But if you want to switch yours over into 8k or whatever shooting mode, you want to be there same thing with photo when you actually click on this little option here instead of 9 by 16 this, or you can put it as that, 108 megapixels or if you have the smaller galaxy s, 20 it'll, be that 64 megapixels the next setting that we're gonna change, we're gonna! Do it right now, because the screen timeout is starting to bother me as I shoot videos I hate having to touch the screen to illuminate it again. I always like to have mine, even if I wasn't shooting videos I like to have mine set up for about either two or five minutes for a timeout. Thirty seconds seems to be pretty quick for me, so I'm going to move it over into five minutes again. All you have to do. For that.
Setting is going inside the settings you can go inside your display and as you scroll on down, you change the screen timeout to five minutes, two minutes, ten minutes whatever you want it, whatever suits your needs, the best. But thirty minutes is really fast since we're looking at this home screen here, you can see that this, this weather widget, is just sitting right there. The moment you get your brand-new phone make sure that your locations is turned on, and then you set it to your location. So this way it doesn't just say regular weather there. Now it can actually show something for your local area.
If you don't want it, you can press and hold, and you can actually remove it from your home screen, and you can also make it a little smaller again set it really anywhere that you want it to go, and you can do the same thing here with your Google search bar and so as you hit there, you can actually make it smaller, and you can break it down, and so now it's going to be something that maybe makes a little more sense for your setup. The next setting to change is one that you could have done a little earlier on when you're putting all of these little quick settings in order, but make sure you do have Dolby Atmos turned on, so you get the best sound quality and if you tap on the words below you can put it as Auto. So this way it'll automatically change if your listen to audiobook, YouTube or music, and it'll make a change for you automatically. So now that we've done a lot of the customizing personalizations of the phone, lets kind of go through the security I already have both of these set up, so I'm just going to show you where they are go inside the settings scroll down to where it says, biometrics and security now inside here make sure you choose on face recognition and fingerprints with face recognition. You can also put in an alternate look.
So if you are somebody, let's say you're a guy a lot of times you like to wear a hat and sunglasses, you can set up your face recognition with all of that off and then maybe with the very next set up, you can do set up, alternate, look, and then you can put in your hat and sunglasses for fingerprints. You could put in your right thumb and your left thumb and just kind of have all of that set up and then once you have all of that set up we're still inside the screen. Make sure you turn on find my mobile and what's this one is turned on, you do have to make sure you're signed in with your Samsung Account and anytime, that you lose your phone. You can't locate it. Maybe it's inside your house, you don't know where it is.
It's on vibrate. You can't ring it. You don't have your Smartwatch that's connected once you go into the find my mobile Samsung comm when you log in with your Samsung Account. That gives you all the credentials to do everything you need to do with your phone. So let's say that you forgot your lock screen password, you can automatically unlock it.
It's really nice, so I need to put in my pin here just to turn this on. So this way, if I do forget, my password or somebody puts a password on my phone I can't get into it because I know what my Samsung Account login is I'd, be able to remotely unlock it, and you do want to turn on to send last location, which means once it goes down to a certain battery percentage. It's going to send it where it last was so then, hopefully, if it's outside you'd, be able to find it. But again you can locate your phone. If it's lost, stolen you'd also be able to remotely unlock it.
You can wipe it. You can look at your call log. Furthermore, you can look at text messages. If someone was using your phone, you can see all that stuff so find. My mobile is super, super important, so we're almost done.
There are two last things: I want to talk about and that's going to be, with your edge panel, the edge screens. These are things that are just super helpful. These are little tools that you might use on a daily basis. You can go inside your quick settings here, or you can just go inside your settings. Go inside of display and as you scroll down just head over into edge screen and once you open up edge screen, make sure you have it turned on.
This is also where you can turn on your edge lighting, but once this is turned on, you can also change the order of how these are sitting. So, if you wanted your tools to go a little before your smart select, you can do that. But again just make sure you have this one at least turn on. It's a lot of really helpful tools and then the very last thing which you can do this first. If you want to really these things are not in order, but if you're still here, one of the things you might want to do is go inside your settings, go all the way to the bottom and check for any type of software update.
So if there's any type of update, then you know you're running your last update. So you can do this even first thing out of the box, but I, usually kind of personalize and customize. My phone I set up the settings and then I, just usually after that I check for an update. So these are the things that I would highly suggest changing the moment you get yourself the Samsung Galaxy s, 20 or really any other Samsung phone I hope you guys have liked this video, if you guys did please give this thing a huge thumbs up, don't forget to hit on subscribe, subscribe over here in the very bottom left-hand side, and if you liked this video, the more than likely you'll. Also like this video, and I'll see you guys later.
Source : Jimmy is Promo
Phones In This Article
Related Articles


Comments are disabled
Latest Articles


