Zhiyun Crane 2S official tutorials 03 Menu Settings By Marcel Brandel
Hi everyone today we're going to go through the menu and the settings of the Dorian crane 2s. Let's get started all right, we'll start with the activation. When you first get your gimbals, it will prompt to ask you to activate it. Just follow the steps shown on the screen. It will ask you for an activation. You might need to sign up for a by play account if you don't have one already and see if it asks you for a firmware update.
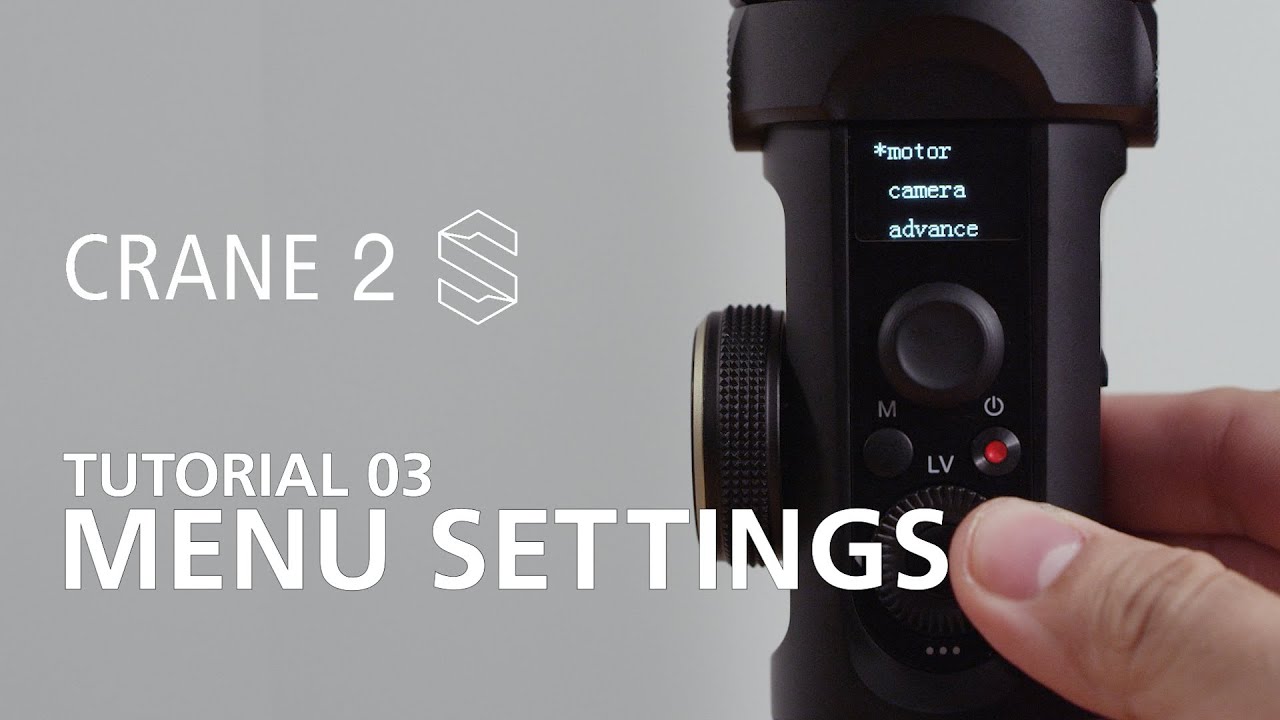
In our case. It does do note, though this is a two-way process. First you're downloading the firmware, then you connect to your gimbals but don't enter, and you install the firmware you just downloaded after that. Your firmware update is successful on the direction we'll press down to get into the menus press left or right to go back or into a setting. First, we got motor here you can let it calibrate automatically, or you can do some custom settings for each axis tilt row and pan and also level here you can select.
The strength of the motor low is suitable for, like smaller cameras such as Sony a6400 and highest, for example, perfectly suited for cameras like canon, 1dx or PCC 4k. Then we got camera here. You can choose the camera that you're using, so you can gain the access to its iris control, shutter, speed, ISO and also start and stop, and do note that there is one which is called CCS. You want to select this one if you're using the image transmitter, and you want to control it remotely. Then we got advanced here.
You can do some fine-tuning, so we got speed, smooth and dust band. Speed is how fast the gimbals turns smooth is how gentle it eases in or out of a movement, and that band is at which moment will start turning sensitivity of reaction to your hand's movement like a reaction window and of course, if you adjusted them too crazy, you can always go back to default to reset it. Then we got focus here. You can adjust settings of the focus, module and zoom module, so in the focus module we can see that we can change its sensitivity. It's a b point: reverse control and upgrade the sensitivity is basically how fast it turns in relation to your focus, wheel, movements, if you want the focus module to react faster, then select high.
If you want the focus, module react, slower, then select low av points are perfect for lenses that don't have hard stops, so you can set the to the closest point and b to infinity, and then, if you do, the focus control will be way easier, and also you can of course clear them once you have put on another lens and need to redo the b point, then we got reverse. If you are more into it to have the focus rule direction different, then you can choose this one. Lastly, we got upgrade, so you can update the firmware of your focus module. Then let's go into zoom in zoom, it's basically exactly the same as in focus. You also got the sensitivity, av points reverse and upgrade.
Then we have wheel under the function. We can select what it does. The wheel either like currently turns the focus or the zoom, or it can even do electronic focus, which is amazing lenses such as Panasonic 12-35 attached to the gh5s. These are actually also electronically focusable. This one can actually also be used via e-focus, so you don't even need to attach a focus module onto your camera, and you can directly control the focus through the camera control, cable, or you can also just turn it off.
Then we got priority if you want to use the handle or an external controller like this one, then of course same thing: you can also select reverse. If you want to have the other direction, then we got key. It's basically this front one, the f mode key under the trigger you can see you can either do it like hold. So you only activate it if you hold it or click, so you just activate it once or hold slash click. No matter what you do, you will be able to access the f mode.
Then we got joystick, which only has one lonely setting, which is reverse, so you can also reverse direction. If needed, then we got calibrate something very important to do after a firmware upgrade, but for that we have a specific tutorial. Then we got angle here you can see pitch and row settings are available for fine-tuning. This is because, if you are using different quick release baseplates, it might be a little non-level, so you can use these to find tweet. Lastly, we got Sanchez which actually should be in English called language, and here you can change the language to Chinese or English.
At the end we have about under about you can see the firmware number of your crane 2s, and with that you should be able to know if you need to upgrade your firmware or not with some cameras, you don't see the live view image directly on your screen. So with this button you can enable it. Alright, that's all. Hopefully that has helped, and if you have any questions, feel free to leave them down in the comments below and also consider subscribing to this channel to see more awesome content, especially tutorials on the dream queen 2s, you.
Source : Marcel Brandel
Phones In This Article

Related Articles

![Asus ROG Phone 5 First Impressions - OMFG! 💧💧💧 [No Giveaway]](https://img.youtube.com/vi/F_4J0kquR34/maxresdefault.jpg )


Comments are disabled
Latest Articles


