Turn Your Old Phone Into a Handheld Emulation Gaming Console By Taki Udon

Last year I did a video about turning your old phone into a handheld gaming console. Since then, I've had a lot of requests from viewers for a follow-up video wanting to know how to recreate things that they've seen in my videos and also how to get started with emulation on a phone with no prior experience in this video. I'm going to teach you how to configure a variety of different emulators with optimal settings, so you can create your own gaming handheld. This is a huge video with a lot of information, so feel free to jump to the sections that you need and if this helps you in any way, please show your support below by leaving a like on this video. The most important aspect of making a gaming handheld is selecting the phone that you will use. If you only have one device, obviously go with the one that you have.
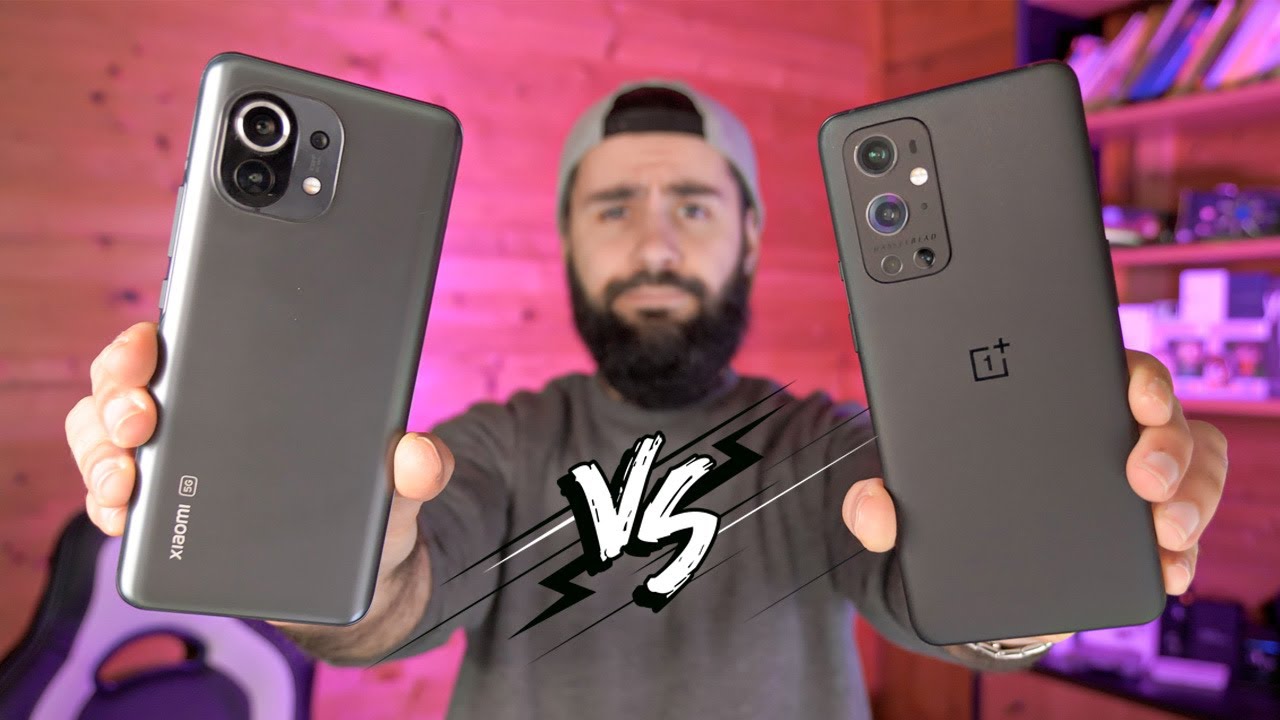
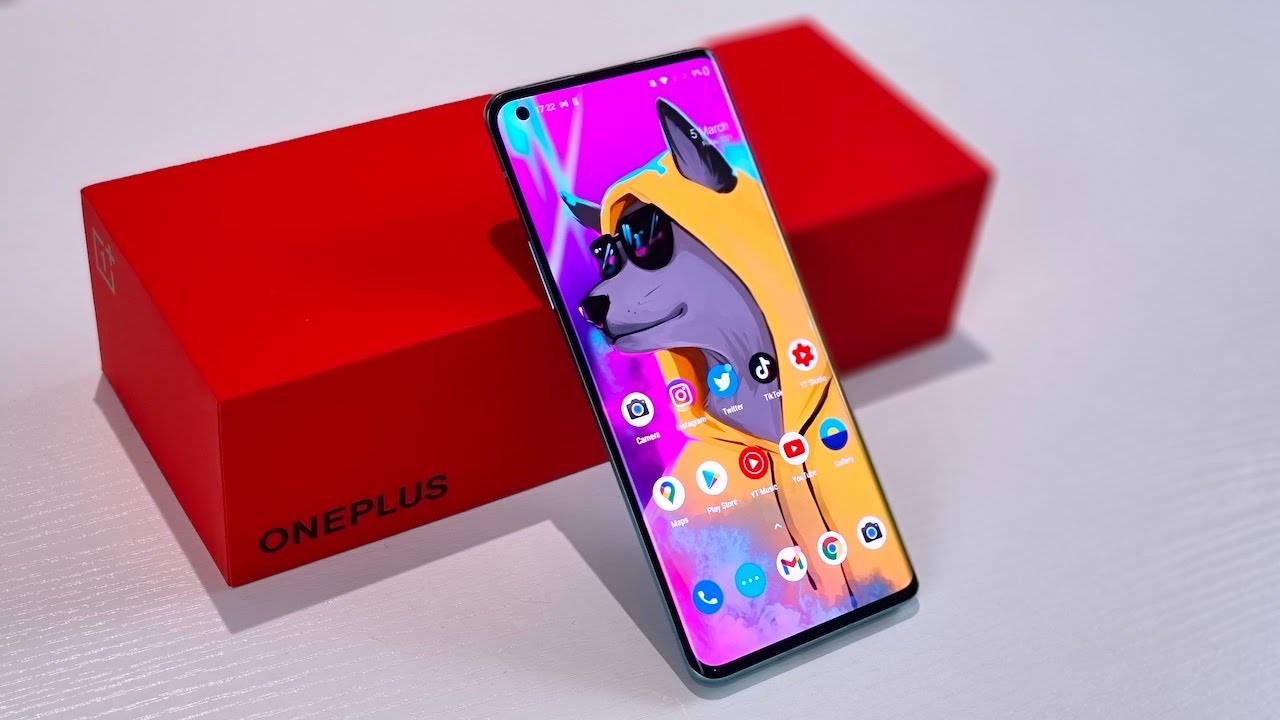
Your objective here should really be to reuse, something that you've already got. In my last video, I used my old Xiaomi note 5 pro, and I had enough power to emulate a ton of systems. Unfortunately, that phone isn't powerful enough to showcase all that I want to in this video, so instead I'll be using the Poco x3 pro that I recently reviewed. There is one important thing that I want to stress. Before: moving on emulation is really GPU dependent on android.
You can have an incredibly powerful phone that is trash for emulating certain systems, just because of your GPU at the time of making this video snapdragon is really the king when it comes to emulating on android, and you really can't go wrong as long as your phone has a snapdragon in it. If you have your hard set on emulating higher end systems, you should look toward using a snapdragon, 700 or 800 series chip from within the last three to four years. Your mileage may vary for everything else, that'll show here, and it really does come down to a lot of trial and error. The android version that you're running can also play a big role in what you'll be able to emulate, based on my own experience, android 8, 9 and 10 give comparable performance using the same phone, but android 11 really makes emulation more annoying if the emulator that you're using hasn't been updated in a long time in these situations, you'll find that you aren't able to browse the files that are on your SD card, and you'll be limited to using internal storage only speaking of SD card. If your phone is old, but it supports a SD card, you can get around not having a lot of internal storage by storing your ROMs on relatively cheap SD cards, and this is what I do on all of my phones.
The next thing that we're going to talk about is choosing the quote: unquote right controller. I have three controllers that I'll be using this video that I've selected for good reasons. On the high end, we have the apex 2, which is a Bluetooth controller that comes with amazing mapping software. If you want to get a little more out of your controller, I also have a generic Bluetooth controller that I bought for around five dollars. Just to show that you really don't need to go out and buy something expensive.
If you don't have the money too, and on the other end, I have a telescope controller with a type c connection. These cuts down on latency and makes it a great option for people that are really sensitive to input lag. You'll see me use all three of these controllers throughout this video. In this section, I'm going to teach you how to configure the pass emulator when you have ROMs on your SD card or in your internal storage on your phone you'll want to go over to the games, tab and path over the directory with your games in it after this head over to the settings menu. The first thing that you'll want to check is, if you have a Vulcan option for the rendering mode back in, if you have a phone from within the last five years, or so, you'll typically have this option, but it is GPU dependent, and it doesn't always give you better performance over OpenGL if you're having trouble running a game, you'll probably end up needing to change this buffered rendering option to skip buffered, and I'll show you an example of this in a few moments.
I don't ever really use the frame skip option on this emulator, but if you did want to use it, you can set this to a frame skip of 1, and then you'll skip over every other frame. Generally, I would use skip buffered before I would ever consider turning this option on you don't need to worry about the post-processing shader section scaling is completely up to you. I have it set to the default option of auto-scaling, but you can come in here and fully stretch out the image, so it fills out more of your phone screen if you want to now. Let's talk about the rendering resolution: if you have a powerful phone, you should have no problem setting this above 1x generally, I only play PSP games on an emulator if I can run a game at or above 2x native resolution. If I can't do that, then I'd really just use a real PSP aside from this option, you just want to make sure that you have enabled vertex cache, clear frame buffers and the two speed up options feel free to keep the filtering option at 16 x.
You won't really get any added performance by lowering it, so you can just leave this at the default value. The only thing that I would enable here is the show fps counter for speed and for fps. So you can see if there's any performance issues that you need to address. The lower resolution for effects option won't really help you unless your phone is really struggling over 1x rendering resolution. So you can always just leave this at the default value.
There's nothing that I need to change in the audio tab for controls. If you have a controller, you are going to want to come in here and make sure that all of your mappings are correct, and they are set to the values that you want them to be. This is typically autoconfigured for you, so you won't need to worry about it, but it is a good idea to set the pause button to something. That's really easy to use as you'll be pulling this up frequently, while you're using this emulator. If you aren't using a controller, you can also customize the default layout if you want to, but I find that the default layout is perfectly adequate for most phones, there's nothing that you need to change in the network or in the tools tab in system.
There is one thing that we're going to want to take a look at if we're playing a game that has internal frame, skip, and I'll, show that to you in just a moment, but for now everything here can stay on their default values. Let's start off with an easy game at 3x resolution. If you can play this game without any issues, you'll be able to play a lot of the PSP library without any trouble, but for now I'm going to pretend like it isn't running well at 3x, I'm going to back out into the PSP emulator, and this is the point where I would make a custom config file for this game, using the option on the right side. Now I have an individual config file just for this game. With this I can do things like come over to the buffered, rendering option and choose skip buffering, and now I can go back into the game and see if things are improved.
This is actually a game that has missing floors if you use skip buffering, but it does improve performance. Let's go back out again and change this back to buffered, rendering the option that's going to make the biggest impact is changing the rendered resolution from 3x to a lower value. So let's try 2x and see if the game runs any better. Now 3x was actually running without any issues, so we can go back and bump that up to 4x if we wanted to, but there's not a huge difference between the two options. If your phone has a small screen now, let's go over some information, specifically about the god of war games.
I'm going to use ghost of Sparta for this, but everything that I show you here apply to the other game as well. Once you boot into this game, you can check your fps in the top corner, I'm going to back out and make a custom config for this game using that right, menu again back in the game. You can see that we're not able to run this with buffer rendering at this resolution. This is where I would typically do one of two things: I'm going to make a save state right now, and we're going to go back into the game settings, and we're going to drop the rendering resolution to 4x and try again it's a little better, but we're not at full speed. However, if we bump down to 3x or 2x, we almost get full speed gameplay if the game still isn't playable.
At this point, you can turn on skip buffered rendering, and you should see that the game runs much better at the resolutions that we weren't able to use with buffered rendering there is one more thing that you can do: go into the system, menu and click on change, emulated, PSP CPU. This is going to be a lot of trial and error for you, but the process that I'll show you will work on any device change the CPU clock to 120 megahertz and then click. Ok after you do this, you need to completely restart the game for the settings to kick in click exit to menu and then restart the game without using a save state. You need to wait until you see this title screen before you can launch into a save state. You should see that the 60 out of 60 fps has changed to something lower because the game is going to be using its native frame skip.
Furthermore, you can see that at the menu we are running at 45. Out of 45 fps, which is a lot less demanding than what we were doing before now, I'm going to load back into that save state, and I want to stress that we're running this at 3x resolution, but I could probably go up to 4x now. If I wanted to, we are still using buffered rendering we are just forcing the game to be less demanding load into the save state, and you should see performance increase drastically without any sound issues at all. If you have a weaker or more powerful phone, you can redo the steps that I just showed you with a higher or lower CPU clock speed until you get something that works for you even at 4x. This is running without any issues.
I hope this helps all those that always ask how to get this game to run on weak devices. In this section, I'm going to teach you how to configure and use the m64 plus FM emulator that you can find on the play store after you have the emulator installed. We need to add our ROMs click on the plus sign in the bottom corner and then start the file picker to path over to your roms' folder. This emulator has been updated for android 11, so you should be able to use your SD card for this navigate over to the n64 folder and then select use this folder and then allow access after this is done. We need to map our controller head over to the top menu and then go down to controller under profiles, click on android, game pad and then click copy.
You need to give this new one a name, and I'm just gonna, simply add the number one to it after this check your buttons and make sure that they're how you want them to be. In my case, three of the buttons were mapped the wrong way, so I'm going to remap them hold down on the button that you want to remap and then click on map after you're done with this remap, the buttons to the correct ones that you want and then back out to the main menu once you're here, go to select profile and then go down a controller profile.1. in here make sure you select a profile that you just made. Now, let's go over some settings for the display. You can keep the resolution at the default value of 480p, but if you have a lower powered device, you can change it for a small boost in performance.
You can also scale up if you have a more powerful phone for this example, I'm going to select 1080p as my resolution, while you're here. Furthermore, you should also turn on the frame rate counter. So you can monitor performance when you are just getting started, and you can always just come back and disable it in the future. If you don't want to see it once you've done all this, you can open up one of the ROMs that you want to play to check the performance. If the game isn't running well, you can open up the side menu and then select exit.
When you reopen the game, you want to go down to the settings and then, when you're here, you want to go over to emulation profile by default. This is going to be using the glide 64, accurate profile, which is a little demanding if this isn't running well for you, you can try out the other four profiles that are labeled with fast rice is basically going to be your nuclear option. If everything else fails, but it severely lowers the quality of your games. If you have a weak phone, this is your best chance at getting something to be playable. For now, I'm going to select glide n64 fast and check my performance again.
This in combination with changing your rendering resolution in the per game settings, is what you'll need to do on a trial and error basis for any game that doesn't run well with the default settings. In this section, I will show you how to configure and use the drastic Nintendo DS emulator, which is available on the play store. The first thing that you're going to want to do if you haven't done so already, is head over to external controller inside the configuration option, choose the select key mapping option and then choose no mapping from the pop-up menu after this click on map control and then go through and map all of your buttons to be how you want them to be when you're done click on map special, and I would encourage you to make sure that you map screen swap to an available button on your controller along with menu after you're done, go back to the main config menu and then go to general. I would recommend that you turn on the show fps option, so you can monitor performance as you find out what your phone is capable of doing after you. Do this go down and choose the default layout that you want to use I'm going to select the second option because it shows two screens at the same time, next, head over to video by default.
Frame skip is set to auto. You can turn this off, but the auto setting really does a good job in comparison to other emulators. So it's best to leave it on, while you're here turn on high resolution, 3d rendering, which will give you a huge boost in image quality for 3d games with this option, you'll also want to enable multi-threaded, 3d rendering this next part is up to personal preference. But you can also change the filtering option from linear to something else to change the quality of the image. In this example, I will use FAA if you're on android 8 through 10.
You should be able to path over to your SD card for your ROMs, but android 11 might require you to have your ROMs on internal storage, or you won't be able to see anything on. This screen launch any of your games, and we will move on with the game, open press your menu button and then go to menu from there go to edit screens and virtual pad on the pop-up window. I'm going to select the second option in this screen press menu and then press edit control layout click on all the buttons that you don't want to see one by one to disable them when you're done click apply and then save this as a global layout. Now your screen should be completely cleared of controls. In this section, I'm going to show you how to configure and use the Ciara 3ds emulator, which is available on the play store and as an APK file.
There are two versions of this emulator that you can install. One is the official version and the other is the mm version that I'll have linked in the description box below there isn't a lot to cover with this emulator, and I will just say that Ciara really performs the best on snapdragon phones, and you do need a really powerful chipset to be able to play most games from this system. The first thing that we're going to want to do is head over to settings. A lot of this is going to be on by default, and the only real thing that you can do to gain more performance with this emulator is dropping the internal resolution down to the native 1x setting the phone that I'm using now does a good job at 2x. So I'm going to leave it at that.
Make sure that you try out the three different shader options to find out the one that works best for your phone. Normal shader with cache has been the best for me on the x3 pro the shader cache is going to make the game much smoother after the effects have loaded once, and I'll show that off in a moment. Everything else here can be kept on their default values with that done, let's load into a game here back out once to open up the game menu and then go into settings. There are a few options that can be helpful depending on the game that you're playing these are the FMV hack, skip slow, draw and skip CPU access. You can also change your resolution in this menu.
Beware that some 3ds games will have occasional lag, the first time that you see an effect, but the performance should increase the second time that you see it when the cache is built in this section, I'm going to go over the red ream emulator, which is available on the play store. Re dream requires OpenGL 3.1 to work. So if you find a message that says your device is not compatible skip over to the retro arch section of this video for another option, when you launch the emulator for the first time navigate over to your roms' folder at the time of filming, this application doesn't seem to support SD card access on android 11. So I had to put my ROMs on internal storage. After you add your folder of ROMs, you should see all of your games populate inside the games.
Tab and their artwork should slowly start to populate on screen. There's not much else that you can do with this emulator, which makes this one of the most user-friendly in this list. You may need to change your controls. After launching a game like I do now open the menu with the top right hand, button and then head over to input, remove any of the buttons that are wrong by selecting the x and then remap them one by one. In my case, my shoulder buttons were wrong.
That should be all you ever need to do with the red ream emulator. In this section, I'm going to show you how to configure and use the dolphin emulator, which is available as an APK file linked in the description box below in two different versions. In this first part, I'm going to cover the official developer, build from the dolphin website. You need a fairly decent phone for this version of the emulator to be your best bet over the mm build, let's start by going through the option. First, click, the gear icon and then go into general here turn on enable save states and then back out twice head into game cube input and then select controller 1.
In the pop-up menu, select, emulated and then remap to remap your buttons once you're done, click, save click, the gear icon again and then head into graphic settings, you're going to have to experiment with OpenGL and Vulcan to see what gives you the best performance to measure that performance. Make sure that you have the fps option enabled you can keep your shader option at its default value. I happen to have this as four 16x9 with the widescreen hack, but you can keep it on the default setting in the enhancement section, you can increase the rendering resolution. If you have a powerful phone. Everything else here can stay on their default values, but I have enabled the widescreen hack with back-end multi-threading from here back out and go into hacks.
A few of these options can give you a small boost in performance, but they really are annoying to trial and error on this version of the emulator. If you're lucky, you shouldn't see any performance issues playing a game like double dash at 2x resolution, there are a few more things you could do to improve performance, but they're a little more complicated, and it's a lot more missed than hit. Now, let's go over the mm build of the dolphin emulator, at least at the time of making this video. This is the version that's going to give you the best performance for most users due to the creator of this build, focusing on making things playable. Instead of focusing on accuracy like the main branch start out by adding your ROM folder to the emulator and then select, ok, now we're going to go back into the settings, I'm going to start off with configuring.
My input again, just like I did on the official version with that done head into the settings menu and then go to general when you're here go down a sync on idle skip and disable that this will improve audio lag in games that are running slowly, and it's an all-around good option back out or save and then go into graphics again. You're going to have to experiment between OpenGL and Vulcan to see which option is better on your phone, and you can measure that performance by enabling show fps. You can leave everything else here on their default values for now back out and then go into enhancements for most users. Furthermore, you should just stick to 1x resolution. Furthermore, you can keep everything else here on their default values, but I am going to turn on widescreen hack, and I'm going to use the 4 16 9 option in the previous menu for hacks.
Furthermore, you can leave everything else here, as it is because this is really easy to change on the fly when you're inside a game. Now it's time to load a game. As you can see, I have controls on screen that I need to remove, pull down from the top and then open the menu on the top right, select, toggle controls and then select toggle all to clear the screen. Now you're going to be at the point where you're trying to do some trial and error to find out how to get a game to run well. I will walk you through some of what I try to do when I'm working on lower power devices pick a game that has relatively static content.
That's good for benchmarking, like the one I have here, pull down from the top and then click the processor icon to open the floating config menu. Here you have access to a bunch of hacks that you can try to use to increase emulation speed. These apply the moment that you close the window, which is why this is much better than the official version. You can experiment with present CFB and the options above it. It really is just rinse and repeat until you find the best combinations for the games that you're playing in my case, the performance is still low.
So I'm going to create a save state file and then close the emulator I'm going to go into the graphic settings and see if Vulcan gives me better performance, launch the game again and then compare the fps to what you had before to see which is better I've, disabled, the widescreen hack, and I'm just standing in a stationary spot testing out the top options to see which combination gives me the best fps. If you try all of this, and you still don't have enough performance, you can try one final thing. This is something you can also do on the official version, but it's a pain to do. Compared to this we are going to try to use the override, emulated, CPU clock, speed option. This doesn't actually do anything in the game that I'm showing right now, but the process is still the same.
I typically turn this option on and then try out different percentages until it reaches a point where the sound is clear and the game runs smoothly. You can get great results doing this on a ton of game cube and Wii games, but it's going to be a lot of trial and error in this section, I'm going to cover configuring and using retroarch if you're in this menu. When you first start the program, you need to click the gear icon and then go on to drivers, go down to menu and then change it to XML, go back to the main menu by selecting the house icon and then click on configuration file, click, save current configuration and then close the application. When you restart, you should see the XML theme now we're going to go through a couple of customization options before we start gaming first go over to video and then turn off threaded video. If you have performance issues later on, you can turn this option back on to improve your gameplay, but for now leave it off.
I also keep bilinear filtering off, but that is entirely up to personal preference from here: go to scaling, and I'm going to enable integer scaling. But you can leave this option off if you want back out to the menu and then go down to input, go to hotkeys, and we're going to set the menu toggle controller combo to start plus select while you're. Here. It's also a good idea to map things like fast-forward, rewind save state and load state to available buttons. On your controller, I typically put these on my right analog stick since I don't tend to use that inside this application.
You may also need to configure your controller so head over to port 1 controls and remap anything that wasn't done correctly. I'm going to change the device type to retropad with analog, and I'm going to set the analog to digital type as left analog. While I'm here, I need to remap a few buttons that were auto mapped incorrectly from here head to latency and then go down to run ahead to reduce latency. This is a good option to use if you have a powerful phone as it will reduce the amount of input lag that you can feel while gaming on android another option, that's worth enabling is rewind under the frame throttle menu. I'm going to set my fast-forward rate to 4x, and then I go into the rewind menu and turn on rewind support next head over to on-screen display and then go to on-screen notifications go to notification, visibility and turn on display frame rate.
This option is important for monitoring performance. When you're testing out game configurations, I like to change my interval to 60 instead of the default value. If this window is too big for you, go back one menu and turn off scale, graphic widgets automatically and set your override value to a lower value. Now, let's go into user interface and then go into menu item visibility. I like to turn off favorites images, music and net play to keep things clear, go back to the top menu and then head over to quick menu in here.
I just want to turn off start recording start streaming and take a screenshot, as those are all useless options for me back out to the user interface menu and then go down to appearance. If you want the menu to be smaller, you can change the menu scale factor to a lower number. This menu is too big on my phone, so I'm going to set this to a lower value, but you can also make this bigger if you need to. And finally, if you want to change the XML color go down to menu, color theme and pick a different option. I happen to like the default option, so I'm just going to stick with that.
The final thing is to set our content directory, go to the directory menu and make sure you take note of the bios' folder location, because you will need to use that in this section of the video to make your life easier, go down to file browser and navigate to the root of your ROMs folder and then select use this directory. Now save your config file again and restart retro arc. Now it's finally time to download some cores, go to the online updater and then go to core downloader. I'm only going to get a few of these for the purposes of this guide, but you can get any that you want just by clicking on them. You can see the full list of cores that I've downloaded on screen the most important ones for the purposes of this, video are the two PlayStation course and the dream cast core.
Now, let's round off things by building a playlist head over to the plus sign in the main menu strip and then select scan directory navigate inside the ROM folder for the system that you want to add and then select scan this directory, your games will be added as a menu inside the XML theme and their artwork will start to download. I'm also going to do the same thing for dream cast. This subsection is going to cover emulating ps1 inside retroarch inside your ps1, playlist click on a game and then select run first, I'm going to show off using the rearmed core, since it's the one that will run on pretty much any phone with great performance. After you select the core the next time, you select the run option. The game will boot with the re-armed core.
There's no performance issues here, but you may want to go over to the video options and turn off integer scaling inside the scaling menu. If you want to have the game fill out more of your phone screen, this core isn't bad, but it obviously has its limitations. Now we're going to use the beetle hardware core for added visual quality head over to the game in the playlist again, but this time set core association to beetle hardware. If you run the game, and you see this menu, it means that you need to put a bios file inside the system, folder that I showed you in the earlier section after you do that the game will boot with no problems now, let's start changing some options, open up the quick menu and then go down to options, go down a bit and then turn on skip bios, while we're here we're going to turn on the widescreen mode hack. Now you can see the game fills out more of the phone screen and the image isn't stretched, but the quality is still bad to remedy.
This go back to the quick menu options and change the internal GPU resolution to 2x you're going to need a super powerful phone to do anything more than this, and this feels good enough. In my opinion, there are a bunch of other settings that I didn't go over in this emulator, but this should give you a good starting point. You can also check out the duck station or swan station core, depending on the version of retroarch that you are running in this subsection, I'm going to cover emulating dream cast using the flypast core inside retroarch head over to your dream cast playlist that we made earlier and then launch a game. There isn't a lot that you can do if your games aren't running well inside this emulator, but I will go over a few things inside this options' menu. If a game is running slow, you can drop your internal resolution down to 240p for a small bump in performance, but the phone that I'm using is powerful enough to go much higher than 480p and that's what I'm going to be doing in this section.
You can also try going down to alpha sorting and turn on per strip if you're having performance issues. There is also a frame skip option near the bottom, but it doesn't really work well on dream cast, so I never choose to use it. I'm going to increase my resolution to 1080p and turn on the widescreen hack. This is a great emulator to use if you don't have the paid version of dream cast, assuming that your phone is powerful enough you'll be able to enjoy some beautiful dream cast games. In this section, I'm going to tell you how to configure and use the dig front-end available from the play store, we're going to cover how to add systems and install one theme using this application.
The first thing you're going to want to do is head over to options once you're here, click on themes and then click on installation theme to install the theme linked below this video. Once the zip file is selected, click on confirm, then click on select theme and pick revive from the pop-up menu. You should now see the inspired menu on your phone, go to options and then go over to ROM scanning. Then you're going to need to click on start manual, scan, choose the folder to scan option and navigate to your roms' folder, I'm going to scan my entire ROM directory, but it's a better idea to choose a subdirectory. If you have a ton of ROMs, you can check the progress of the ROM scanning by clicking on the icon.
In the top right hand, corner go back to home and then go into the system menu. You should start to see the menu populate with ROMs that are being added in each section. You will also start to see box art slowly start to fill in for the games that you've added with these games added. Furthermore, you can click on any of them and then click on the play button. If you followed my retroarch section, the game should boot up.
Assuming you have the core installed before ending this section. I want to quickly show you how to customize the emulator that is opened when you try to run a game, click on a ROM and then open the top right hand, menu, select, manage game and then change the top menu option so that it's using the exact, emulator or core that you want. In this example, I don't have the SNES 9x 2010 core. I just have the standard one, so I need to change this option for the game to work. Here's that exact process again, but this time with a ps1 game that I want to change to boot with the re-armed core.
In this final bonus section, I want to cover playing android touchscreen games with a controller. Your first and best option for this is going to be to buy a controller that has good touchscreen software and fly digit is my favorite company in this space as it's the brand that I use for testing and for personal enjoyment, simply open up any game via the mapping. Application and you'll have the ability to configure any of the things that you see on screen. It's a super simple process, and it's how I play games like gentian impact that don't have controller support with a controller. You can do the same thing with a generic Bluetooth controller using the octopus app.
The process is almost the same, so this is a good cheap option if you don't have enough money to throw at a real controller anyway. I hope this guide was helpful for you. If you have any questions, leave them below, and I'll try my best to get back to you happy gaming. Everyone takes out.
Source : Taki Udon
Phones In This Article
Related Articles


Comments are disabled
Latest Articles


