Turn Your Chromebook Into A Portable Retro Gaming Station With Batocera By DB Tech
Hey guys, the other day I put up a question or a post or whatever, on my community tab, saying that I wanted to do more Chromebook material um, but I wanted to know what you guys wanted to see, and I had a few people respond, which was awesome. I just got my community tab the other day or fairly recently, really, and I've just started using it, and I've had perfect results, and I'm really stoked about that, but um. Somebody I'm on here said that I should do a video about something called badasses. I guess that's how it's pronounced, and I've never heard of it before, and so I did some research on it and realized that it is a like a ROM emulation thing like retro pie or something like that, where you can emulate all of your old favorite arcade games through ROMs, so um, I immediately started figuring out how it worked and ended up turning my Chromebook into a portable uh retro gaming station, and I thought I would just take a little while today. I think it may be a bit of an intricate video um to show how to uh get it from the internet, get it onto an USB, stick boot it and then actually install it to be a permanent operating system on your Chromebook. So I guess, with all of that being said, let's go ahead and jump into all the other stuff.
That's going going to get us where we want to be by the end of this video, okay. So a little of a disclaimer here. In order for this to work on your Chromebook again, I'm specifying this for intel based Chromebooks um, because that's what we're doing this whole process on um you're going to have to modify the bios in your Chromebook to be able to boot from USB. Now I've made a couple of videos about how to do things like installation windows and install Linux and different versions of Linux, and things like that. I've also got a video uh that I recorded a while back and uploaded um, and it's called um install windows or Linux on your intel based Chromebook um.
I encourage you to go, watch that to learn how to modify your bios so that you can basically unlock your bios to install basically any kind of operating system. You want on your intel based Chromebook. It is kind of a precursor to this um, but just know that you have to be able to boot from USB uh in order to get this to work on your Chromebook okay. So the first thing we need to do is actually download the ISO or the image file so that we can get started. I will have a link to uh this Batista webpage uh down in the description below, so you can go down there and click that to get to where I am on the screen now.
So, of course, we're going to click download because that's the logical place to go next um, and here we can see all the different architectures that this will work with. We've got x, 86 and x64. So that's your 32-bit and your 64-bit computers they're listed out here as standard computers for 64-bit and old computers for 32-bit. I tend to agree with them on this. Um also keep in mind that if you need to for whatever reason you can run 32-bit applications on 64-bit processors, but you cannot run 64-bit applications on 32-bit processors um.
So that's something to keep in mind. Um also they've got stuff for raspberry, pi's and droids, and things like that, so download the one. That's that's specific to you in this case. We're gonna, download, um, the one for the computer and over here you can just click on the download link. I've got a 64-bit processor in my Chromebook, so we'll go ahead and click that, and it's uh it's about 780 megs roughly give that some time to download and then once that's done downloading we'll skip over to the next step.
Okay, so here we are on my desktop. You can see that I've got a folder here called badasses. That's got a couple of files in it as well as 132 disk imagers open next to it. Now both of these are uh compressed into like a zip file. That's what that go means, and so basically what we've got to do is extract.
That I'm going to use the 64-bit, so I'm just going to right-click on that and say extract here. We'll give this a second to extract, and then you can see that we just get a dot IMG file, so that's cool! That means we're on the right track there any second. Now there we go all right, so yeah, 1.85 gigabytes. So that's good! You should only need a couple of gigs on your SD or your USB stick. Maybe a four gig.
This is an eight gig, so I'm going to use this, I'm just going to go and plug that in and then over here you can see that it picked up. The h drive there. So that's good uh! Next I'll go ahead and click on the little blue, folder I'll go to my desktop open this up and right. There is that that image file that we just extracted, so we'll go ahead and click on write and then say yes- and this is a couple of gigs, so it'll take a few minutes we'll go ahead. Let this finish up, and then we'll come back and actually get into uh the installation process on the Chromebook.
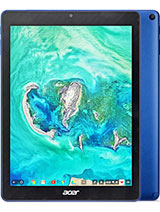
Okay, so here is um. The Acer intel Chromebook uh, it's plugged in make sure you plug it in this may take a while you'll, probably drain your battery, so make sure that you keep this thing plugged in. Of course, then we need to use our USB stick here, so we're going to go ahead and plug that in and then hit the power button, and immediately it pops into battery Linux. This process will take just a little while, while it kind of figures, some things out and goes through its initial boot process, so uh, so we'll go ahead and let it think for a minute, and then we'll get to the installation process once it's booted up also. I should mention that this black screen will sit here for a minute um and, and it's a little scary, the first time uh just let it sit here for a minute and run through its processes and do what it's got to do, and eventually you will get to this white screen, and immediately it'll pop up uh to some of the consoles that are immediately available on it like, for instance, Commodore 64 uh Super Nintendo like and there's more that it will support um, but these are ones that have some games in them.
That are say like open source or whatever the case may be. I figured I should probably just throw my face up there. I know you guys miss it if it's not there. So here we are, like, I said, we're back on the desktop here for uh, badasses and um. You could plug in um.
You know a controller and kind of go through some of the things that way, but sometimes the controllers aren't the best way to do this. So uh you can actually just tap the space bar it'll, bring up the main menu here, um and basically what we want to do. Uh first things. First, we want to. We want to install this right.
We want this to be the primary operating system on this device, so it makes sense to go into system settings and then scroll down to where it says, install battery on a new disk uh. If we click on that and wait a second, you want to definitely want to give it a second here to think about it. This part's a little slow while it's going through some of this stuff for the first time, but eventually it should pop up a screen that gives us more options. Okay, so here we've got target device, target architecture and validation, so the Kingston, that's the internal SSD, that's cool! We want to see that target architecture. If you try to navigate left and right there, it's going to crash um and the reason for that is in order to.
In order to do this, we actually have to connect it to the internet. First, I don't know why they've done it this way, I think it's actually going to have to pull up system information, that sort of thing to download the right information, but now we get to do a reset and reboot and connect to the internet. First, I knew that that was going to happen, but I wanted to show you that that would happen. In case you tried to go out of order. You didn't want to follow along.
That's what will happen if you don't do this in the right order, so once it gets up to the that console screen where we can see all the different uh consoles and whatnot uh, the first thing we need to do is actually connect it to the internet so uh. Once we get back to that screen, we'll hit the space bar, and we'll just go down to network settings, and again we're going to give this a second to load. It will take it just a second, but once that pops up, then we can put in our wireless SSID as well as our password for that SSID, and then we can connect everything, and then we can actually go through the installation process cool. So here it is network settings um we've got our status, our IP address. Neither of those are connected.
Hostname is badasses. That's fine! Uh! We actually want to turn that on the Wi-Fi SSID. This is going to be specific to you um. So I'm going to enter my information connect to the internet, and then we'll continue. Oh, I should also mention that the keyboard here doesn't work, you're actually going to have to use the arrow keys and manually click each one, and it sucks.
I wish there was a way around that, but from what I can tell there isn't and then once you've got all of this typed in and ready to go, go ahead and click go back and click enter. It says Wi-Fi enabled we'll click, ok and let's just go back in there to make sure that it actually connected the way it was supposed to cool. So we're connected. We've got an IP address. Everything there is good.
So now we can go back uh. We can go into system settings uh. Then we can go to install beta Sarah again. This will take just a second to boot up target. It's fine um.
So now we've got some options here for whatever we want to install, as this is a 64-bit uh operating system and processor, so I'm going to select x86 underscore 64 and validation. This is just so you don't accidentally do this for some reason. This is also very common like when you're uh rooting, a phone or jail breaking or whatever it's called these days. A lot of times they'll make you click down several spots before you can click, ok, just as a fail, save so go and click. Yes, I'm sure go ahead and click install, and it's going to say working.
It's doing its thing. It's going to download some stuff, and this is why it needed to connect the internet uh. This will take a little while and then once it's done, uh the process. I should be good to go and uh we'll just go ahead and continue from there. Now there you can kind of see it now.
It says: download, downloading 12 um, so we'll just go ahead and let this sit here for a while and then, like I said once it's done downloading and installing we'll move forward cool. So now it's finished the actual download uh, and now it's going to go through the process like it says here, um reading the disk SDA, I think they mean writing the disk, but can't win them all uh, but it's definitely something that I actually just noticed for the first time there. So while it's doing this again, it'll take probably a few minutes to write all the data and then at that point um. At that point, we should be able to reboot straight into our new portable retro gaming system cool. So now it's finished that also doesn't look right, but whatever it says it's done, so we can go and click ok, and then we should be able to click back and then quit, and then we're going to click on restart the system.
Yep we're going to really restart I'm going to take this out. We don't need this anymore, so it's going to go ahead and reboot, and hopefully it should boot back up, and we should get back to our desktop. You know what just to expedite this. I'm gonna, I'm gonna just force a reboot on it cool. So that's good again.
Um I've got this out uh, it's not plugged in we're booting natively straight into the system here, and then we're going to do we're going to do something a little different to maybe make this a little easier on the eyes and whatnot, and I'll show you how to set it up so that you can actually port this out the HDMI in this case into my capture card, but you could also port this out to say, like a TV or an external monitor, or something like that. So, let's do that, and then we'll pop this up on the screen and make it a little prettier for you guys to watch some stuff moving forward, so obviously HDMI cable um. So the next thing that we want to do here, uh is press uh, space bar, again we're going to go into system settings. Maybe I honestly don't remember on this particular part: uh UIL video output. Here we go um, so it's under UI settings, video output, um because I don't have a HDMI cable actually plugged in on the other end, it's not sending and receiving a signal um, so we're not actually seeing video output but uh.
Once I plug it into my capture card, we should see that um, and then we'll come back in just a second there and, like I said once I got it plugged in on both ends. Now we can actually set HDMI, so I'll go ahead and um just go ahead and go back, and it's going to need to reboot. I don't know if you can actually see that maybe a little there and then once it do we'll go ahead and pull it up on uh on our screen. Okay, so here we are back on our desktop um. I'm actually going to record this for the second time now, um uh, really the only thing that we're going to have to kind of skip over a little.
I'm still going to explain it is that, in order to get ROMs on here like you can see that Nintendo's got one PC engine has two dooms got two Super Nintendo's got one, and these are all you know things like Donkey Kong classic uh. These are things that are free to distribute, so it came with it just kind of to demonstrate but uh. Of course, we want to be able to put our own ROMs on there and in order to do that, uh we're going to have to make sure that we're connected to a network and um by default. We're not, so I'm just going to go ahead and back out, I'm going to press space bar again, and then we can go into network settings. Um chances are, you won't be connected at this point, but you'll just go through that same process as before.
Uh to you know, to enter or to turn Wi-Fi on, enter your SSID and your key, and then it should connect and once you're connected you want to. You want to make note of uh that IP address that's up there, that 1.32 yours is going to be different, that IP address for you will be different, but what you'll want to do is just make note of that, because the next thing we need to do is actually go over to our local desktop and in um like on our uh like in our file explorer here. What we're going to do is we're going to do two backslashes and then the 192.168.1. In my case, 32 again, you rip address probably will be different, but that's what mine is, so I'm just going to do. Backslash that IP address and I'm going to hit enter.
Then I'm going to go ahead and open up the share, folder and there's going to be a bunch of other stuff in here like music and ROMs and all kinds of stuff. What we want to focus on primarily here, though, is the roms' folder, and what you're going to see here is there's a bunch of folders already in here. It looks like there's 65 already, and you can see that they're named to reflect the system that they're for like game boy, advanced game, boy color, you know mega drive, Nintendo entertainment, center, uh, PS2 virtual boy, it's all in there, and you can see on my side that I've got some ROMs uh on my local system that I'm going to go ahead and copy over that they're named the same already, so I'm just going to drag these over, it may have a fit because I already started this process once and then realized. I wasn't recording this, so yay go me um, but while it's thinking well it's while it's copying all this stuff over, it's going to take it a little. While again it's doing this over Wi-Fi.
If your Chromebook has an Ethernet cable, this would be a cool time to hook that up, if only for this part, but we'll go ahead and let this copy over, and then we're going to do a system reboot. You can do a manual like scrape and have it figure things out, but I like to do a reboot once everything is copied over, and then we'll jump back into the rest of this okay. So now we are back we're back on the desktop everything finished copying over. You can see these. These blue highlighted folders the ones that copied um.
So all of that's good to go at this point uh. So now. What we'll do is we'll switch back over to here. We're going to go ahead and back out of all of this and then again, like I said, I'm going to compress the space bar I'm going to scroll all the way down to quit. I'm going to do a system restart I'm going to say.
Yes, I really want to restart, and then we're going to go ahead and wait uh, just a second for it to reboot like it's doing it there. So that's cool um, almost ready here again, nothing in the Commodore 64 folders. But if I go over to like the Super Nintendo folder hey now, we've got a crap ton of games in there. So we'll go ahead and press enter, and now you can see you know you can just I'm just using arrow keys on my keyboard here um, and you can see that it's I mean it'll scroll through it pretty quickly. If there's a certain, you know alpha or numeric or alphanumeric thing you want to get to uh, you can do that.
Um next thing I'm going to do here- is actually plug in a controller so that we've got that cool. That's not what I wanted to do. So, let's back out of there no exit, I just press the escape button um, but let's go ahead. Oops, does this I'm going to go into controller settings um again, there's a lot of different options for controllers out there, and they've actually done a perfect job as far as making it uh so that you can control just about any kind of controller here um. You know whether it's pairing, a Bluetooth, controller or an USB controller like I'm using here, I'm going to say, go ahead, go ahead, and I'm actually pressing the b button on my controller here.
To do this, I'm just going to press and hold that, and now we can go through the process of up down left right now we don't have a joystick on on on this little controller, so I'm just going to press and hold in this case b, and I'm just going to keep doing that on anything. I don't have something to configure there and of course you know a b x y start select, and then I can do the two bumpers for that. So uh left and right- and I don't have any of this other stuff, so I'm just going to keep pressing and holding b to get through each one of these um and then hopefully sure. Why not I'm sure that's going to screw me up, but you know whatever, so then we'll go down here, and we'll click on back, and we'll click back, and then we'll go ahead and go into here and oh darn it I clicked the left or clicked right, clicked. Oh, there it goes.
Sometimes it does that that's I've actually had that happen on where it'll skip left and right. But it's still scrolling here. I've had that happen on like Raspberry Pi and that as well. So, let's, let's see um. Oh, here we go Super Mario kart um and there's no audio on here.
You can turn audio on um. If there's a there's a setting in here, oops, of course um. If you go into here, and you go into sound settings by default system volume set to zero- I don't know why, but it is, and you can change uh, your audio to just about whatever you want. I'm just going to leave it on auto, and I'm going to set it to zero. But you can, you can't turn this up and have volume, but for copyright reasons and whatnot, I'm not going to do that um.
So I'm going to jump back into this game, real, quick, just to show that it is working. I also dig like around the edges. You can kind of see like uh an illustration of what that console would have looked like um oops dang it yeah. I knew that was going to happen um anyway, because I uh hit b on that controller thing. Uh, it's its being stupid.
So let's go back into the configuring, a controller configure a controller oops unplug it plug it back in sometimes the controller things are a little wonky and that sucks, but let's see yeah so configure controller oops. Let's try it in here use the keyboard. Oh, because I used there because I was pressing b to skip everything. Um b ended up being like the hot key and that's stupid um. So I'm going to do up down left right.
I'm going to skip all of these again. A b x y start select left right, I'm going to skip these and then for the hotkey, I'm going to press select it's fine, and then we'll go down to back out of this. Let's try this again. It is one of the weird wonky thing. Sometimes things don't work the way they should uh, and you got to go through the configuration a couple of times.
I'm going to do a one player game here, I'm gonna to do sure: let's do 50. , that's fine! I'm going to go with my man toad. Always I've always played toad. Ever since I was like 13 or 14. Whenever this game came out, I've always played toad.
So I'm just going to go ahead and stick with that. Of course, this will be a little weird with no sound. So this is why I don't have a gaming channel. It's because I get wrapped up in my game and I forget to talk so oh, I almost did that. That's fine, but so anyway, this is me playing Mario Kart, which I hope Nintendo doesn't freak the hell out about but uh, but there you go okay, guys.
So there you go, that's that's the process of getting Batista set up on an intel based Chromebook a little wonky in a couple of spots as far as uh having to connect to the internet in order to install it and then, of course, then, once you get it installed having to reconnect to the internet so that you can get on the network to transfer your ROMs over, you could probably uh put them on a SD card or an USB stick or whatever put it in their copy mover, but that's not how we did it. We did it over the network um, and it's always probably a good idea to have that connected just in case. You want to move files around so like I said that is installing battery on a Chromebook um. Hopefully you found the video helpful or informative uh. If you did a thumbs up would mean a ton to me helps me and the channel out a bunch uh if you want to help support the channel, there are some links down in the description as well as if you want to buy me a cup of coffee.
I've got a coffee link down there. I've got a Patreon. Furthermore, I've got some merch uh. This isn't one of my merch shirts, but I like it anyway. Uh also don't forget to follow me on Twitter, I'm pretty active on there.
Sometimes so yeah going to go ahead and wrap it up here. As always. Thanks for your time, I always appreciate your support, and I'll talk to you in the next video.
Source : DB Tech
Phones In This Article
Related Articles

Comments are disabled
Latest Articles


