Sony Xperia 1 Teardown Disassembly Repair Guide By PBKreviews
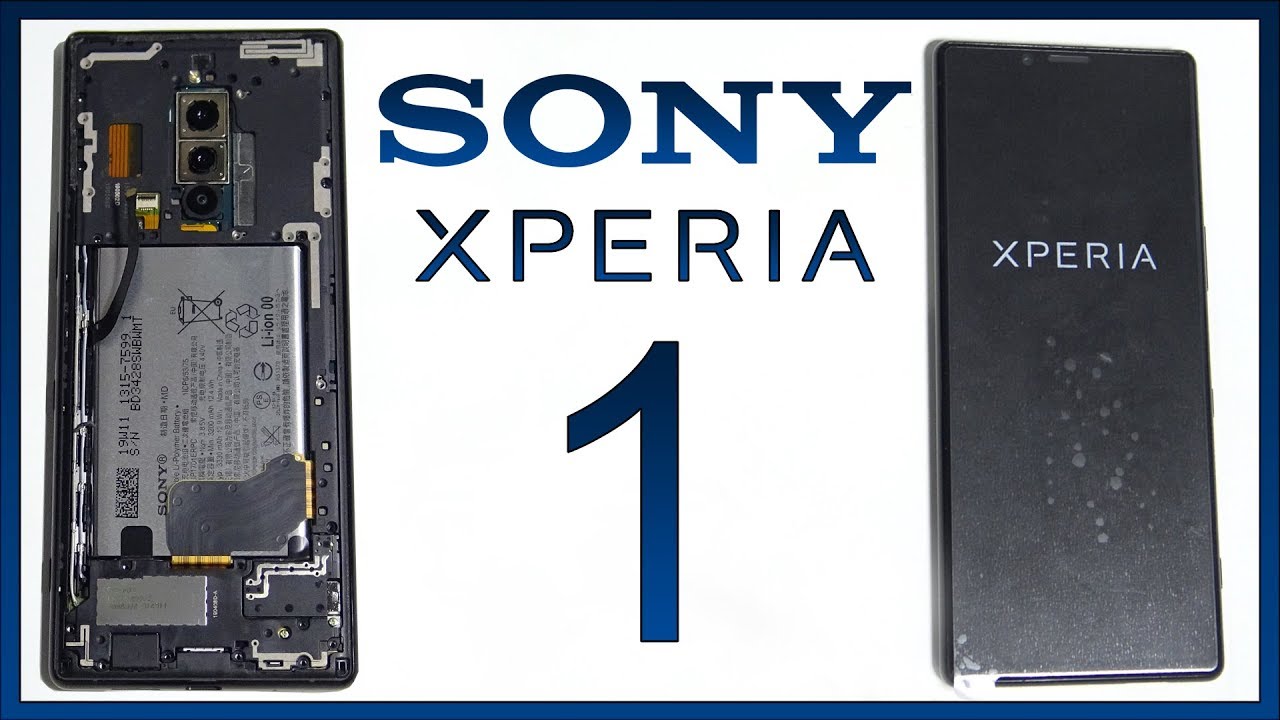
All right, let's take apart the Sony, Xperia one first we're going to remove the SIM tray, and then we're going to use a plastic pry tool to work our way around the backplate and pry the back off. Okay, let's lift this tape, and then we're going to lift the lock. Now, let's pull up the table now, let's go ahead and remove the 21 Phillips screws or let's remove the top cover. Does this connect the battery cable? Now, let's remove the bottom cover. So here's a speaker assembly, let's disconnect the charger cable, the cable for the screen, the cable over here you have to wire cables over here pop those off your front facing camera, cable and, lastly, your vibrator motor cable down here. Okay, now we're going to remove the main board Arthur, here's the front of the board- and this is the front of the board with the shield's removed and here's the back of the board.
You go to thermal pads over here and here's a look at what the shields removed. There's two Phillips screws holding on the bracket: that's covering the camera cables once you remove that bracket, you'll have access to it, disconnecting the camera cables. So if you're planning on replacing your screen at this point, you'll be able to do so. You just have to heat up the front and pry the screen off the frame, and you're screwed cables right here, so you just pass it through the mid-frame, and then you take your new screen cable and pass it through the mid-frame where this cable is right here, and then you reapply the new screen on and just reverse the process. Now, as far as removing the battery goes, I really like what Sony has done with this.
Now, if you haven't removed your main board yet, and you're just planning on removing the battery and replacing that you have to pry tabs on the bottom over here, these pull tabs right here, you'd go ahead and pull that off basically to remove the battery, but this has happened to me many times and I know: it's happened to a lot of you out there we're halfway through when you're pulling the tab. It just rips or breaks, then you get stuck and have to resort to reusing some kind of plastic tool or something to stick underneath the battery and pry it off like that. But here's where Sony comes in, and you have two tabs over here- they lie underneath the main board. Let's just say: if these two over here rip and break while you're pulling it off, you can go ahead and use these tabs over here to pull those the battery tabs off now another good thing about the pull tabs I've included in this phone. They have one underneath the vibrator motor over here.
So this Blackpool tab right here so basically the first year to remove the two Philips screws holding the vibrator motor down, and then you pull off that pull tab or from underneath the vibrator motor to really study sit and then you to be able to remove the vibrator motor. Now, let's take off the two wire cables on the charger port board: let's remove the two Phillips screws in the bottom right corner. Now we can go ahead and pry off the charger port. As far as remove that cable for the volume buttons and the fingerprint reader you're going to have to remove the battery first and there are some screws on the side holding the bracket in which holds the cables in place. Okay, now it's time to reassemble the phone now, once you have everything put back together, go ahead and apply some new adhesive and then place your back panel back over and then go ahead and power on the phone, and you're done.
Thanks for watching guys, I'll see you guys in the next video you.
Source : PBKreviews
Phones In This Article

Related Articles


Comments are disabled
Latest Articles


