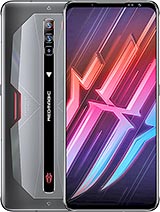
Nubia Redmagic 6 Gaming Phone Disassembly Teardown Repair Video Review By PBKreviews
You're watching the Nubia red magic, 6, disassembly, if you need any tools, there are links in the description we're going to start off by removing the sim tray. Now we need to use a hair, dryer or a heat gun to apply heat to the backplate, so we can loosen up the adhesive underneath, and then we're going to use a plastic pry tool to pry the backplate off now we're going to turn the backplate over since the flex. Cable is still attached for the LED lights and considering the fact. This is the first time I'm opening this phone. There seems to be a lot of fingerprints over here on this copper film. So I'm not sure if there weren't gloves out the factory when they're assembling the phone or not, but it's pretty awkward.
We need to peel off this film over here covering the connector. Now we're going to lift the lock, and then we're going to pull out the cable. Here's a better look at a glass backplate, so this flex, cable over here is for the LED lights which are here and here- and you have this flex cable over here, which is for the LED flash right there. You also have your aluminum heat sink over here, and you have some thermal paste on top over here and here which basically transfers the heat from the components onto the heat sink and the fan blows. The heat out there's also this rubber layer over here, which seems to be providing support for the backplate, so it doesn't crack in the middle when you press on it or there's any pressure applied against it.
At this point there are 25 Phillips screws which need to be removed. Now, once the screws are removed, we can go ahead and remove the plastic covers. I guess that one wanted to come out on its own on the top plastic cover. You have some antenna lines around. The edges there's also some foam padding over here.
Next, let's go ahead and peel off this copper tape over here as well. The graphite film, underneath it now once we've got this peeled back, there's another Phillips screw underneath which needs to be removed. Now we're gonna, lift this metal cover, and then we're going to disconnect the battery cables after we disconnect the battery cables, we're going to go ahead and disconnect the rest of the cables. Let's remove the bottom cover. You also have some antenna lines on the bottom cover.
At this point, we can peel off the copper film, so it's a mix of graphite, film and copper. This cable over here goes for your power button over here and the antenna assembly over here. You also have this one over here, which goes very keys on the side over here, as well as this antenna assembly. There are three wire cables. We need to disconnect now we're going to disconnect the headphone jack.
Now, I'm going to peel off this tape over here covering the connector for the front facing camera, and then we can go ahead and disconnect the front-facing camera. We have one more flex, cable over here to disconnect there's a Phillips screw over here in the center of the board, which is holding the main board down, which needs to be removed. Now we can go ahead and lift and remove the main board on the back of the main board. There are two wire cables, one here and one here which need to be disconnected once those are disconnected there's one more flex cable over here, which connects the main board to the sub board, which needs to be disconnected so taking a closer look at your main board. You have your three cameras over here and the connectors are right here.
You can disconnect them by just popping them off. Furthermore, you also have your secondary microphone over here on top, and you have copper tape over these shields. Once we peel back the copper tapes and remove the shield over here, we can see there's thermal paste on top of some chips, as well as the thermal pad which goes over here. So taking a look at the back, we have more copper tape on top of the shields on the side. Once we pull back the copper tape on the back, we can see more thermal paste on top of the processor and ram and some over here all right.
Let's go ahead and disconnect this flex cable over here now we're going to disconnect this cable down here now I want to disconnect the wire cable over here now, there's one Phillips screw over here holding on this board, which needs to be removed once that screw is removed, you can lift and remove this board. Taking a closer look at this board, there's a liquid damage indicator right here. Your primary microphone is located right here. Your sim reader is located on the other side. Now it can lift and remove your charger port.
Here's a better look at that now, it's time to remove the speaker assembly and here's a better look at your speaker assembly. There's a mesh filter over here over the opening. Now, as far as the battery goes, there are no pull tabs to help you pry the battery off, so you are going to need to use isopropyl alcohol and get some around the edges of the battery. So they sleep in underneath the battery to either way out the adhesive, so it'll make it easier to pry the battery off you're generally going to want to wait about 30 seconds to a minute for the adhesive to start loosening up here you have a better look at the battery, and it doesn't seem to be two different batteries together. There seems to be one single battery, but does have two connectors for it now, once the battery is removed, we can see your fingerprint sensor located over here and here's a connector for it.
You have your linear, vibrator motor located over here. You have your antennas on the side over here and your screen cables over here rattle through this opening or slid in the mid-frame. So if you have to replace your screen, you would need to remove your battery. So you have access to the screen cable over here, and then you would have to heat up the front of the phone where the screen is, so you can loosen up the adhesive underneath, and then you pry, the screen off get your new screen, apply new adhesive and reapply. Your new screen making sure you run your cable back through the slit or opening in the mid-frame, so moving on, you have your fan over here.
You have thermal paste over here on top of the copper vapor chamber underneath it. You also have some copper tape over here and here, where two of the cameras sit in your headphone jack is right here. Your earpiece speaker is over here. This cable over here is for your proximity sensor, and the flex cable over here is for your fan. The flex cable over here is for the button over here which enables the gaming mode on the phone, and you have the flex cable over here and one over here, which are for the touch capacitive keys for your gaming.
Now, as far as repairability goes on this phone, I'd probably have to give it a 3 out of 10. , it's quite difficult, taking this phone apart and there are a lot of pieces as well as different size screws, not to mention the battery doesn't come with pull tabs to help you pry the battery off all right. Now I'm going to go ahead and put the phone back together once you have all your screws back in place and everything connected apply, new adhesive and reapply your backplate flip over your phone power it on, and you're done. I hope you guys enjoyed the video and if you guys want to see more videos like this make sure you like subscribe and click on the notification bell, so you'll be notified the next time. I upload a video thanks again for watching guys, and I'll see you guys in the next video.
Source : PBKreviews


