Matte Screen Protector for Samsung Z Fold 2 5G Review By Matt Gray
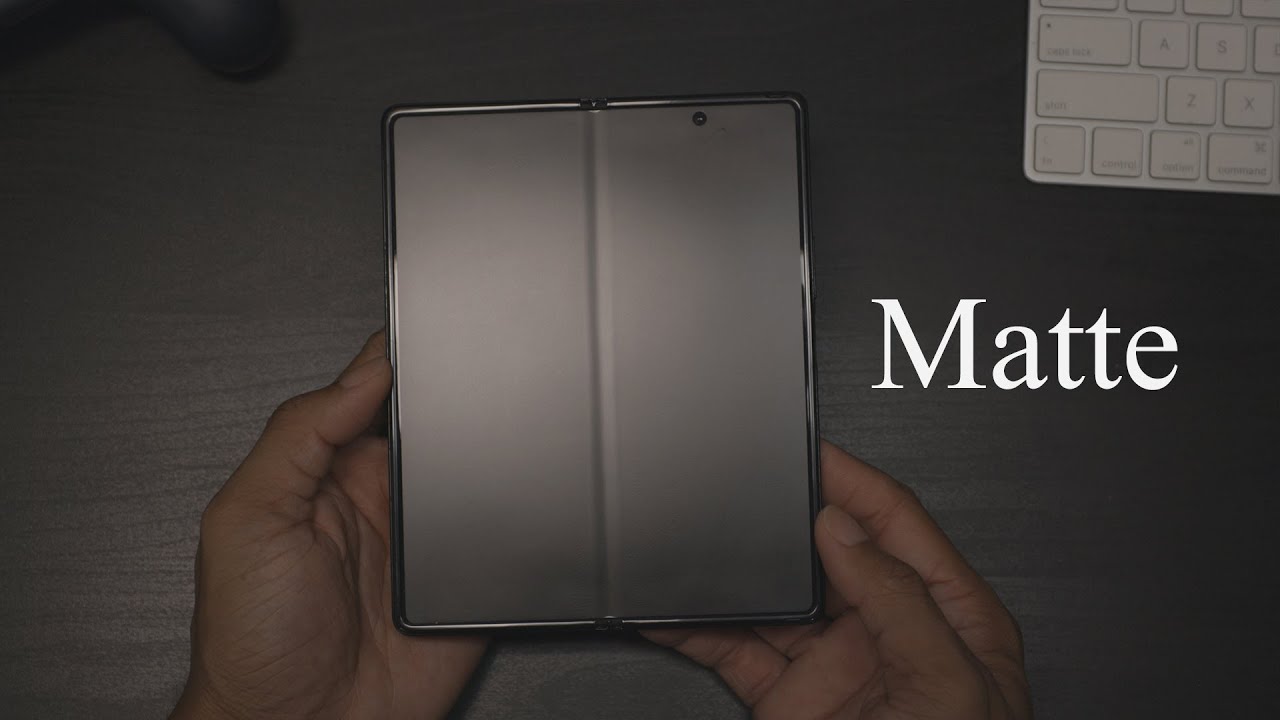
What's up internet Matt Santana here- and I am back with a video for this screen protector that I picked up for my z, full two 5g. I saw this on gadget goddess's YouTube channel as well as uh as a review on Amazon, so shout out to her for buying this screen protector and putting it on her 2 000 devices. Um, not all heroes were capes, so I appreciate it, so I saw her video and I decided to go ahead and pick it up. The problem with my current screen protector was that it was starting to lift in the middle. You can kind of see some of the air bubbles that are showing in my previous screen protector and I needed something to protect my screen, because what was happening is Samsung. Wanted me to send my phone into them.
The break, fixity stores or the Samsung stores are currently not near me, or they don't have the screen protector part. So my only option was to send it in or find an alternative screen protector. So I'm just going to install it, for you guys, give you guys my first impressions and give you guys some information on. If you should do this or not, I don't know I'm switching to a matte screen protector, so I'm kind of weary about the clarity and the picture quality, but we'll see when I get it installed so to remove the screen protector. They say you're supposed to like to take your nail or something like that and kind of start grabbing by the camera cut out.
What I did was just get like a plastic tool just so I could gently remove it and that worked very, very well. It came up right away, and I did that because I didn't want to scratch with my nail and actually scratch the screen um but yeah as you can see. As I pull the screen protector off, this screen protector got absolutely disgusting and even worse. Under the screen protector. Was this like nasty moisture film thing it was really gross, I'm not sure how that happened.
I don't know if, at some point in time some moisture got under the old screen protector, and then it started lifting it up. But if you see right down the hinge, it was just really, really gross, so I'm going to have to clean this up with some alcohol pads and some wet naps, or something like that to make sure I get all this oil and dirt off of the screen. Good thing is that the screen protector comes with a wet cloth so that you can kind of wipe the screen down before you apply the first layer- and this is a three-step screen install very similar to the tag screen that I did a video on for the secondary display, the outside display um and, if you're interested on a screen protector. For that, I will link that above you can check it out right here, but yeah. So I'm just going to clean it down a little.
Um, I'm not really supposed to wipe back and forth if you're really supposed to wipe in one direction, and that's so you don't grab dirt and kind of dig it into the screen. So do not do it like I'm doing it, you definitely want to do it in one clean motion across the screen, especially wiping in a straight line versus wiping in circles. So after you get it cleaned up, you're going to make sure that there's nothing. You know no debris, no fingerprints, no film, no haze because you're about to put a screen protector over it. So you don't want that to be the case, and once you get that nice and cleaned up, you can start the first step, which is to take the screen protector, and you're, going to remove the film and lay it over the screen and the best way to do that is to align it with the camera cut out again.
I personally think that this is a really, really smart way to install screen protectors, because what this first layer does is. It actually removes all the dirt and maybe even some grime or stuff that may have been left over from me cleaning it. So you essentially just lay it over there. You squeeze it out as best you can, it doesn't have to be perfect, and then you lift it up, and then you kind of fold back the first step, and then you squeegee that part on so that part is really, really slick, really smooth installation. I was worried at first because, as I was doing it, I could kind of see some air bubbles.
I was extremely worried, um, but you'll see later that, there's that's nothing to worry about. So after you do the top part, you kind of make sure it's good make sure you squeeze you down very well um, and then you can sort of move on to the neck side, which is done. The exact same way, lift it up fold it back a little so that the adhesive cover can kind of fall off, and you just squeegee it right on there. Now I was probably supposed to do it from the hinge out. As you can see, I had a lot of air bubbles in the actual hinge part um.
So I would advise to kind of do it. You know like a butterfly pattern. You know squeegee from the hinge on out, since the hinge is kind of soft you can kind of get down in there, and then you can just squeegee it out towards the edge of the phone. That would be my advice on getting it right, the first time so after you kind of squeegee and work through the know different air bubbles, which came out fairly easy you're, going to see that there's still some left over. It's not perfect, but it's enough to kind of give you the idea that there's not going to be.
You know too bad of a residual effect of the air bubbles, and you'll see it even more apparent after you pull out the outer screen protector. If you can see here, the air bubbles are quite prominent, but there's no dirt under there's just air, which is good news, because over the course of the next 24 to 48 hours um, I was able to slowly work them out manually. You know with my fingernail or even using like a credit card or something like that, but the end result honestly was absolutely perfect. Uh. This screen protector does have a different type of texture than the outer screen protector because it is matte, but it does not show as many fingerprints.
The outer screen protector shows a lot of oils and fingerprints, but the main display now is just absolutely perfect. I mean just look at this install it turned out great there's no air bubbles, there's no lifting there's, no anything. It is completely covering the screen. I don't have any worries about when I fold it. If you see, there's no lift at all.
It's completely adhered to the hinge part perfect man, I'm super happy with it. Now I've been using this phone as my primary device for a while now, and I will tell you right now that I cannot wait to give you this the review. I think it's going to be something that uh I'm going to really enjoy putting together for you guys. So if you guys have any questions, any comments, let me know down below. If you liked the video please hit that like button, it does help the channel get discovered if you are interested in more videos like this definitely subscribe.
More videos are to come, including my review and other than that I'll see you guys in the next video stay up.
Source : Matt Gray
Phones In This Article

Related Articles

Comments are disabled
Latest Articles


