Lg V35 ThinQ Battery Replacement Steps or Battery Issues. Bad Battery Defective By T&E Repair
Hey there everybody we're going to be showing you today uh how to replace the battery for the lg v35, also known as the v35 thing uh. As you can see here, this is gonna, be the phone that we're going to be replacing the battery on. So it's a really simple process. You know something you can do yourself or, if you're, not confident uh. In doing it yourself, we have three locations uh across the valley that you can come to, and you can get a replacement same day. So we are going to go ahead and start off by heating the back a little just so that it can come off a little.
Go ahead, get something thin, a little thin pry tool uh. It works a little better if you have a little of alcohol on the end of it just so that it already softens up the loose adhesive. That's on the back, so just go ahead. All around the edges, uh be sure not to put it in all the way. Just a little helps, and you're just going to do that all the way around the edge of the phone until you start feeling that the back cover gets loose all right, it may take a little of time for you to take it off just because the adhesive is fairly sticky.
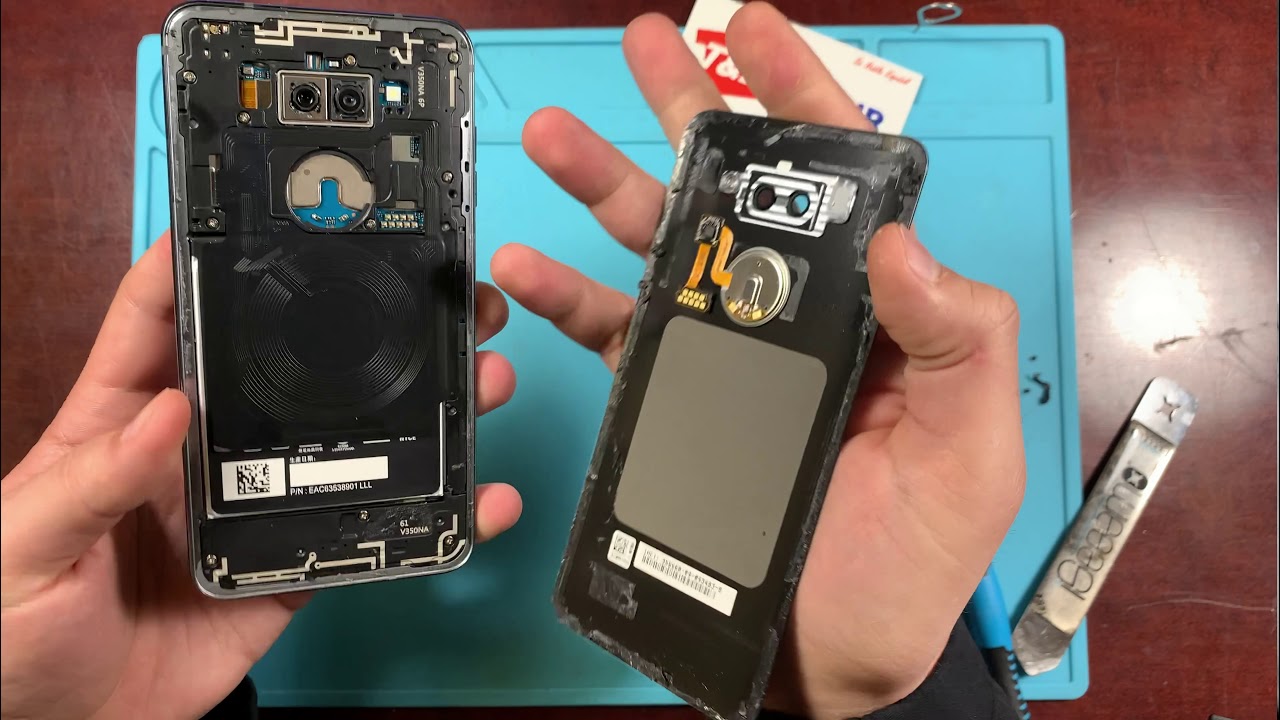
But as long as you have a little of patience, you should be able to get it off fairly easy. So as soon as you feel that it is loose, you're, just going to want to go ahead and lift it up carefully. Uh not too quickly just to make sure that there are no cables underneath and there we go so old, or the back cover is off now at this point, just go ahead: peel off any of the excess adhesive. That's around the edges just to clean it up beforehand, make sure that it's nice and clean all right and now, as you can see here, we're going to go ahead and start off by taking all these screws off uh most of these screws are the same size. Sometimes you do have to be cautious of where you position screws at one screw in the wrong hole, might cause a lot of damage, so just go ahead and start unscrewing the back cover of this off just so, we can go ahead and make our way to the battery.
Now. Remember, like I said you know, this is something that you yourself can do, but if you're not feeling confident about it, you can go ahead. Like I said we have three stores across the valley that you can bring it to it's, a same-day repair uh, and it's fairly simple to do just bring it in you don't need to make any appointment. We accept walk-ins as well, so feel free come on in. If you know, have a battery, it could be for a phone tablet, but yeah bring them in.
We go ahead and replace them for you all right and just be sure that all the screws are taken off. We're going to go ahead and pry off this back cover carefully uh. There is going to be a little of adhesive on some of these parts, so just be careful not to lift it up too quick and that just pops off right there. So here we finally see our battery uh. This is glued down, so be careful with it.
Just go ahead start off by disconnecting it once it is disconnected, then we go ahead and start taking off the old battery, so just go ahead by starting off heat. It up a little all right and this popped off a little easy just because we already had preheated it uh. It does come off a little easier with a little of alcohol. Also, so just go ahead once you pry it off, is careful when prying it off. You go ahead, pry that off be sure that you clean it underneath just make sure there's no old adhesive on there blocking anything uh causing anything to you know, get trapped underneath there, and you can go ahead after that.
Get your new battery pre-install it just go ahead, connect everything back the way! It was been sure that it's sitting in you know very nice and snug where it's supposed to go, go ahead and reconnect it and reposition. It also just a reminder: if you do live out of uh out of state or if you're, not in the phoenix or Arizona area, I will be leaving a link down below in the description uh where you could go ahead, and you could send us your device through the mail. The link does have a form that you can fill out. That way, you can go ahead if, like I said you're not in the area, you can go ahead and fill out that form. So that way, you could send it through us to us directly through the mail, and we can go ahead and get it repaired for you as well.
All right and here we're just going to be following all the steps in reverse and once you already have your new battery installed, uh and connected just go ahead. Put that back cover back on and just put all these screws back uh in the corresponding holes that you took them out of all right. Once the new battery has been installed, all the screws have been put back into place just be sure to clean the rest of the frame up nice and good. That way, there's no large clumps of the old adhesive on there, and you could go ahead. You could put new adhesive, even if you do have some old adhesive on the back, that's still intact.
You can use it, but in this case we're going to go ahead and just clean the rest of it up. This also does help that when we do put on the new adhesive, everything sticks down nice and evenly, and that way it's a nice flush finish that it's going to have on the back. Okay. So once that we've already gone ahead and removed, all of that we're going to go ahead. We're just going to apply some double-sided adhesive all around the edge uh.
So just be sure that if you do add the adhesive it's cut to fit, you can go ahead and cut it out to any size that you need and that way it makes it a lot easier. Like I said this new adhesive is just going to help out so that way it sticks a little more better. If any of the old adhesive were on there, it's not going to stick 100 like it's supposed to uh, and if the old adhesive is clumped up, it's not going to sit 100 flush, be sure to peel off uh this side. It has a thin paper layer on the other side. Just so it doesn't stick, but just go ahead, peel that off before putting on the back cover just so it sticks all right and once you have, that done just be sure that everything is lined up properly.
There's nothing obstructing the lid just go ahead and put that back in order, the way that it was, and you're all set. New battery has been installed, and it's a simple fix so yeah once again, just to reiterate everything uh, it is a same-day repair. It's something that you yourself can do, but if you're not feeling confident uh, you know feel free. Like I said we have three stores around the valley feel free to come into any of the three stores to get it replaced or check out the link down below. In the description like I said it will have a form that you can sign out just so you can, you know, send us the any device.
It is that you need fixed if you're, not in the phoenix or Arizona area. So yeah, if you have any questions, feel free to leave them down in the comments below. Thank you so much.
Source : T&E Repair
Phones In This Article

Related Articles


Comments are disabled
Latest Articles


