iPhone Xs Max Teardown - Is there any Thermal Cooling? By JerryRigEverything
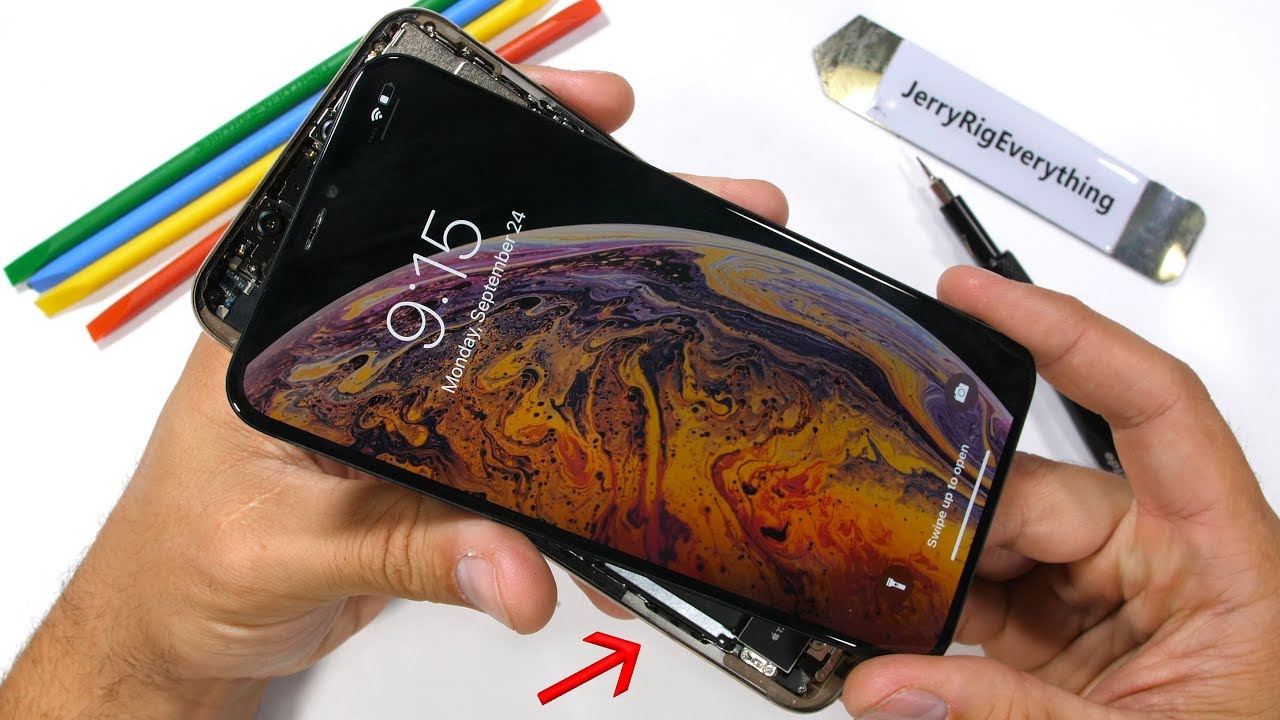
Apple has been trying pretty hard to keep people out of their phones. Steve Jobs himself said he didn't want people fiddling around inside the iPhone, which is why they've all been sealed shut and hard to repair from day one. But that's never stopped us before. It's time to open up the brand new iPhone Xs Max and see what new obstacles Apple has placed in our way. This video has been sponsored by Audible. Let's get started.
Grab some popcorn – this video might be a long one. Turning the phone off is done with a volume button and power button combo press. Kind of exciting. Then we encounter the proprietary pentalobe screw Apple implemented back with the iPhone 4's. The inexpensive toolkit I'll link in the description includes all the bits you'll need for this phone repair.
Apple uses 4 different styles of screws this time around, and they are all different sizes. I'm keeping everything super organized so hopefully it'll all go back together in one piece and turn on when I'm done. Opening up the phone is easy enough. A large suction cup helps. Apple has upgraded their water resistance to ip68 this year – finally matching the rating Samsung's had for the past 2 years.
You can see the stringy black waterproofing adhesive holding the screen to the metal phone body. It's kind of all over the place. Remember, there are a lot of things that can be damaged inside an iPhone, so I'm taking special care to insert only the tip of my tool inside. The screen is latched up at the top and needs to be pulled down ever so slightly before folding open like a book. The ribbon cables along the right side are the main thing to avoid while opening.
Any stress or nicks on those cables would ruin the display, and we just don't want that. To remove the screen, Apple added an obsticale with 7 uncommon, flimsy, tripoint Y000 screws. Luckily, my toolkit comes with all these hard to find bits already included. I'll set the different sized screws right next to the bracket they came from – that way things stay organized. Before I unplug that crazy dual cell L-shaped battery though, Dustin, one of my buddies, tweeted that 'if you feel like the dumbest person in the room, then you're in the correct room.
' This was one of the reasons I chose to read “Astrophysics for People in a Hurry” by Neil DeGrasse Tyson this week. Huge thanks to Audible for sponsoring this video. If you want an incredibly detailed intellectual description of the universe, and how all the elements exploded into existence, like the lithium inside this iPhone battery, “Astrophysics for People in a Hurry” is a worthwhile listen. You can get your free copy with a 30 day trial of Audible using the code: “jerryrig”. I'll link it in the description, or just go to audible.
com/jerryrig. Texting the word “jerryrig” to 500-500 works too. J-E-R-R-Y-R-I-G. Even if you cancel your audible subscription, you still get to keep all your books. Astrophysics might sound complicated, but it is an incredibly interesting summary about our place in the cosmos.
And like I said earlier, if you feel like the dumbest person in the room, you're in the right room. Don't forget. Let's unplug that battery and get the screen off. One Lego-style connector for the battery, and each of the 3 ribbons attached to the screen has their own Lego-style connectors as well. Then the whole screen can pull away from the phone body.
Super simple. Apple screens are much easier to replace than they used to be. With only 3 more screws holding onto the front earpiece, there are no home buttons or fragile fingerprint scanner cables that we have to worry about now. Everything just kind of folds out at the top of the screen like some funky origami. I'll link replacement parts in the video description as they become available.
I'll get everything pressed back into place, and even though I did need special screwdriver bits, a screen replacement is a pretty simple process. Things only start getting super complicated in the iPhone Xs Max when I dig deeper into the phone. I'll set the screen off to the side. It's time to remove the battery. Apple was nice enough to include the magic pull tabs holding in each half of the battery.
One massive pull tab up top. And 3other magic pull tabs under the bottom segment. Once all of the pull tabs are removed, there's nothing else holding the battery in place, so make sure it doesn't get away from you. Batteries can be super dangerous if punctured. The combined power of both cells in this battery is 3100 milliamp hours – about 22% smaller than the Samsung Note 9, but who's keeping track.
There's nothing else super easy to replace inside of this phone, which is mostly fine since the screen and battery are usually the first things that go out or break on a smartphone. We'll talk about the back glass replacement in a second. First, let's pull out the rear camera units. With 2 Phillips head screws holding down the large rectangle metal plate, I'll set that off to the side and unclip both camera units. Each of these 12 megapixel cameras are placed in the same metal housing for that fluid transition from a normal perspective, to the 2x optical zoom lens.
Both camera units have optical image stabilization – that physical OIS. The iPhone cameras are actually pretty phenomenal. I'm always impressed by their image quality. Before I say too many nice things though, let me plug the cameras back into the phone and show you how hard a simple charging port replacement is. The charging port nowadays in an iPhone is taking double duty as a headphone jack and a place to charge the phone.
So it's getting quite a bit of traffic. This means that it might eventually stop working. In order to replace the charging port, everything else needs to come out of the phone – which is a super poor design. A design which could very easily be remedied by moving the charging port connector from the middle of the motherboard to the bottom... like Samsung and every other manufacturer does.
Why tangle everything up if it doesn't need to be? I pulled 5 tripoint screws out of the metal strip along the bottom and set that off to the side next to each other. There's another tiny screw over the small metal bracket protecting a Lego style ribbon connector. And then using a flathead screwdriver, I was able to take out yet another style of screw called a standoff, where one screw screws into another screw... inception screw. There's another screw within a screw on the right hand side of the loudspeaker.
And a regular Phillips head down at the bottom. And then the whole loudspeaker can pull away from the phone body with an exceptional amount of adhesive holding the mouth to the frame. I definitely won't trust my phone to be water resistant after this, but it's still cool to see from the inside. The taptic vibration motor has 2 screws on the left, and it will pull out. I still haven't taken one of these apart yet.
If there's any interest in me making a vibrator teardown review video, let me know down in the comments. The motherboard removal isn't as complicated as it looks. It only has 4 screws holding it in place, and a whole highway of Lego-style ribbon connectors lining the center. I'm still keeping my screws organized because there is no way this phone is going back together if the screws get all jumbled up. Each one is different.
All of the motherboard connections need to be unclipped with my plastic pry tool. And the stupidly placed massive one, dead center on the motherboard, is the charging port ribbon. I'll remove the SIM card tray, making sure the tiny little extraction pin is recessed back into the phone frame so it doesn't block the motherboard. Then I'll unclip the last 2 tiny ribbon cables up at the top of the motherboard. Then the whole thing can come free from the phone.
This tiny little guy is the brains and brawn of the entire iPhone Xs Max. It's a double stacked sandwich PCB with no heat dissipation. But don't worry, the only time you'll ever get throttled is when the next iPhone comes out and Apple needs you to upgrade. True story. We're almost to the charging port.
I bet you forgot what we were even trying to do since we had to remove literally everything else to get here. One screw holds an obstructing ribbon to the side wall, and then we have 3 more standoff screws, one on either side of the lightning charging port, and one next to the plastic microphone support. I'll peel the microphones off the bottom sidewall and you might think we're done, but nope, two more screws hold the port itself into the frame. Once those are removed, now the whole charging port contraption can pull away from the phone. Apple's little proprietary money making port has a little adhesive around the tip but no rubber rings.
But with how tight the screws are against that plastic adhesive and metal phone frame, there's definitely no water getting inside. That was an extraordinary amount of work for such a simple port. The reason Apple charges $599 to replace the back glass is because the back glass is impossible to replace. Apple themselves swap out the whole frame and housing instead of just the back glass. And you're right, that seems incredibly inefficient and an incredible amount of work, but that's how they built it.
It doesn't bug Apple at all though. It's just their way of coercing you into buying a new phone instead of fixing the old one. Say goodbye to your wallet for me. I'll snuggle the motherboard back into place underneath all those ribbon connectors. It's time to see if we can get this thing turned on again.
I feel like it's important to use and fix your phone for as long as possible, especially now that the new phones released every year only have very minor upgrades over previous years. Upgrading your phone every year is just dumb and a waste of money. I've got all the ribbon cables plugged back into the motherboard, along with it's 4 screws holding the board itself into the phone. Then I'll mosey on down past the large circular charging pad in the center of the phone, to the taptic engine vibrator at the bottom. The SIM card tray pops into place, and the loudspeaker with it's standoff screws.
The silver brackets get screwed down in over all the bottom components with those same tripoint screws we kept organized earlier. And the rectangular rear metal camera bracket gets screwed in over the top of the cameras. Finally we get the battery back into place. It's important to use new adhesive. It's starting to look like a real phone again.
The screen's 3 ribbon cables get plugged into the motherboard connector highway, and I'll plug in the battery to test the phone and make sure everything is working before setting the screen into place. I am pretty surprised it all still works. Apple has not made this process easy. Lastly, the metal brackets with the 7 tripoint screws holding everything tight. And finally the screen tucks into the top of the frame first before snapping into place all along the sides.
Can't say I'm a fan of this phone, but I am glad the screen and battery replacements are relatively easy. Would you ever attempt this project yourself? Don't forget to grab your free copy of “Astrophysics for People in a Hurry” from the link in the description. You'll enjoy it. I sure did. Hit that subscribe button.
And thanks a ton for watching. I'll see you around.
Source : JerryRigEverything
Phones In This Article

Related Articles


Comments are disabled
Latest Articles


