iPhone SE (2020) - First 15 Things To Do! By Brandon Butch
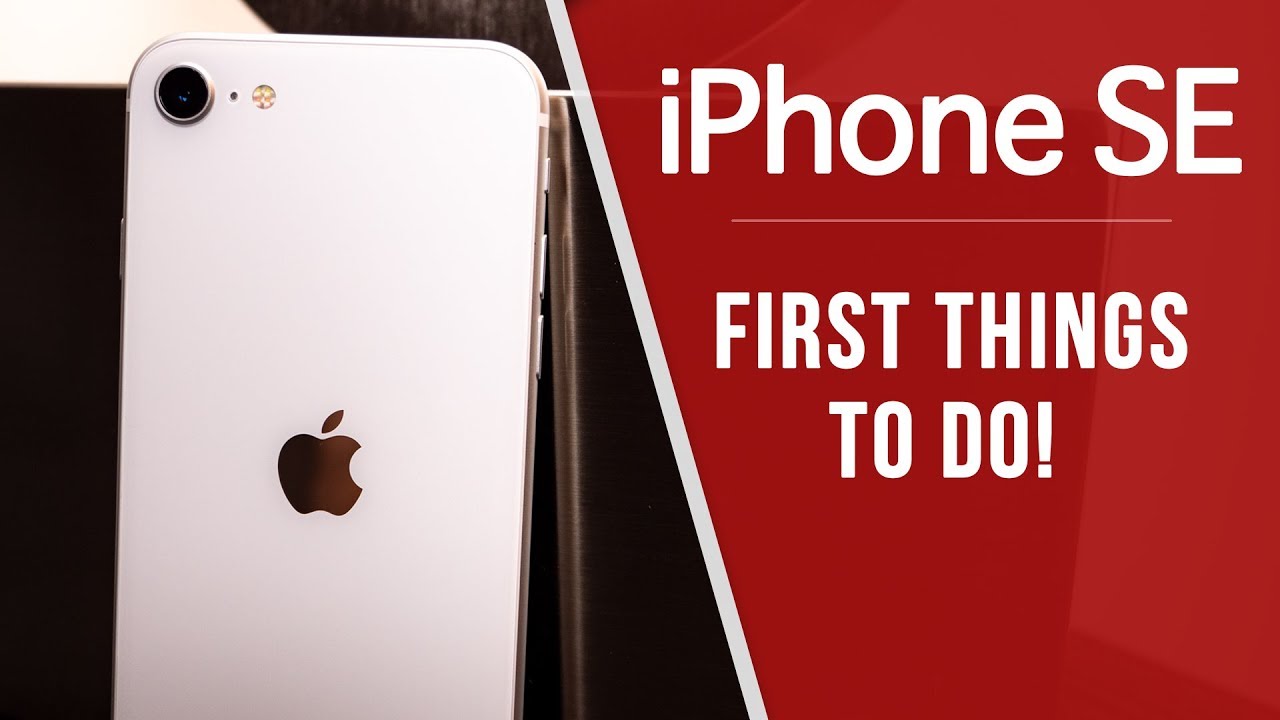
What's up guys, my name is Brandon and by now you've, probably already unboxed your brand-new 20/20 iPhone SE, and you've probably already gone through the initial setup process. By watching my setup, video, but now you may be going through the settings, you may be googling some things and kind of just wondering what you should do next or what you forgot to do and that's exactly why I wanted to make this video to show you the first 15 things you should do on your 20/20 iPhone SE, including settings to change, features to take advantage of, and just some good old-fashioned tips and tricks that you may find interesting and just real quick before we get started. I do want to mention that I am giving away two brand new 20/20 iPhone SES to two lucky viewers. So if you want to win just make sure you guys are subscribed and also click the link down in the description below for all further details, all right, so let's go ahead and get straight into the tips and tricks for the new 20/20 iPhone SE. Alright, so first things first is the home button. So this is probably the biggest change you could say in 2020 and a time when we're living in edge to edge displays with no buttons at all.
A lot of people are gonna, be going from a phone with no button to a phone with a button, and then other people are going to be going from a phone with a mechanical home button to the iPhone SE, which does not have a mechanical home button. It's actually a software based button that uses the tactic engine, and you could actually adjust the click. So if you push down on it, when you push down, that's not actually pushing like a mechanical home button. So that's good, because it's not actually ever going to break since you're, not actually pushing on a physical button. It's all software based! Then.
Actually, if you go into your settings here, go to general, and then you will see a home button right here go into home button, and this is where you can actually change the feel of the haptic home button. So it says you could choose how the home button feels when you press that select an option below and press the home button to try it out. So one you'll feel it's a very light: click ?, it's a little heavier and then 3 is a very heavy click. It's kind of hard to explain how it actually feels you'll have to test this out. I say that one or two is probably the best most people use one or two with two, obviously being the most popular, but I would definitely go ahead in here and kind of just you know that the home button is not a mechanical home button.
It's a software based haptic button and that's just something to know and something to get used to, especially if you were not used to that before. Next up is taking advantage of dark mode and configuring all of your display settings. So obviously we have a black bezel on every iPhone SE now, including the white one, so dark modes going to look even better. So if we go to our settings here and then go to display and brightness, you will see right here right away. We have an option for appearance, and you can see we have a light mode and a dark mode.
If you tap on it, you can see basically how it looks, but you also have automatic right here which basically changes from light mode to dark mode based on when the Sun sets and your current area. So you could actually set that to sunrise to sunset or sunset to sunrise, or you can have it set on a custom schedule. So if you want it to appear light your settings and all your applications and even your home screen to appear light, you can have a set time for that and then also a set time for when it turns dark. So obviously, everything looks better in dark mode. I just have to use light mode for this video because it looks better on camera, but dark mode looks awesome on the iPhone SE, with this black bezel on the front.
So just take advantage of that and know that it is there now going down a little further. You have your brightness, and then you have true tone. So true tone is something on the iPhone SE that you may want to take advantage of. So you can see there. It says automatically adapt the iPhone display, based on ambient lighting conditions, to make colors appear consistent in different environments.
So, if I go ahead and enable this, you will see that the screen turns a little warmer, but of course it's going to depend on your area, so you can see it does turn a little warmer I, don't like that. I personally turn true tone off, but a lot of people do like that. That's how you get that kind of yellow tint on the screen that you may be seeing on other people's phones or maybe on my phone. You should also go ahead and change the auto lock here now. This is when your phone basically times out from the screen, and it gets them first, and then it locks and goes back to the lock screen.
I personally had this on. Never I would probably recommend like three to five minutes that way. If you're, like reading an article in Safari, your phone doesn't just lock, you know and dim and lock itself I mean it is good to preserve battery. But me personally, I always remember to lock my device when I'm not using it, so I like to keep mine um, never but just go in here and configure that to your liking and then right below that you have a raise to wait. So what this does are, basically, it wakes up your phone when you raise it.
So if it's laying on a desk, let me just show you real quick. So basically, if it's laying down like this, and then you go ahead and pick it up, you will see that it pops up so basically have to pull it forward to lock your face, and then it will unlock your phone. But sometimes you may not want to do that. So I keep that disabled just to preserve battery life as good as possible, but that could be a cool feature if you always want to wake your phone when you raise it and when you look at it, you also have your display zoom down here and I. Don't normally talk about this, but since this is a smaller device, some people may have a hard time reading, so you could actually click on zoom, and it makes everything appear bigger your text.
You know your icons, everything appears bigger, so definitely check that out. You do also have bold text right here and text size if you wanted to increase the text size like in your settings right here again, because this is a smaller device that could be very important for some people, I like to have mine right in the middle though, and then, if we go back to our settings and go to accessibility right here and then display and text size. This is where you also have the options for the text, but all the way down at the bottom. You will have auto brightness now, I personally, do not use auto brightness. Just because I like having consistent screens, especially when I'm recording here on YouTube but auto brightness, could save battery life for those of you.
If you don't always go in and out, you know of different places with different lighting. So it's not constantly changing, but it changes from you know a few times a day that could be beneficial for you, so I would look into auto brightness right there. If you are interested in saving some battery- and you have a lot of other display settings in here- that you can take advantage of as well. So the next thing you guys should do is go ahead and setup touch ID. If you did not do so initially and configure it in settings and also maybe consider adding a finger if you maybe have a loved one that you want to let into your phone or if you just want to be able to use different fingers to get into your phone.
So to do this go into settings, go to touch ID and passcode and then enter in your passcode right here, and you will see these options right here. I recommend having all of these and able to specially password autofill. That way, you can just automatically fill in your passcode in Safari with just a fingerprint, so it makes it a lot easier. So anyways you have fingerprints right here. This is where you can add a fingerprint.
So if we go ahead to add a fingerprint so say, I want to unlock my phone with. Maybe my index finger I could do that, so I'm just go ahead and set it down right there and that way, I'll be able to get into my phone with both my thumb and my index finger, so my thumb got dirty or if I burned it or something like that, I won't be completely locked out phone I'll be able to use a different finger. Of course, we have a passcode as well, but this is just theoretical. So there we go continue, and you can see now we have two different fingers and there you can also rename them right here. If you want to so again, if you have somebody else that you want into your phone, you can go ahead and name the different ones right.
There and you can also delete it from that same menu and then, if you scroll down a little further, you have the required passcode. So you could change that if you want to. You also have allowed access when locked. So you can turn off these options right here. If you don't want these to be accessed when your phone is locked, but of course the big thing is adding a finger to your touch, ID right there and making sure that password autofill and all these are selected as well.
The next thing you guys should do is: go ahead and watch my battery saving tips video to take full advantage of the battery life on your iPhone SE. You want to make sure you're getting the best battery life possible, and you know treating your battery right. This is a brand-new battery. You want to make sure you're treating it right so that lasts as long as possible and that you will probably never need a replacement battery. But if you watch that video and follow all the tips, you will be giving your iPhone SE battery a good start, but basically I'll.
Just run through a few things that I mentioned that video, but of course you do want to watch it because it is pretty long, but one thing you want to do is go into your settings right here and then go to the battery section and then go to battery health, and you want to make sure that optimize the battery charging is enabled. So you can see right here. It gives you a little explanation up, and it says to reduce battery aging. iPhone learns from your daily charging routine, so it can wait to finish charging past 80% until you need to use it. So basically, what this does are trickle charge your phone from 80 to 100%, while you're sleeping based on like your alarms, and when you pick up your phone every day.
It uses a lot of machines learning to understand when you actually wake up and start using your phone, and it takes that into consideration and uses that for optimized battery charging so great feature that will help your battery. Of course, you do have your maximum capacity here as well. This is a good place to know where that is so. You know how your battery is holding up and, of course, on the main battery page right here you do have your charts, where you can look and see where all your battery life is going. You can get very specific by the hours right there, and you can also go down here and see what was using your battery.
Of course, this is a new phone, so it's not going to show me much data, but this is where you can go. Also, if you go into your settings and then go to meantime, this is also another section where you can see where your battery life is going, and you know how much time is being spent on your phone and in certain applications. So if you go to see all activity, you can see right here, that's just for this week, and it shows everything that's been used, the daily average and things like that, so just a really great place to go to get more information on how you use your phone and where your battery life is going. You should also go to your settings and go to privacy, location services and then go all the way down to system services and go ahead and disable all of these right here. So I would disable all the products of improvement things right here and then significant locations is another thing you may want to disable.
If you don't want your phone tracking everywhere, you go and that could lead to a little of battery drain there as well, and then I do also like to turn off location based, Apple ads and then also location-based suggestions, sometimes as well. I will turn off so just go in here and turn off certain things that you don't want to be tracked via your location. That could also lead to improved battery life. So the next thing you guys should do is test out the awesome new camera on the iPhone SE. So you can see there.
It does look very similar to the iPhone 8 camera. That's because it pretty much is really. The only difference is that a 13 Bionic chip inside the iPhone SE, it's going to make the image processing and just the images and the video look a lot better than they did on the iPhone, 8, and you'll see down here. We do have portrait mode as well, and you can see it gives you a little of a tutorial there. We have portrait mode, and you have portrait lighting here.
So if you wanted to change the lighting, you could do it just like so and then also after you take a picture, you can actually adjust the both. So if you go to, let me just take a portrait photo real, quick. My hair is an absolute mess, but you can see here you can adjust the intensity of the actual portrait effect and if you click on the little F up here, you can change how much the background blur takes place. You can see the background. Blur is a lot if you go to F 1.4. If you go all the way to F 16, you can see, there's pretty much no blur, so you can adjust those in the camera application, which is pretty cool, and you can see you have that arrow up top.
You can either click on that or just kind of swipe up right here, because you get all these options right here. So you could change like the timer. The aspect ratio live photo things like that by the way that up in the top right is for live photos. So basically it gives you like a two-second gift. If you push down on the actual photo itself now, if we go down and then go over to video, you can see up top.
We do have shooting in 4k right now, so you can shoot and up to 4k six, the extra it's not 4k, but there it is, so you could actually just tap on this to change from 1080p to 4k just like, so you can also click on the frame rate right there. So it's at thirty right now. If we tap on it, it goes to sixty tap again. It goes to twenty-four then to thirty, and it could change it right there without needing to go into settings which is very, very convenient and that's exactly how it is on the iPhone 11s as well. So it's nice to see that make its way to the iPhone SE.
Of course, if you wanted to configure more settings, just go into settings right here and then scroll down to camera, and you will see you have all these: they could change right there. The next thing you guys want to do is set up something that you hope to never use, but you're going to be thankful that you have it set up now, so that is emergency SOS. So if you go into your settings and then go to emergency SOS, this will give you a brief little tutorial of what it does and how to activate it. So, basically, this is a very quick way to contact emergency services without having to dial a number or text. Anybody or anything.
All you ever do is press the home button five times fast. So what you want to do is go ahead and enable this feature right here, call with side button and then, if you press the home button or the power button rather five times fast, this is what you'll hear, so I'll stop, calling it -. They can see there and will start calling emergency services, which is very, very cool and great. If you are in a bad situation. Of course, you can mute that sound as well.
If you don't want it to be super loud like that, and you can see that setting is down there at the bottom, so I would probably turn that off. Just because you never know if somebody like broke in your house or something you don't want them hearing that you're calling emergency services or anything like that, so you can have that on or off right there. You should also go ahead and set up emergency contacts and help. This is also very, very important. Basically, once you create your medical ID, people are going to be able to access your information from the lock screen of your iPhone and emergency responders know that this is a feature, and they will check this on your phone.
If you're like passed out, you know if something bad happened, they will be able to see, or even if your phone just got lost, people will be able to see your information from the lock screen if you set up your medical ID. So again, those are things you hope never happen, but they are very important to have set up on your new iPhone SE. The next thing you guys should do is go ahead and setup Apple Pay so nowadays, I really never have to pull out my wallet anymore. I just used my phone or my Apple Watch to pay with pretty much everything because I use Apple Pay. So this is going to make payments of course, a lot simpler, and you may actually get this notification to finish, setting up your iPhone and most of the time that will be for Apple Pay.
So you can see mine is right there, but if you don't have that alert, all you need to do is go down, and you will see wallet and Apple Pay inside your settings. Go ahead and tap on that, and this is where you can add your card. So let's go ahead and click on add card, and this is where you may already have some cards in there. If not, you just go to add a different card or there will be a prompt there to show you to add your card, but I've already set up. Apple Pay on previous devices and I do also have the Apple Card, so mine, already populates in there, so I'm just going to go ahead and click on continue and by the way, if you don't have an Apple Card, yet I highly recommend signing up.
It is free to sign up, and you get approved very fast approved or denied very fast I actually made a whole video on the Apple Card. So we'll leave that linked down in the description, but it makes paying a lot easier and of course you do also have the cashback that you get, so you get like one to three percent cashback, which is great, so let's go ahead and continue, and then it gives you a little tutorial on using Apple Card and Apple Pay as well. Of course, you do use your fingerprint to go ahead and confirm payment, so you can do this at like the gas station or anywhere where you use Apple Pay, and you can also see in these settings right here. You do have your Express transit card. So if you are in a big city with transit, where you take like the train or the bus, or something like that, you may want to look into this.
You can also set your default card. Shipping address your email and your phone right here as well, and if you wanted to pay really quickly like at a gas pump or something like that and your phone is locked, I have to do, is double press on the home button at the lock screen, and it will activate it. You can see there, it says, hold near reader, so there is also a setting for this and make sure that is enabled you can see right here. It is right here: double click, home button, so definitely go ahead and setup Apple Pay super convenient, and you will not be pulling your wallet out near as much once you set this up. The next thing you guys want to do is set up your control center.
So if you go ahead and swipe up from the bottom, this is your control center. This is how you can activate things like your Wi-Fi Bluetooth. You know your good change of brightness in here. Your portrait law you donot disturb things like that, but these toggles down here you can actually go ahead and change, and you can add to those. So if we go into our settings and then go back all the way up to control center right here and then go to customize controls, you can see here.
You can add controls into this. So if some of the ones I like are, of course dark mode, I would definitely recommend having in your control center I do also like having low-power mode right there, and then I do also like having screen recording. So I can screen your chord whenever I want to, and, of course you can move these around as well. If you prefer some over the others, you can move them around, and it does change in real time. As you can see right there, those have been added, I'm, gonna, add one more just so it looks a little more symmetrical.
So I'm, just gonna, add, let's just say, hearing right there, and you can see there, it adds it, and you have a much better looking control center. That may be more useful now. The next thing you guys want to do is install applications and customize your home screen. So I'm sure you guys already installed some applications. If not, you can just go ahead into the app store, and you know download whatever applications you want to your social media apps, you know, Apple Arcade is another thing.
You should look at the game section right here. You can pay for Apple Arcade, or actually it's the arcade section right here. Sorry and you can go ahead and play this for five dollars a month for full access to unlimited games and Apple Ark. It's actually a very good deal if you are into gaming, so I would consider that and when it comes to moving and customizing your home screen. This is something that you may be unfamiliar with.
If you came from an older device, so to move your icons, you can either tap and hold, and you can see right here. You do get edit home screen and that will put your icons in to wiggle mode, or you could tap and hold and then move once you feel that haptic feedback, and it will put them into wiggle mode without having to press an additional button. So you can also move multiple apps at a time. If you just take your thumb right here, and you're pulling one over here and then tap on the others, you can see you can move multiples at one time you can maybe put them into a folder or whatever you want to do, and if you wanted to make a folder. All you have to do is tap and hold on one of these icons and put it over top of another, and you can see it will make that right there.
Those are just some little minor tips that most of you guys are familiar with already, but if not, that is a little brief on how to customize your home screen now. The next thing you guys may want to do is create a custom ringtone. So if you go into your settings right here and then go to sounds and haptics, this is where you have your ringtone. Your text tone your voicemail all your tones right here now. One thing you can't do in iOS, for some reason is: have a ringtone set for a song that you have so a song in your library.
You cannot set that as your ringtone, but if you watched my video on how to do that, you can, so I will have any link in the description below that shows you how to create a ringtone out of any music. You have on your iPhone, but this is also a place. Furthermore, you can go to change it if you just want one of these default tones and also in that video, you can change your text tone as well. So if you want like a certain part of the song for the text tone, you could do that as well. So again that will be linked down in the description below.
So the next thing you guys may want to do is change your wallpaper to a custom wallpaper, because most people don't like having the same wallpaper as everybody else. Maybe you do maybe don't care, but most people don't so like. If you go into settings and go to wallpaper, choose new wallpaper, everybody has all these dynamic and all these still wallpapers right here. Most people just opt for those, but if you want to be a little different, you can get a custom wallpaper like I, have right here, and I have a ton of these. So there are some good applications you can download for this, one of them is called vellum.
That's one of my favorites I will have a list of wallpaper applications in the description below they can go for great wallpapers. You can also become a channel member for $5 a month and I do dumps of all of my wallpapers and full quality. A lot of people always ask for my wallpapers, sometimes I give them out for free. Some are reserved for channel members, because I do have exclusive access to all of my dumps and full quality. But if you guys want this, wallpaper I will leave this link down in the description below for free.
If you guys want this, and of course, I will have those applications where you can download those as well. The next thing you guys want to check out is Siri shortcut, so this is going to take way too long to explain. I've made multiple videos on this, but basically it's a way to automate a lot of different tasks, so you can have automations in here as well. So you can see right here this automation, for example. Basically, when it detects that I'm home it starts playing a specific song or a specific playlist on my home pod and in my living room and when I leave, it automatically stops playing.
So that's just a very small example of an automation. I also have automations for basically when I get in my car, it starts playing a specific playlist once I hook it up to car playing and there's just a ton of different things in here as well. There are ways to download Grahame photos, Instagram stories you can see right here. We have movie cuts, save story, just a lot of different things. So, like automatically scrolling on Safari, wait progress, we have social media downloader, which downloads all media from any social media site.
You can also download these if you go into the gallery right here, you can go ahead and download some pre-made ones, or I could just go ahead and set up your own by clicking the little plus right here, and it's very much similar to like scripting and coding. So you can add a lot of different things, and they're just explored it and, of course, I will leave links down in the description below as well. If you want to get more familiar with it, I did make quite a few videos on shortcuts. The next one is more of a tip and a reminder that you can fast charge the iPhone SE. So, yes, it does support 18 watt fast charging, but unfortunately it only comes with a 5 watt wall adapter in the box, so you will have to buy a fast charger, an 18 watt, fast charger, or if you have an iPad, you could just use that block to charge your iPhone SE, and it will charge up a lot faster than the traditional 5 watt.
But you should definitely take advantage of fast charging because it makes a massive difference, and also we have a glass back, which means that you can wirelessly charge as well. So if you were on the iPhone 7, or before you cannot be ever wireless charge, but now with the iPhone SE and that glass back you can be wireless charge whenever you want to. The next thing you guys should do is consider getting a screen protector and a case. So since we do have a glass back, it is a lot more prone to breaking and cracking, and it is also a lot more expensive than an iPhone 7 or anything that did not have a glass backing. So just keep that in mind.
It will be- probably you know, a little less than the price of the actual phone itself to repair that glass back, so you do want to protect it with some cases, and there are a lot of cases that I recommend totally has a really awesome. Slim case, a very you know, minimalistic case that doesn't add a lot of bulk or anything. It's not going to really protect it if it falls, so we'll have some links to some protective cases as well and the description below, but I, think the main thing is a screen protector. You also want to protect that screen with a glass screen protector, so we'll leave both screen protectors and cases linked down in the description below and the final thing you guys should do with your 20/20 iPhone SE is considered buying more iCloud storage, and/or AppleCare plus. So these are two total different things, but they are purchasing something extra, so I wanted to kind of tie them into one section here in this video, so go to your settings and go to general about you will see you have your limited warranty right there.
It shows when your warranty last two, and then you have Apple Care Plus coverage available. It'll show how many days remaining to purchase that if you click on it, click continue and will show you the prices right here for Apple, Care, Plus, so $79 or 149. If you want it with theft and loss. That is something to consider. If you didn't want to protect your investment and then also for iCloud storage, if you do get a 64 working goodbye device, you may run out of storage, eventually go right here to your profile.
Go to iCloud! You can see up top. It shows how much iCloud storage you are currently using if you wanted to actually pay for a little. More storage go to manage storage right here, and this is where it shows how much everything takes up in terms of space. But if you go to change storage plan, this is where you can upgrade your storage or my case. Downgrade and right here will show you all the prices for everything with iCloud.
You can see there. You can pay as little as $0.99 per month for 50 additional gigabytes or for 200 additional gigabytes. Furthermore, you could pay $3 a month. So just depends on how much data you are backing up and using in iCloud, but that's definitely something to consider if you are getting a 64 gigabyte device so yeah those are the first 15 things you guys should do when getting your brand-new 20/20 iPhone SE there's anything you think I forgot or something that you did additional, that I didn't cover in this video. Let me know down in the comment below, of course, let me know how you're enjoying your iPhone SE, what color did you get? What you no storage option that you get.
Let me know about your guys experience what they need.20 20, I phone SE down in that comment, section below so yeah there you have it guys. Those are the first 15 things you guys should do on your brand new 20/20 iPhone SE. So let me know how you're liking, your iPhone SE so far, and let me know what color you got and if any of these tips helped you out, or maybe you did something additional- that I didn't cover in this video. Let me know all your thoughts down there and those comments below, but anyways guys, thanks again for watching the video, and I'll see you soon. You.
Source : Brandon Butch
Phones In This Article
Related Articles


Comments are disabled
Latest Articles


