iPhone 7 Plus Battery Replacement By Save Apple Dollars
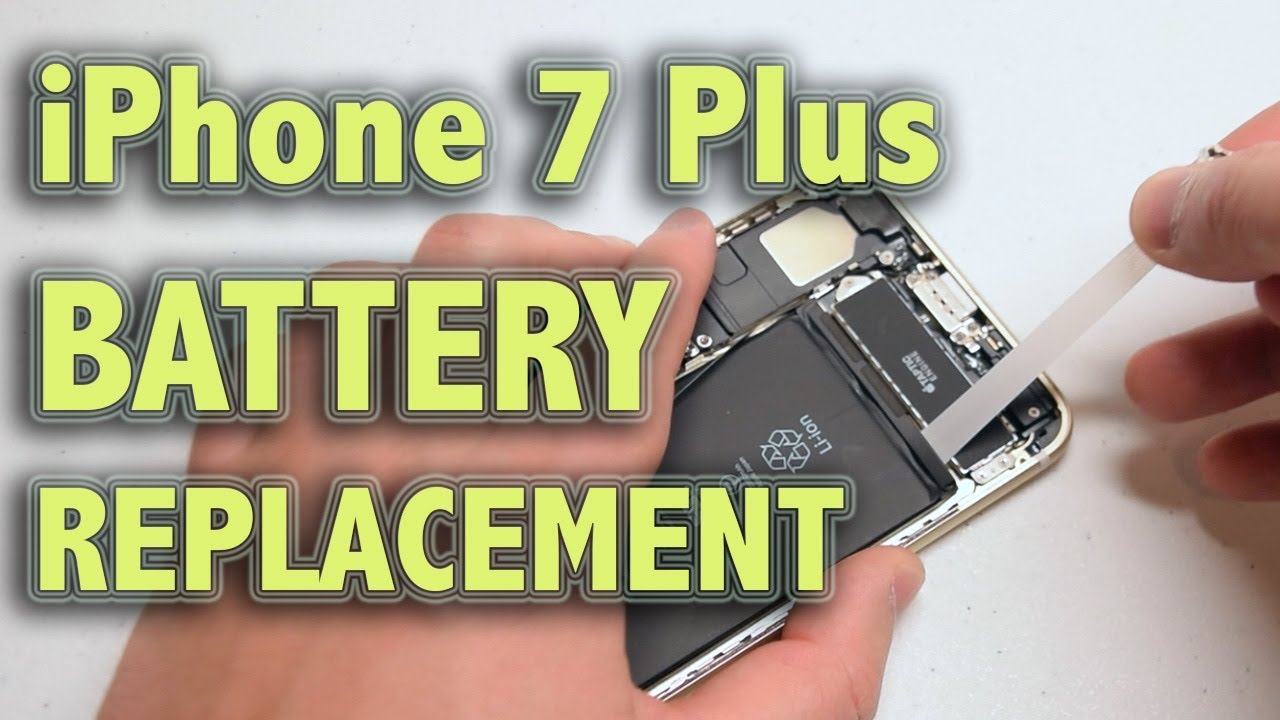
iPhone 7, plus battery replacement, guide warning lithium batteries are highly explosive. Please replace at your own risk. The tools were gonna need are a proprietary pantalone screwdriver at Philips head double or triple zero screwdriver either one will work. A proprietary, Y screwdriver, a suction cup for crying the screen apart. Also, a plastic triangular pick tool for separating the screen. This is an optional tool here.
This will help remove the adhesive around the contour of the screen and a plastic spider for prying connections. Apart then also tweezers for managing screws and difficult to get to components. If the phone is on go ahead and power it down near the charging port, there are two pantalone screws: securing the screen to the phone case, go ahead and remove the two pantalone screws go ahead and place the suction cup, as close as you can to the home button, make sure it's firmly secured and nice and tight now loop, either your index or your middle finger through the suction cup loop pinch. The sides of the phone with your other fingers make sure that you have leverage now pull as hard as you can on the suction cup. This will create a small crack for you to sneak the triangular pick through.
You go ahead and start prying it from left to right to pry the screen apart, the tension and resistance that you'll feel is going to be from the adhesive, the waterproof adhesive. You can go ahead and remove or cut away this adhesive with the metallic prying tool. Furthermore, you can use it in tandem with the plastic tool or just the plastic tool itself. In case you don't want to risk scratching. The phone run the tool along both sides of the phone pry, the screen up just a little, no more than an inch remember this phone folds out like a book and not straight up what you want to do is you want to pull it down and then flip it over like a book, and you're going to close it and then push it back in when we're done.
So that's how it opens up, go ahead and loosen up the top of the adhesive near the top of the phone. Now it just tilts it and push it out and then open it right up just like a book and that's it when the screen is connected in two places to the logic board, we'll need to remove the cover that guards the connection it's secured, with 4y tip screws, go ahead and remove the four white tip screws, as you see here now, go ahead and lift and remove the cover. This will expose the two connections once the digitizer and one to the LCD, with the plastic prying tool go ahead and get underneath the LCD connection now go ahead and get underneath the digitizer connection. This side is now loose, let's undo the top go ahead and remove the three wide tip screws that are guarding the shield and then remove the shield now, with the plastic prying tool get underneath and pop out the camera connection, this will completely loosen up the screen. We can now separate the screen from the phone go ahead and locate the battery connection and pry.
It up with the plastic prying tool disconnected and push it over to the side. Now flip the phone here you can see three little pull tabs. These pull tabs are elastic, double-sided pieces of tape that are underneath the battery and a vertical length of the battery. There are three of them: go ahead and start pulling the first one be very, very gentle, because these can rip and then prying out the battery becomes so much more difficult. If you go very slow, you can be just few inches at a time, pull the tab out.
So we're not gonna speed up the video here, we're just showing you the regular speed at which we're pulling out the tab. The first tab you're still pulling on that right here, oh yeah, or it makes a funny noise when it comes out and that's it that's the length of the tab right. There now go ahead and pull out the two other tabs now we'll speed it up right here. These tabs are relatively long fully stretched they're about two to three feet now: go ahead and remove the third final tab, and that said that should release the battery. You can now gently lift the battery up and out of the way if one of the tabs rip only use a plastic pry tool under the bottom left corner to pry out the bat reassembly.
Instead of using the pull tabs, use, double-sided m3 tape to replace the new battery, this will make it easier to remove again or service if you need to go ahead and tear out two pieces, the length of the phone and peel back the guarding tape now just place the battery right on top of the double-sided tape, make sure to align it near the connection port and go ahead and click it in. Let's reattach the screen to the phone go ahead and align it side-by-side now at the top go ahead and secure the camera connection first, by aligning it in the following orientation and then clicking it into its socket. You can use the plastic prying tool to assist you to make sure you get a good connection. Now go ahead and place the shield over the connection and secure it with the three white tip screws. Moving on to the bottom go ahead and secure the LCD and the digitizer a portion of the screen, the digitizer first, as the smaller ribbon cable go ahead and plug that into place.
Make sure it's nice and firm click then secure that LCD. Now you can put the cable cover over both of the connection scare it with the for white tip screws. If you got them mixed up the one all the way in the right is the longer one. We can clamp up the phone now go ahead and fold it up now, at the very top make sure you tuck that in first and the latches are in at the top, and then you can go ahead, clamp it shut going around the contour, making sure that it's sealed and clamped in once you went around the contour a few times, and you feel, like you, have a good seal. It's time to reinstall the two pantalone screws near the charging port.
You can go ahead and load the two screws into their sockets and then tighten them with the pantalone screwdriver. Now, let's go ahead and power on and test the phone looks good. Thank you for watching. If this video helped you please hit like and subscribe, and check out more awesome videos at apple. com.
Source : Save Apple Dollars
Phones In This Article

Related Articles


Comments are disabled
Latest Articles


