iPad 8 2020 10.2 Battery Replacement | iPad 7 10.2 By Geardo
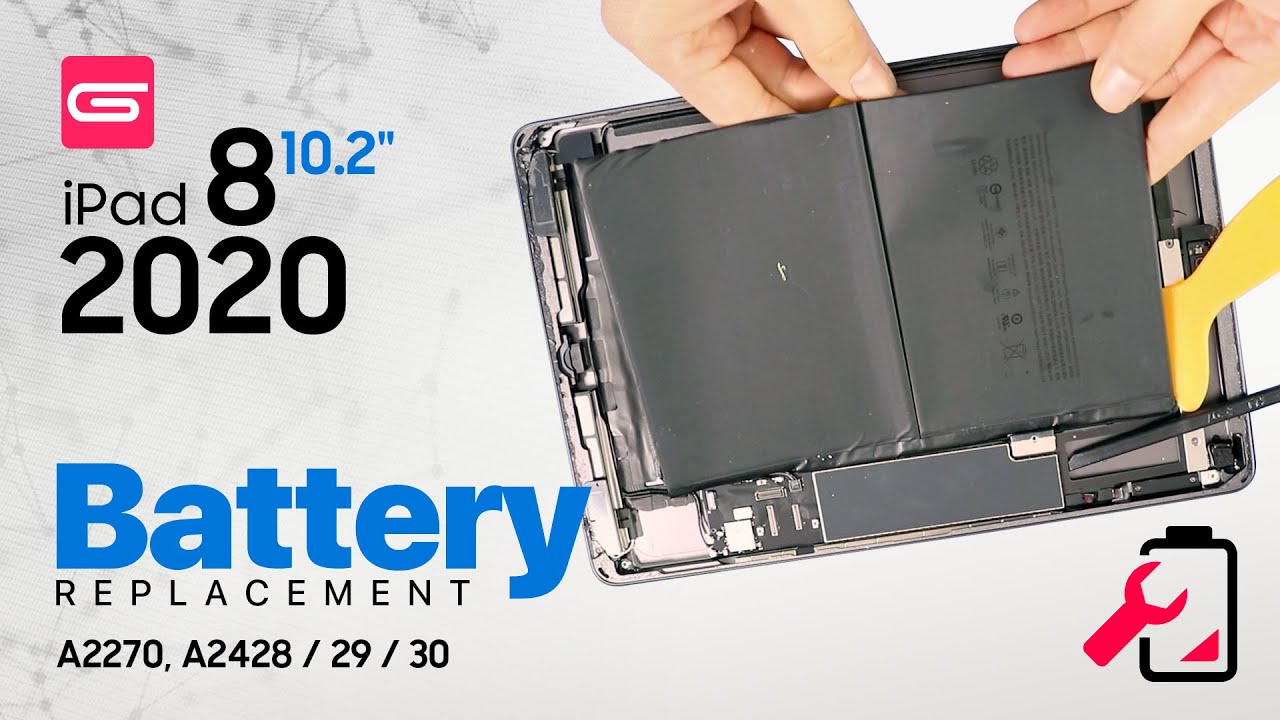
Hi everyone, welcome back to geardo. Today we will show you how to replace the battery on the iPad 8 Gen 2020 10.2 model, Before Starting, we need to have the right tools to proceed with the repair, which You can find in the description. Proper heating is required to separate the screen from the body for tablet repair. For this, we use a heating pad designed for tablets and mobile phones. On iPad 2020, make sure to heat the front side. Select the Tablet heating option and leave it till the heating completes.
Alternatively, you can use a heat gun or hairdryer. Once the heating has completed, use a suction cup on the sides to lift the front screen. In between, Insert a Plastic Card pry tool or triangle picker and cut the adhesive around. Be gentle while pulling; there are flex cables attached to the logic board. To lift the touch screen, take the direction like opening a book, but from the left-hand to the right-hand side.
Open and place it like an open book till removing the LCD Screen. Next, take off the LCD screen by undoing screws, There are sticky tapes are covering the screw heads; move aside and remove four screws. Next, lift the screen to 90 degrees by the top and disconnect the plug by undoing three screws and the shield. The shield is missing from this device, but your device should have it. Next, unplug both touch screen connectors by the socket, peel the tape, and raise the tab to take the touch ID connector plug.
Now the Touch Screen unit can leave from the body. Next, Undo the screw on top of the battery connector and then To take out the battery , it needs some more heating on the battery side. Again we are using the heating pad, but on the rear side, where the battery locates. Next, using a pry tool, Gently cut the adhesive and raise the board by the top. And then, Slide in a pry tool and keep it steady till it takes out the battery.
By doing this, we can create enough space to pull out the battery. Next, use a couple of pry tools to lift the battery, Gently raise the battery slowly while cutting the glue. The bottom of the sticky connector can be a little strong, be careful, and slowly cut the adhesive to pull the battery using a pry tool. There is no connector plug, and the Battery pins are touching the logic board pins. Next, place the new battery with adhesive and take out the supporting pry tool on the board.
Next, slightly push the logic board to sit securely in the body. Next, add the screw on top of the battery connector. Finally, start adding the front screens. First, connect both touch screen connectors and then the Touch ID flex. Next, plug the lcd connector and add the shield by inserting three screws.
Place the lcd on the body and ensure the screen sits orderly. Next, insert four screws on all four corners by the screen. Next, to clamp up the iPad 2020, first ensure it has enough glue on it. If not, you can use B7000 glue or Double-sided pre-cut adhesives. Take the closing book direction and place the digitizer on the body.
Place the bottom section first, follow the top, and click sides and the bottom simultaneously. Just make sure to put pressure on the frame sides and verify that the home button sits and clicks precisely. Here, we are using screen bonding clips to tighten the screen to the frame. If not, you can use rubber bands and leave them for some time. I hope you have enjoyed the battery Replacement guide Let us know if you have any questions; please like, share, and comment on our videos.
Do not forget to hit the subscribe button.
Source : Geardo
Phones In This Article


Related Articles


Comments are disabled
Latest Articles


