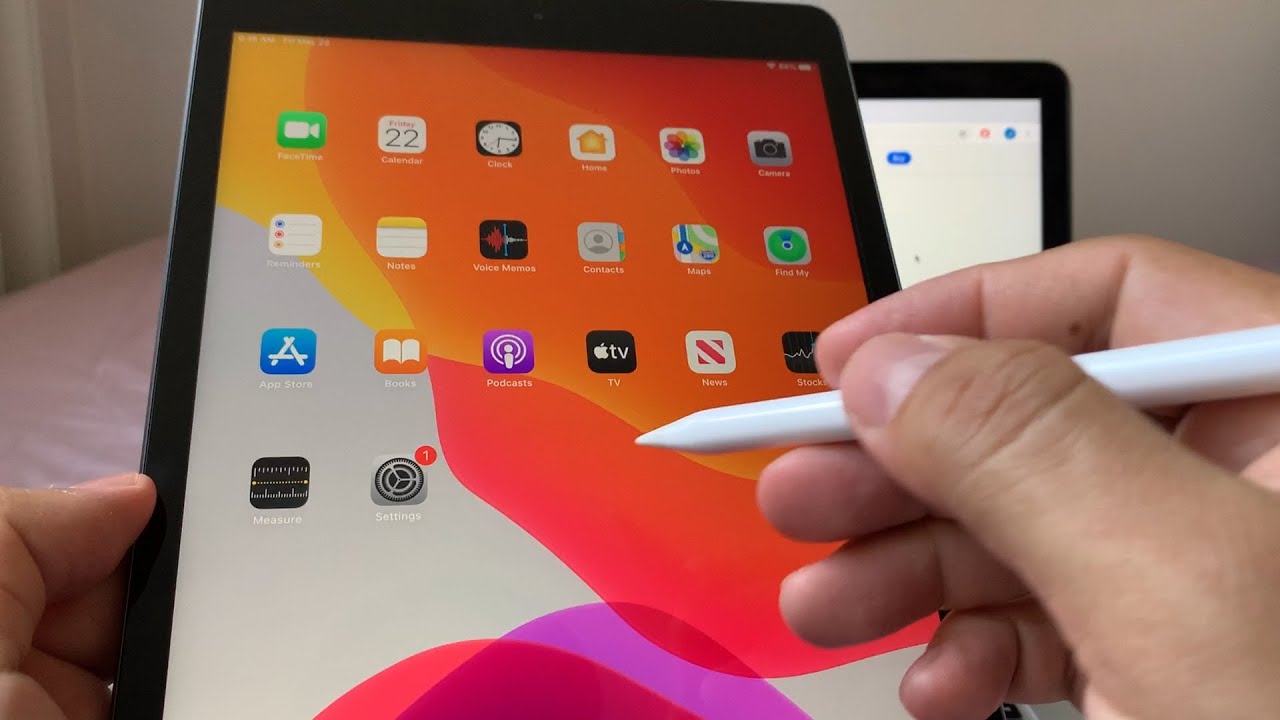
iPad 7th Gen Screen Replacement! (10.2 inch iPad) Tutorial By Affordable Tech
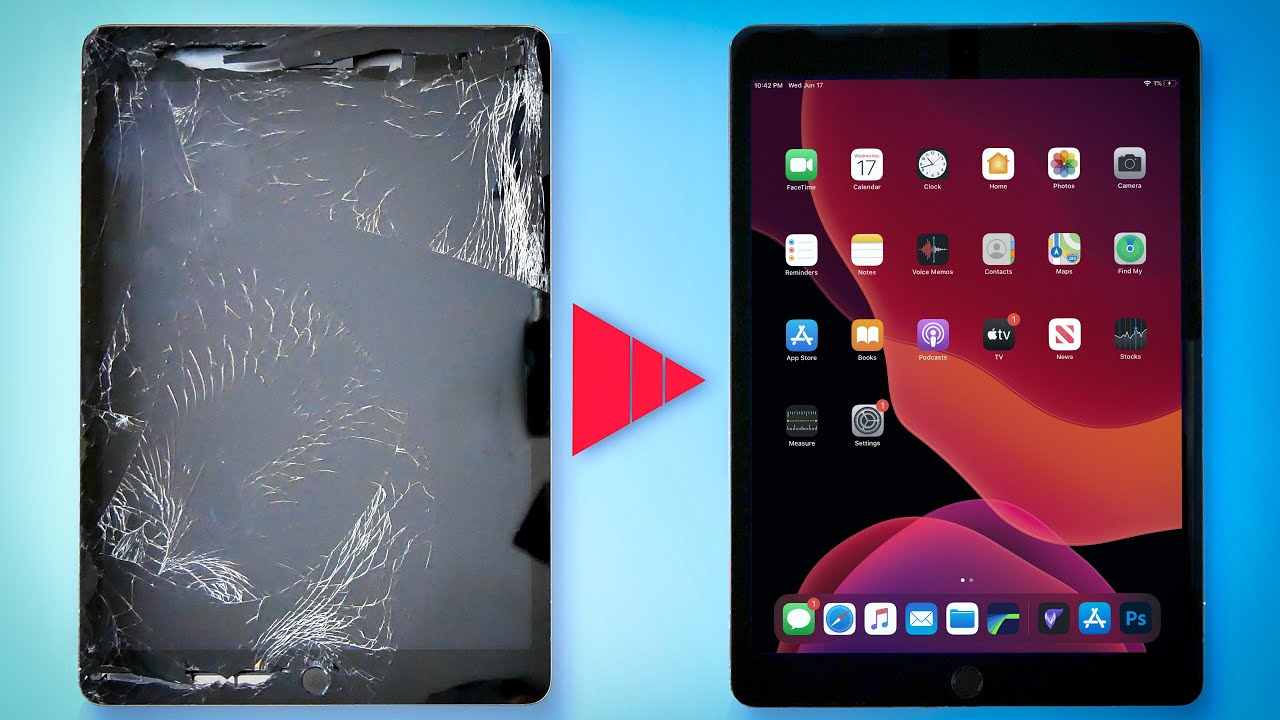
I've on the seventh gen iPad for quite some time now, but my younger brothers used it most. One of them ended up, cracking it and I know. A lot of you have experienced something similar. So in today's video I'll be showing you an alternative option to taking it to Apple or a third party to get the screen replaced coming up, so I bought the screen replacement on Amazon for $65.99. There actually doesn't seem to be very many sellers selling this and prices range pretty drastically. On top of that, there aren't many reviews on any of these, so just make sure when you're looking for one I'll leave the one that I got in the description.
If it's not available just do your research and try to find the best one you can so hopefully, this video provides an in-depth and easy-to-follow process to make sure that works well and saves you a lot of money. I say it's definitely worth the savings. If you can do it yourself, because Apple charges 249 for their repair, I'm sure you can find it a little cheaper at third parties, but with this screen only being $65 you'll save, maybe 200 bucks. In fact, there have been times that Apple has sold this iPad for cheaper than the screen replacement, cost, let's go and get into the replacement, alright, so getting into it. The first thing you're going to want to do is power.
This device down, as you can see, this screen is pretty cracked, so hopefully, at the end of this process, it'll be looking brand new and once the device is all the way powered down, the next step in the process would be to heat up the edges of the screen and that's going to help us remove the screen. That being said, you're supposed to be doing that with a heat, gun and I know that a lot of you are doing this on your own. Don't have a heat gun, so what we'll do is try to use a blow-dryer and then go from there and really quickly, so the tools actually came with the screen replacement, as well as a basically like a pair of tweezers, so we're going to try to be doing everything with just everything that came in the package, so we'll move that away for now and start heating up this display that should be enough. I can kind of feel I saw this screen, maybe lifting a little, so we're going to go ahead and get these tools right here, we'll open them up. Okay- and the first thing I'm going to try to use- is this suction cup right here also keep in mind.
The connection area is located right down this side, so be cautious when you're dealing with this area, all right, so it seems like the edge, is still pretty secure. Some of you may not have a screen to where I can lift from here, so I'm going to try not to utilize lifting it from there look like it started separating a little no there. It is all right and should be getting in here soon, so basically just continue working your way around the screen till you have an area to where you could slide something underneath. So, let's continue. Okay, we're gonna, go ahead and just slide this in there to hold our place.
Now, as you can see, the problem with my screen is that it's very cracked here along the edges. So it's going to be difficult to get this off cleanly Kara now I'm going to go ahead and use a little more heat, hopefully try to pry some word of that glue out. Okay. So now we have pretty solid chunk being lifted, all right, let's go ahead and once again follow around the edges to try to loosen stuff up, lift this up, hmm, making progress. Alright, let's go ahead and continue down this line on the side, all right, all right, so, basically, after a lot of effort, we finally got this screen off here.
We also need to uncover some screws that are up there, so we need to go and get the rest of that off. So I'm going to flip this back over shake the glass off my fingers. So here we are, after repeatedly, going back with the blow-dryer to prying a little more. We finally got it to where the top-up here is clean. The bottom is as well, and then this screen lifts entirely, so the next step would be to unscrew this LCD, okay.
So what we want to do? We want to hold the screen up because of the connection. That's right there. We don't want to over bend. So we're just going to put this box right here, just to kind of give it a little of support and then from there what we need to do. We have four screws that we need to undo.
They are just Phillips head. The screwdriver came I mean the kit came with a couple different heads, I believe this will be the one. So let's go ahead and unscrew all four of these and make sure you're putting pressure down as you push you don't want to strip any of these screws, so apply a lot of pressure in that first bit. Okay, there's one number two is underneath here: so what we need to expose it all right. So there's number two we're going to organize these in the order that they come out.
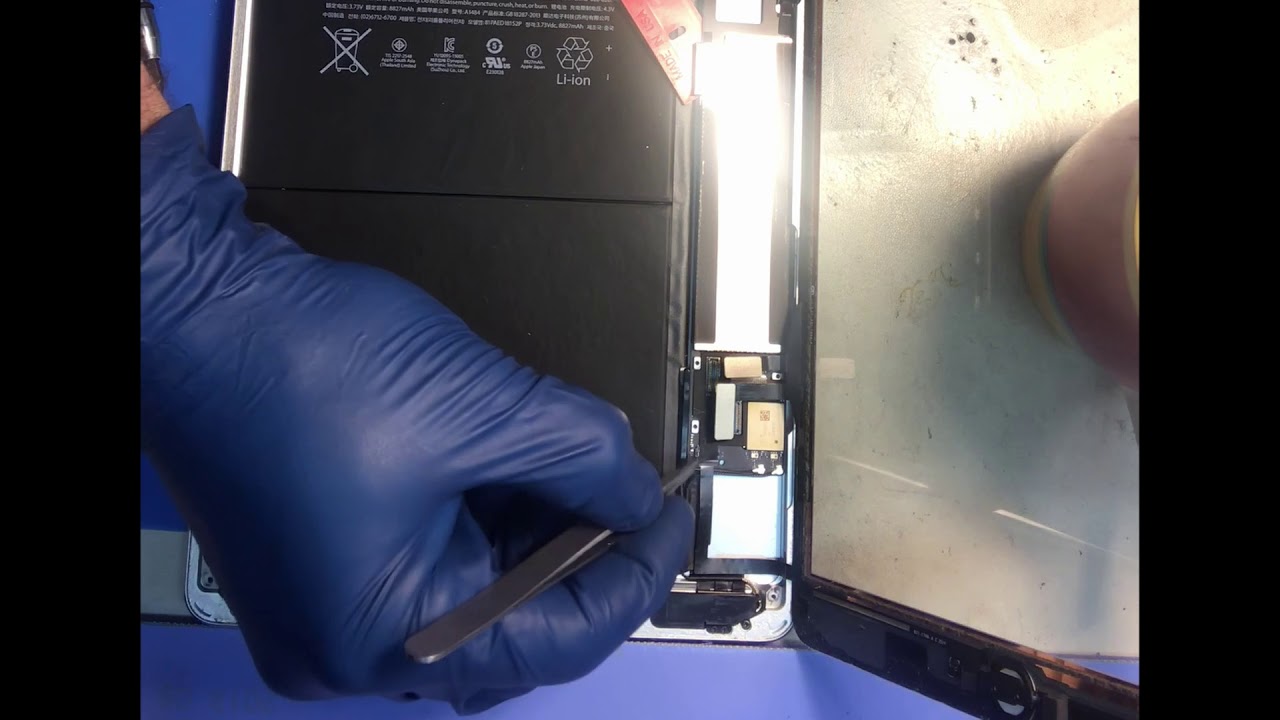
So if in the bottom left corner I'm going to put that there the bottom right and put that there and then these two I want to put right there in there just so we can remember when we put them back in, because some of these screws might be different, make sure to continue to apply pressure while unscrewing, okay and then last ones right here. I have a piece of tape underneath here to kind of keep this from moving, but it's kind of offsetting this iPad, but pressure and twist so really quickly. I made a mistake of pulling out this screw, so the other, the fourth one that we need to do is underneath here, and that also needs to be exposed. Okay, let's go ahead and expose this. Fourth, one all right, so all four screws are undone now we should be able to slide something underneath this LCD to pry it up right this side up, go back over here, a card or something longer and thinner would work a lot better here, but all right there.
this. So now that kind of popped up, we go to left, lift this up just straight that way: I'm just going to blow off some glass. What you want to go ahead and do first, is these connect the battery so to do that? That's right here we're going to unscrew this little screw right here. Okay, pull that out! Just remember this for the battery. After removing that screw, we want to go ahead and stick something under here to disconnect the battery I'm going to use something a little thinner, this library card to hopefully try to stick it under there yeah.
Okay, that should be enough. It should be disconnected, but in order to find out we'll go ahead and pull this screen down and attempt to turn on you just okay and as you can see, it is not turning on, so we'll put that back up now. We need to leave that in place. The next step would be this cover right here that is Philips head as well. You have three screws there so go ahead and do all of those all right.
Now we have this plate that comes off we'll go ahead and set that aside next to those screws, all right. So now that this is now that the metal cover is removed, we can go ahead and disconnect the LCD just by pulling up on that and the LCD is disconnected. We go ahead and set this aside. Now we can go and remove the home button connector. So here we have this foam piece that would need to be removed.
Okay and then now that that is removed, we can just set that aside for now. So, as you can see, I remove this little sticker, I guess for protection over the home button, connector. Basically, how this works is that from here this lifts, and then you should be able to slide this out and then from there when you reassemble it, you slide this back underneath, and you should be able to shut it down. So you want to firstly pry that up pull that out, and then you should be good to go, and then we can go ahead and remove these two that connect the digitizer. You need to choose your fingernail or whatever you prefer, and now that that's them should be all fully disassembled next step would be to disconnect the home bone from the screen and put it on to the new screen which I haven't pulled out yet, but let's go ahead and disconnect that from here.
So this just pulls up like this okay should be able to kind of just follow it along alright. Put that underneath here and continue. You want to make sure that you're not putting too much tension on these wires, but, as you can see, the glass was so messed up that it kind of came with the assembly. So thanks, let's continue to remove what we can off of this. Now we have the home button completely disconnected I adjusted the lighting.
So hopefully we can kind of see things a little better, but now that this home button assembly is disconnected we're going to need to place it onto the new screen, so we're all done with this screen. We can go ahead and get rid of it, and I'll pull the new screen assembly on now. Now, if your screen looked anything like mine, you're, probably going to have shards of glass, it would be ideal to get a handle, vacuum and vacuum that up, and you're, probably also gonna, have a fair bit of glass on the inside of the iPad case. So I would go ahead and kind of vacuum that up a little as well all right perfect. So we have most of the glass taken.
Care of it'll probably still be a couple bits and pieces here and there, but that'll get cleaned up later. So here we have the new digitizer of that so looks pretty nice, and it has the two connectors that are needed. Well, we'll go ahead and do is place this home button assembly onto this and the reason why I slid it under this is that I want to make sure that I'm not touching the back of this screen before final assembly. So now it's still protected, so before we put everything back together, you're going to want to clean out the edging of this metal case, and the reason for that is because this comes pre glued and when you peel this blue thing off, and you slide everything back together, you want to make sure that everything's going to be flush, and you don't want anything pushing up on the display. So let's go ahead and clean the edges of this with a razor blade.
What I would probably do is warm it back up with the hairdryer. So let's do that. Also, this is easier. If you have some goo gone, you can go ahead and just get a paper towel fold it up a couple of times make it to where you have a nice edge just like so and then what I would do. I would spray just a little onto this edge and then go around wiping it on and then going back with the razor blade and clearing it off, so that should make it easier, make sure not to get goo gone in any other place other than the outside area.
Alright, so after removing all the glue, you would then go around with an alcohol wipe and then make sure that it's kind of clean all throughout. So let's go and get this assembled. Also on a side note, some of you may have damaged the casing, which you can see I have here. I would probably try to extend that out somehow or just lightly tap it with the back of this and try to make it smooth again. That way, the screen should fit nicely, so I'm going to go and try to do that now, so all I did to fix that was take this hit it a few times with the back of the knife and it kind of moved a bit and I think it should be good now.
Also, so a quick tip I get some roll tape. Put it on the bottom. Like that, and that usually helps the iPad pretty much stay in place, so let's go and get this connected, I just removed the cover that was over here, just so I can kind of see. What's going on so basically, like I said you lift this up now that that's exposed you're able to just slide this. It should just slide it right underneath now that that's in there we can go and shut.
This connects the other two now the digitizer is fully connected. This phone part, this goes kind of over there we're going to leave it out here for now. Let's go ahead and set this set that up and connect the LCD is now connected. Now we can go ahead and reconnect the battery. Let's see what happens if we try to power down all right.
That is a good sign. All right. Let's check it off, let's see all right and there you go. You can actually see that the digitizer is working. Let's go home, let's go and put the brightness down, so you can kind of see what I'm doing over here.
So here you can actually see that it is working and responding really well. It's actually really neat how this works. Super cool to see, though, now that we know everything is working, lift the screen back up, put everything back together and then continue from there get this back on another quick tip to magnetize your screwdriver there are some magnets over here rub them on there, and you should be able to pick up the small screws perfect so now that that's connected, let's go ahead and get the battery screw back in. So let's lay this back down and drop it into place all right. So now it's time to put these screws back in now, we need to clean off this LCD I would once again use an alcohol wipe for that.
So once you have the screen as clean as you can get it ideally try not to get as many fingerprints on it as I did. You can use some Windex or alcohol to clean it best. Now that that's them, we can go in and peel off. All of these blue pieces to expose the glue and finally, once all of those are peeled, we'll go ahead and double-check. The screen makes sure there's nothing on it, and we'll just peel this protector off of here once that's off, let's go ahead and put this all back push and press into place.
Let's go ahead and see if this thing actually works all right. It's powering on peel this off just put the brightness up there. We go nice a little lower, and it looks to be working just fine and there you have it. Let me know in the comments if you were able to do it successfully and if not, let me know what issues you're having, and I'll try to help thanks for watching you enjoyed the video, make sure to drop a like down below and, of course, if you enjoy tech and like saving money, make sure to subscribe, I'll see you in a bit.
Source : Affordable Tech
Phones In This Article


Related Articles


Comments are disabled
Latest Articles


