How to replace an iPad Pro Battery By FIXD Phone Repair
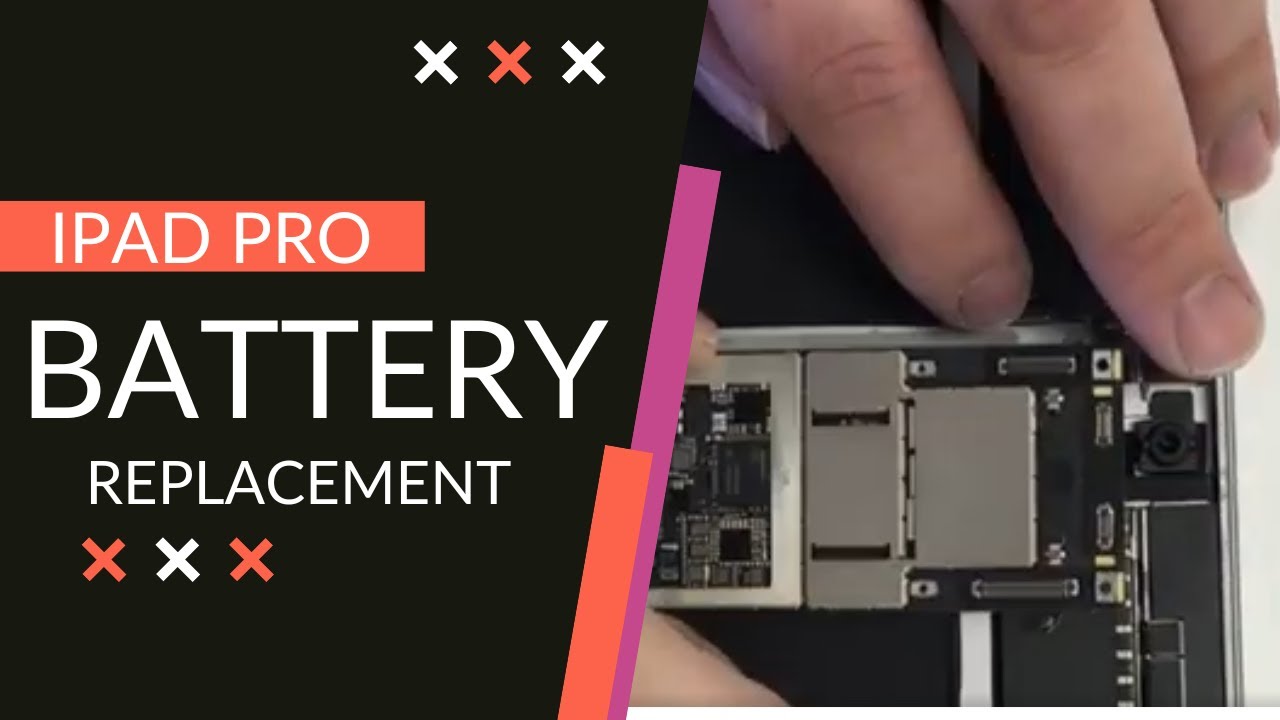
In, today's video we'll be doing a battery replacement on this iPad Pro it's Model, A 17:09. This is the 10.5-inch iPad Pro first thing we'll do is we'll place it on my heat plate to allow the adhesive to loosen up a little on the edge of the display. This whole video is going to be in maybe doing it fairly quickly. It's a fast-forward so plan for over an hour of time for this repair, it'll wait a minute or so on the heat plate we'll take it off and take a pry tool, go ahead and stick it there in the side, I find it on the sides. It's best. You'd barely want to get the tip in then I take a plastic piece acts like something similar to a playing card, but it's slightly thinner, I'll use that I'll go around the edges and cut through the adhesive have a little of trouble on this corner.
The adhesives thicker on the corners and for some reason, I was able to get it up as quickly effort will be able to get through it. I could have edited this edit this out, but there's no point to show you honey. You know it's not always the easiest thing, so I'm showing you how reality is slide down the side. There go ahead and try to separate the bottom as well, and one of the reasons I like to use this plastic piece is because it's a fairly forgiving when you run into a ribbon, cable or something you're not going to cut through it. Whereas if you use a pry tool, a metal, pry tool or something even weird, like even a guitar pick, you could, you could cut through and hurt the cables.
So once we have that off we'll go ahead and unscrew the battery connector there. Now that I have that off I'm going to take this little plastic tool that I made out of the same plastic, piece I, just cut a little notch out, I'll give a little pressure on the board to lift it up, and we'll slide that in so that we can take away all the power to the device, because only iPad pros. You definitely want to you're going to be doing any type of work, especially disconnecting and reconnecting to the display, but what I have the battery disconnected I'll take off the bracket and disconnect all the connectors there, and then we'll remove all the screws that hold down the plate? That protective shield that goes over the logic board, because there are connectors throughout then we need to remove, so we'll go ahead and pry up on the top and just pull it up. It'll slowly, snap back this shield tends to bend, but it's easy to bend back, and it snaps back in really easily there's a four or five connectors there at the top. The side that went running at the battery there's the connector for the SIM card, tray the Wi-Fi antennas and then the speakers down there at the bottom there on the bottom side of the logic board, there go ahead and pull that up now, having removed all the screws we'll go ahead and set it back on the heat plate, because the logic board and battery are both adhered to.
The two the back of the frame I just placed some isopropyl alcohol under the onto the logic board, squirted it in there, and we'll go ahead and use the same plastic sheet to wedge our way under the logic board, to start to separate it using the pry tool. We can give it a little more pressure so that it wants to lift out, and we'll add some more isopropyl alcohol as we go so that it can loosen up and allow us to lift it. I forgot to disconnect these little antennas here at the top. All right once that's loose. We can slowly start to lift the board, and we'll have to do the same thing towards the bottom.
Once that's done, we can pull it out and set it aside, because we're replacing the battery will then start with some more alcohol under the battery. I use this little knife here. It's designed for oil painting, but it's flat and long, and it does the job, so I use it with the isopropyl alcohol to get under the battery and cut in each section of this, the adhesive here, and I'm going to be extra careful right here around this cable, because there's a cable under the battery that we don't want to cut a ruin, so we'll go ahead and get around that and add more alcohol as needed and as I get close to where I know the cables that I'm gonna start to use the plastic. Only because I don't want to damage the cable I'm getting there, and the alcohol won't do any damage to the cable. So it's okay to use more than needed.
The next thing we're going to do is I'm gonna, go ahead and add some and clean up the old residue I'll skip through this. This takes some time, but you want to rub all I like to rub off the majority of the adhesive, with my finger tends to roll off, but it leaves behind the residue that I like to clean up so that the new adhesive on the new battery has a good surface to adhere to it's take some time, but it's worth their doing going the extra mile, especially for the customer there. It is nice and clean, we'll go ahead and align the battery up with the little where the screw goes at the bottom go ahead and insert the motherboard back in making sure all the cables are going in the right spot. It's a little tricky some like to fold under and there are multiple ones on, so you have to do them all at the same time, so over the top. There's those four connectors plus d2 Antennas that you have to get out of the way and then middle, the board there's another connector there and then at the bottom.
You've got the SIM card, tray, connector, those beakers the antenna for the Wi-Fi and, of course, during the next portion of this process. I want to make sure the battery never gets power to the logic board, as we work on, didn't solve for that plastic piece back in place, go ahead and connect all the connectors making sure they're all securely on there once I'm sure that all the connectors and antennas are connected and that the battery is definitely isolated, we'll go ahead and cover the logic board back up with the shield or connecting the speakers again at the bottom. Long tricky ways cut out with you. There we go put the shield back on, take it all down and put all the screws back, the top teeth screw into the actual logic board, but the next eight screws are service mounted on the logic board. Alright, with the battery still isolated, we'll go ahead and connect the display with the four connectors there making sure those are sturdy, and I'm just going to put pressure down on the battery, acting as if the screws there we'll go ahead and turn it on yeah I know the battery's working because it's coming on without issue there we go.
We also had to replace the display on this because of the one of the main reasons to customer other than it was broken there we go if you liked this video check out some of my other videos. Here's where I'm doing the iPad Pro charge port repair I also have videos of me doing the backlight repair on the iPad Pro 10.5 like this. If you uh you're interested I also have videos on how to replace the glass on all the different Apple watches. We got the series one two and three, the 38 and 42 mil online for you to enjoy watching thanks for watching.
Source : FIXD Phone Repair
Phones In This Article


Related Articles


Comments are disabled
Latest Articles


