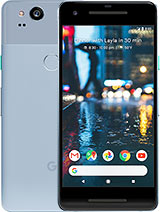
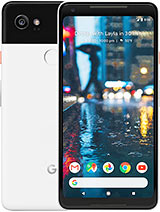
Google Pixel 2 USB-C charging port replacement By NorthridgeFix
We just got a Google Pixel ? that needs a charging port replacement. That's the charging port is bad, and I told the customer in order to open the screen, there's a risk that the screen can break and the slightest prying of the screen can actually break the screen. We do not want to be responsible should this screen break while trying to do the job. So we tell the customer. The customer looks like he did his research. He went online.
He looked up how to change the charging port on the phone, and he knows that there are risks involved, changing the charging port on this. Hopefully, everything will go the way it should, and let's start, let's see how we can pry the screen open. The first thing I want to do is try to get a plastic card under the screen. Just like this now I remove this. It's very bad to pry screen open with this, because you're going to end up scratching the paint under the screen, or you're going to end up doing something bad.
So we always use plastic cards very, very thin plastic cards. I'm going to apply some alcohol. It makes things a lot easier, we're going to try to fight the edges. Now we have very little room on the edges. Do not go deep because you can end up breaking the screen, just a tiny bit on the edge now what I did is I placed the cord under the actual LCD Hey screen is still good.
Let's hear at the bottom, and now, let's try to pry again just one second, yes, I'll be right there, let's continue okay, just check in on the screen every once in a while the court slipped all the way. We have to be careful at the bottom part, because that's the most important part we do not want to force anything. We do not want to break any cables. I'm gonna use just heat to soften the glue from the bottom side, and then I'll just fry up. Just like that.
Just like that, that's it! The screen is out no paint scratch, no breaks, no cracks and if we turn it on the screen, still working hey, that was the hardest part of the job. All we have to do is disconnect the cable from the middle. There's. Still some glue on here now to pry the cable out we have to remove two screws from here. Let me get a screwdriver that will fit right, so this is one screw, and we have one here, the screws, that's it so.
Here's the screen- okay, so I'm gonna, go ahead and take the screws off. Okay, so I took the screws off from the top sides. Bottom you'll disconnect the cable from here from the top here, and then you have to also disconnect the speaker, which is over here in order to get the charging port out. Of course, we have an antenna connected at the charging port that we remove. We have the speaker wire connected to the charging port.
You take that out, and now I'm able to take the whole charging port out, there's also a wire connecting to the bottom of the charging port. Let's take a look at what's connected to the bottom, so we have to solder two wires to the bottom. Here. Let me look at the charging point that we got okay, so we're going to have to solder those wires here. We're gonna unsold them from the charging port, the old charging port, and we can solder the wires back on here.
These are the two wires that we need to disorder, and this is the new charging port here. We're going to have to solder those wires on these two solder blobs right here, one two: let's start with the bionic right: hey, buddy, hey so black on top red on the bottom, let's put some Fox and the job is done now. What we're going to have to do is flip this over this, then we have one of the antennas. The white antenna here will connect to the charging port, and we have the speaker which is over here. It sits on top of the charging port.
It goes on top of the charging board and the speaker, cable will connect to the charging board. I'm going to do this under the magnifier. I will put this on top will screw it back. We'll put the screen seal it from the edges, and we should be all good. We put all the connections, all the screws, all the cables we put the plate back, so we're going to connect the screen yeah.
The customer is already waiting out there for the phone over here. Let's turn the phone on okay, so the charging port is working and everything is good and that's how we change the charging port on the pixel -. It's not an easy job. By all means you have to be careful when prying the screen open the screen can break when find the screen open. It's a very thin screen and any pressure on the screen can make it break after you remove the screen.
You don't have to remove your all. The screws take out the plate. Take out the speaker take out the speaker, cable, two antennas, and then you have to disorder two wires and solder them back on the new port, put everything together and that's how it's done so. This will give you an idea of the things that goes on when changing a charging port on the pixel, ? I. Hope you enjoyed this video like this video.
If you liked it subscribe, if you haven't already done so leave a comment, you have any questions, and I'll see you in the next video you.
Source : NorthridgeFix


![Xiaomi Mi Band 4 (Global Version?!) Full Review [Xiaomify]](https://img.youtube.com/vi/LVl8uy0qHDw/maxresdefault.jpg )


