Google Pixel 2 Disassembly (Screen and Board Removal) By Real World Review

Hello everyone- this is Matt from real world review, and today I'm going to show you how to disassemble the pixel ? before we start, I want to let you know that this screen is an AMOLED screen, so make sure to be very careful when working on this, just like the pixel one, you have to start from the front so for that I'm going to grab the heat gun and start heating up the adhesive around the screen. Once you heated it up, you want to get something thin to lift the screen in this case I'm, using a razor blade, and then I'm going to put a card in the card is more flexible and less likely to crack the screen. I'm gonna start cutting through the adhesive and whenever I feel too much force, I'm going to heat it up again, make sure not to add too much heat or else you'll burn in the AMOLED screen. What I recommend is starting at the top and then going through the side. The cable for the screen is at the bottom, so you don't have to be too careful on the top and on the sides. In this case, I did not know that the cable was at the bottom, so I was being very careful.
It may take some time to cut through the adhesive, but be very patient. To remind you all you're focusing on is the top portion and the side portions you. There is a little white cover that goes over the front camera, but you don't have to worry about that too much you once we cut through most of the adhesive, then we're going to work on the bottom. Now that we got most of the Teresa vowel I'm, going to heat up the bottom portion again and slowly lift the screen make sure not to bend it too much or else you might crack the screen with a mixture of heat and the card. It shouldn't be too difficult to cut around the adhesive again stay on the edges and don't go near the screen.
You don't want to cut that cable. Now that we have the screen moving I'm going to use the card to cut through the adhesive a little more add some heat and the screen should just fall off you, you and once the screen does come off, you should set it in the position that I'm showing you right now. Next you're going to use a Philips screwdriver and a t5. We start with the t5 by removing the two screws that hold down the panel covering the LCD plug in once you remove that little panel, you can unplug the LCD with a thin pic make sure not to use anything metal. Once we take the screen off, there's one Torn screw on the top right and the rest or Phillips screws.
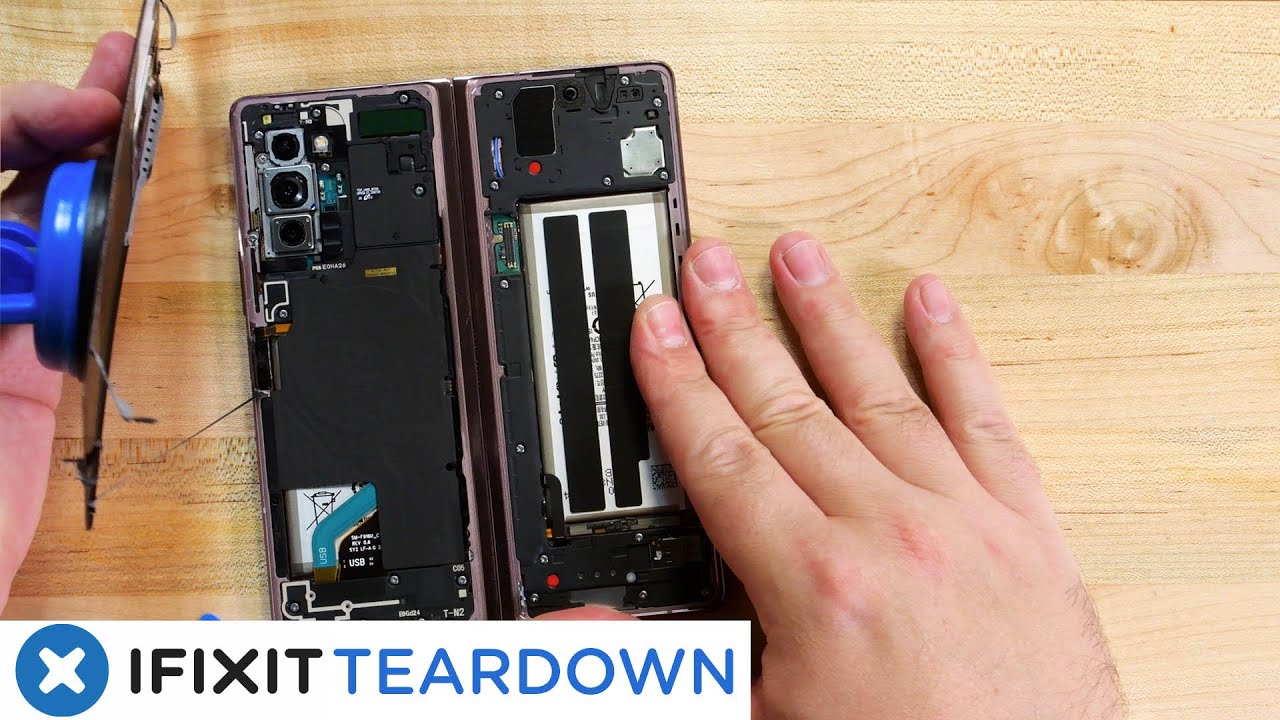
Some screws will be a little difficult to take out of the frame, so you can either leave them there or use something like a razor blade to take the screw out. Once you take out the screws, don't forget about the one that is above the speaker and below the speaker. The frame will lift that aside and have a little piece that you have to rip off once we open it up. You want to start by unplugging the battery, then we'll unplug, the charging port cable. Next, we'll unplug the cable on the left, the cable on the right and then the other cable on the right, two screws that are holding the logic board in and once you take those out you can lift it up, but be very careful.
Remember the fingerprint scanner is on the back, so start by lifting it up on the top, and then you have to unplug the fingerprint scanner on the bottom portion of the logic board. Next, there are two antenna cables that you'll have to unplug as well and once those are unplugged, the logic board is free. Now you can feel free to do whatever you need to do on the logic board, replace the battery place, the charging port, whatever once you're done, doing whatever you're doing we're going to plug in the antenna cables. We will then carefully plug in the fingerprint scanner and then start moving on to the front of the phone. The way that the logic board sits in is you want to angle it at the bottom and push in the top you next, we start plugging in all the cables, except for the battery make sure that the antennas are tucked in on the side.
Once everything is all good, we'll plug in the LCD and plug in the battery to make sure that it is still working, and it is, we will also plug in the charging port to make sure that it's charging once that is over you unplug the battery in the LCD, and then we start moving on to the frame. The sensor might be a little difficult to plug in, so I'm gonna. Remove that from the frame now I'm going to start with the top on the frame to make sure that that sensor is tucked in properly and push down on the bottom, once everything is lined up, I'm going to start putting in the Phillips screws, and then we'll move on to the one Torn screw in this case, I'm going to leave the adhesive, but what you would want to do is you'd want to remove all the adhesive and put new ones around the edges, make sure to keep the adhesive on the edges, because that's what it looks like the screen sticks to also, if you're changing the screen, make sure to add the speaker, grilles and don't forget the plastic piece that goes around the camera. You have everything set up plug in the LCD. Put the cover over put the two screws in it and power it on and make sure it's all good, and that's it if you have any questions, feel free to leave them in the comment section below or on Twitter at Matt of RR.
Hopefully this video helped you out thanks for watching.
Source : Real World Review
Phones In This Article
Related Articles


Comments are disabled
Latest Articles


