Galaxy S21 Ultra Tips and Tricks: Pro Mode Tutorial! By Jonathan Casey
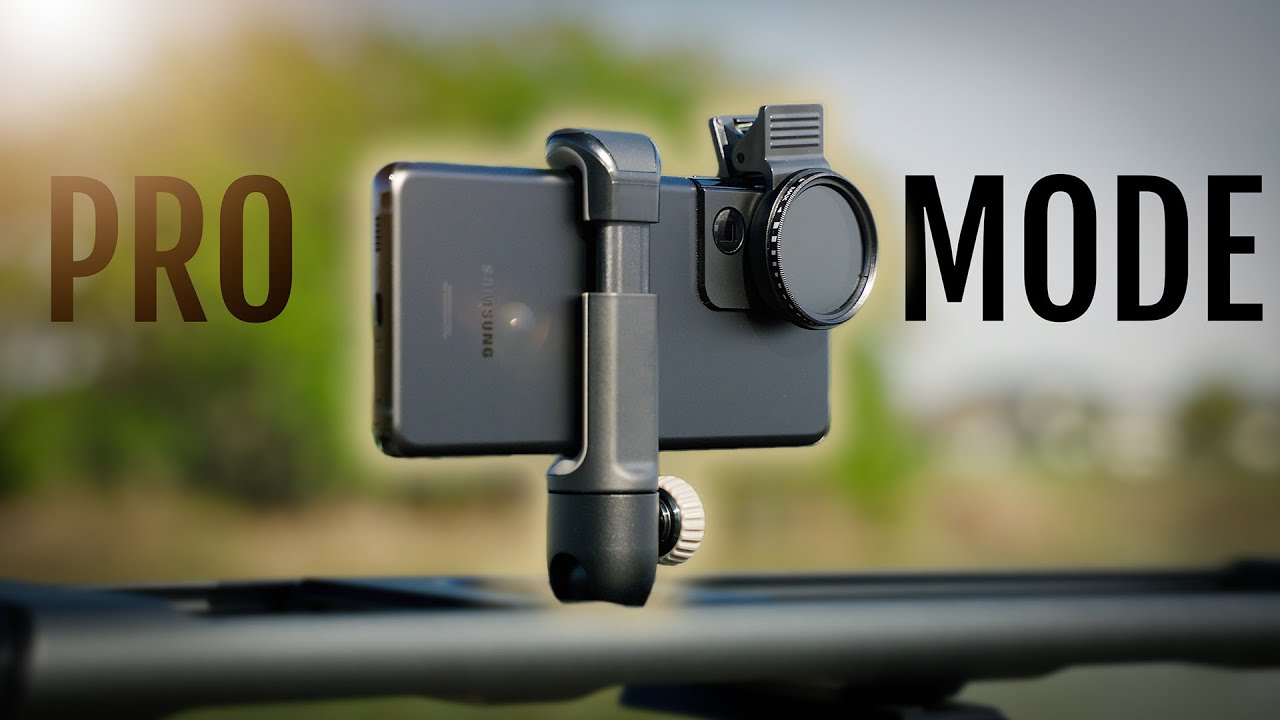
What's up people- I hope you all are doing well before we get started if you enjoyed tips, tricks, tutorials and my personality make sure to click. The subscribe button, followed by the bell to be alerted when new videos go live. Also, follow me on Twitter and Instagram for fun, lifestyle, stuff and other behind the scenes' news today we're going to be diving into the pro modes on the galaxy s21 ultra I'm going to go over what they are, why you should use them what you can do with them, how to use them and why you shouldn't use them. I find the last one just as important as all the others so make sure to listen up. First and foremost, what exactly are the pro photo and pro video modes in short, they're manual modes? They allow you to take full control over your camera and override any software processing from AI and scene detection. This gives you the ability to dial in the exact settings that you want for the scene that you're capturing.
So why would you want to do this well by taking full control over the camera? You can determine the outcome of the shot versus relying on software processing for the most part scene. Detection in Samsung's processing does an incredible job, but there are plenty of times when I've taken a photo and the colors are not the way they looked in real life. Either the exposure was messed up or the white balance was off with pro mode. You can adjust it properly to match what you're seeing in person. Secondly- and possibly more importantly, you have access to 12-bit raw, which is awesome.
You do have to enable it within the settings. So let me show you how to do that in order to enable raw you're going to go into the settings you're going to swipe down until you get to format and advanced options, tap on that and make sure raw copies is turned on. Now, it's going to save a JPEG and a raw copy, so you're going to have both you're going to have one that you can use straight out of camera, and then you're going to have that raw copy for advanced, editing and stuff, like that, the benefit of shooting in raw is complete flexibility. When editing your photos, the exposure, colors and white balance can be pushed much more when editing a raw image versus a typical JPEG or a HEIF photo. This is especially the case with 12 bit raw for video.
You have more flexibility with frame rates, resolutions and aspect ratios. For example, you can shoot a video in 21x9 for a widescreen cinematic. Look another benefit to using pro video mode. Is the ability to use external microphones? It supports USB microphones as well as Bluetooth and what's cool is if you're, using something like the galaxy butts pro, you can use the microphone on the butt. The quality isn't the greatest, but it's still a cool addition.
So here's a quick example of the rode USB-C shotgun mic plugged into the galaxy s21 ultra. It should give you a pretty good idea of what you can accomplish, using an external audio source and pro mode on the s21 ultra. So here's another example using the Galaxy Buds pro as an external microphone. The audio is not going to sound as good as the shotgun mic, but again this gives you an idea of what you can do, especially if the phone is pretty far away, and you still want to record audio. This is a good solution, so what can you do with pro mode and pro video mode? Well, there's a lot, actually.
So I'm only going to give you three of the more common examples. For starters, you can slow down the shutter when using pro photo mode and capture long exposure, shots to soften out water, create light trails or get some really cool, macrophotography shots. These will take practice, so don't expect to nail them right off the bat, and you might need to use a little clip to attach filters like indies or polarizers I'll link, the ones that I use in the description for video. You can record clips with smoother motion blur by adjusting the frames per second to double that of your frame rate. On the other hand, if you want to create a shot that has a dramatic effect to it, think saving private Ryan, you can increase the shutter speed.
Quite a bit to remove motion blur to create a jittery effect on your footage in both photo and video. You can control your focus point and with focus peaking, it makes things easier to focus on smaller objects. You can even rack focus or perform a focus, pull with practice using pro video mode to direct attention to a specific point in the scene. Let's do a breakdown and tour the interface of both pro modes I'll also do a quick tutorial on what each setting does. However, if you're looking for a more in-depth explanation, you can find a ton of learning, photography or videography videos out there.
Okay, so we're inside of pro photo mode, and you're going to notice a few things. You have only two camera choices here you have your standard camera, and then you can switch to the ultra-wide. You don't have access to any of the telephoto cameras, and then you have a lot of settings right here that you can swipe up or down for if you swipe up or if you swipe over to the right you'll see a reset button. This is going to be used to reset all the settings. So if you end up changing a bunch of stuff- and it's not looking right- you can just tap reset it'll go back to its default state, and then you can start tweaking things again all right.
So let's go ahead and start with ISO. So if we tap on ISO, this is going to be the amount of light sensitivity the sensor is set to. So, if you have a higher ISO, it's going to be more sensitive to light, thus being brighter. So if you're shooting in a low light situation, raising the ISO is going to make the image brighter. However, it comes at a cost of noise.
So, as you can see, I have my hand right here. If I dial up the ISO to 3200 and then come into the shutter speed and dial it up as well, it's going to create a very noisy, very noisy image because of how high that ISO is so the idea is to keep your ISO as low as possible and then use the shutter speed to brighten the overall image. But you can only do this if the subject is staying still, which we'll talk about more once we get to shutter speed. So if we go into ISO and adjust it- and we no longer want to keep that value, we can either dial it back. We can tap on the reset button, or we can come up here once you start adjusting it.
We can tap where it says manual, and it's going to switch it back to auto. So now, diving into the next option, which is shutter speed. This is how long the shutter stays open. Um, the lower the number the longer the shutter is going to stay open, the more light that's going to be let in the higher the number the faster the shutter is going to be letting less light. In so, if you want to do like a slow, shutter photo so think about like a long exposure, so you want to really smooth out the water, or you want to have the clouds look really soft you're going to want to take your shutter speed and go pretty low, so you're going to want to do like maybe two seconds one.
Second, you can go all the way up to 30 seconds, which is going to be an extremely long exposure, but it's going to give you a ton of like light trails and movements in your shot if you're capturing something that has a lot of action in it, and you want to really capture that action and freeze the frame. You want a much higher shutter speed, so we'll go up to one over twelve thousand, we'll go to the ISO and dial it up to like thirty, two hundred. Actually, let's go to like one over four thousand and if I move my hand and then take a photo, let's see move my hand a little take a photo and then go into the shot. You can see it freezes the action now in comparison. If I go back and then have a slower, shutter speed of like 1 over 20 dials down the ISO and then do this, take a look at the photo.
You can see there's a lot of blur because of how long that shutter was open and just like with the ISO. If you dial in a setting, and then you want to revert to its default state, you could just tap up here where it says manual, it'll put it back in auto, or you can always just tap that reset button. So if you want to use pro mode but kind of like in an auto like fashion, you could do that by leaving everything in auto like it's set up now. So the ISO is in auto the shutter speeds in auto, and you could use the exposure compensation here to dial in your exposure. So right now everything is properly exposed but say I want to under expose my hand a little.
I can take the exposure compensation here where it has a plus and a minus and dial it into the negatives, and, as you can see, the image is getting darker. But if I want to brighten the overall image, I can go into the positive numbers raising the exposure, and it's automatically going to compensate for whatever I put here by adjusting the shutter and ISO on its own. So this is a way that you can actually take advantage of capturing a raw image while also having the benefit of not having to fiddle with any of the settings, because it's still doing it automatically. So that's exposure and exposure compensation. So that's what that is right there.
If you have your exposure compensation set up to one, and you just want to quickly dial it back again, just tapping that reset button will reset everything to its default state. Now, right next to the exposure compensation, we have AF, which is autofocus. If you tap on it and then tap up here where it says auto or just start adjusting it like this, it's going to automatically put it in manual focus and if I put my hand up here and then start dialing in the focus, you can see like little like a green light, go around my hand or on my subject, and that is focus peaking that lets. You know, what's in focus and what's not in focus so right there you can see. My ring is in focus and if I go to the light back here, you can see the light is starting to turn green, which means the light is in focus.
So that's how you can manually focus inside pro mode and then, if you want to go back to auto autofocus, just tap up here where it says manual and boom now you're using the autofocus again. One thing to remember when using the focus is that the flower down here means close, focusing distance. So if you start going towards the flower, it's going to be like a macro type shot, which means it's going to focus closer and then the mountain up here means further or far focusing so think, landscape. That's why it's a mountain, because you want to focus on a landscape which is going to be further away. Think flower means macro, so close focusing, so that's one thing to remember, and then again, just tapping on manual brings you back to auto right next to AF or focusing we have WB, which is white balance.
This is how you can adjust the colors in your shop. So if you notice that the colors are a little funky, you can just tap on WB and then manually adjust the white balance until you get it to where you want it to be. This is probably the number one thing that you'll use inside of pro mode um, because a lot of the times the phone can mess up the white balance, especially when it comes to AI and scene detection. But if you just want to go back to auto inside of manual just tap up here where it says manual- and it goes back to the auto white balance mode, a quick tip for you- if you just want to lock the white balance, all you have to do is just let it set itself and then just tap auto and now that white balance is locked, and it won't change. That's how I would use it inside pro mode and that's how I suggest that you use it as well.
Next to the white balance settings, we have some fine tune, controls for the image, so we have a contrast slider, so you can adjust the amount of contrast in the shot, which is basically how the highlights or bright portions of the image interact with the dark portions. Lowering, the contrast is going to kind of give you milky, shadows and milky highlights blending everything together. Increasing the contrast is going to separate those bright portions from the dark portions. Much more, I want to say harshly, but if you dial it in correctly, it's not going to be harsh. It's just going to make the bright areas stand out more from the darker areas.
Then we have highlights, so you can control kind of like the highlight roll off right. Here we have shadows, you can boost the shadows, you can lower the shadows. You can really crush them. If you want, you can adjust the saturation which is going to be the overall colors in the scene. So if I bump up to saturation, you can see my hand is getting really red and then going down is going to mute things and get rid of that color.
Next to saturation we have tint. This is going to work in conjunction with white balance. So if you adjust your white balance, but you notice that there's still like a little too much green or too much magenta in the scene, you can come under tent, and you can either add magenta or you can add green to balance it out now bouncing up to the top. Here we have our metering mode. This is going to work in conjunction with your exposure compensation.
So right now, metering is set to center weighted, which means it's going to use a center portion of the frame in order to expose properly. So if I were to switch to matrix it's going to use multiple points of the frame in order to get the proper exposure, so you can see it darkened it immediately, because it's now taking some exposure points from the light itself and then, if I tap on spot, it's literally using a very small spot in the center of the frame to get exposure. So now, if I bring my hand up, you can see the exposure changes. I can dial it down or up using the exposure compensation. If I switch back to center weighted, you can see it darkened the frame and then, if I go to matrix, you can see it got really dark.
So if you were trying to properly expose for a specific part of your frame so say I want it to expose specifically for my hand, I think spot meter would probably work the best for this situation, and then I can just adjust the exposure compensation over here to balance everything out in order to retain all the detail in my hand, while retaining as much detail as possible in the background. So that's one thing to keep in mind, while you're messing with the exposure compensation slider is what metering mode you're in again, this is a lot of information. I know if you really want to learn the correlation between metering and ISO and shutter speed and exposure compensation and all that stuff. You really need to watch a video on learning. Photography, it'll, explain it a lot better than what I'm doing right now.
This is just like a down and dirty way of getting you started and getting you out there using pro mode now, next to the metering mode. We have our aspect ratios if we tap on that, we have 4x3 16 by nine one by one and full nothing new. Here I kind of covered these inside of like the regular camera walkthrough um they're, just also in pro mode. We also have our timer here. So, if you're trying to do like a selfie and put your phone on a tripod and be in the shop, timer is going to come in handy and then, of course, we have our flash diving into the settings.
You're going to see a lot of grayed out stuff in here like scene, optimizer, shot suggestions, qr codes, swiping, the shutter button use wide angle for group selfies. All of this stuff is grayed out, because you cannot use it inside of pro mode, there's nothing that you can do about it. You just cannot use a lot of this stuff inside of pro mode, because pro mode is meant for exactly what it states. It's meant for, like professional manual control over your camera, and it's eliminating anything that has to do with AI processing or smart features, moving right along we're going to go into pro video mode, and a lot of this is going to be repetitive of what we just covered. But there are a few additional features here, so we have the same exact cameras: um.
We have our standard camera and our ultra-wide again no telephoto options or front facing options. Inside of promo. We have our histogram up here for properly exposing um. You can see. We have three stages to it.
So if it's all the way over to the left-hand side, it's going to be very dark you're under exposing all the way over to the right hand, side is going to be very bright, and it's going to show you where you're clipping or where you're under exposing too much and losing detail in the shadows. We also have our audio meters here, which are unique to pro video because, obviously for photo, you don't need audio meters um right here on the bar. If we swipe over to the right hand, side or swiping up, we have our reset button, which is going to reset all the settings just like in pro photo mode and then, above that we have our microphone or way of recording audio. So you can pick and choose different microphones. If we tap on it, we can use the omnidirectional microphone, so it's using the front microphone as well as the rear microphones of the phone itself.
You can choose to do only the front or only the rear, and of course you can dial in the amount of uh level or the level of the audio that it's recording. So you can, you know, tone it down a little if it's too loud, or you can increase it. If it's not loud enough, you can do the same thing for the rear, um one cool thing about this is you can plug in an USB mic which it's grayed out right now, because I don't have one plugged in. But if you have one plugged in you'll see this light up, and you can use an USB microphone. You can also use a Bluetooth microphone such as the instar mic, um, something like that, or you can use the Galaxy Buds buds pro buds live as a microphone.
The audio isn't going to be the best, but you can use them, and this will light up and give you the option to do that once they are connected, and then you can mix the Bluetooth audio with another source, and then you can adjust that as well. Going back, we have our ISO, which is the exact same thing, but keep in mind the higher the ISO, especially when it comes to video the more noisy, the image, the lower the ISO, the cleaner, the overall image. Then we have our shutter speed and the thing that you need to consider when it comes to shutter speed and video. Are you want to try to get your shutter speed to be double that of your frame rate? So right now, I'm in 4k at 24 frames per second, so my shutter speed should technically be 1 over 50. That's the ideal shutter speed for smooth realistic motion blur.
However, this is also an artistic choice. So if you want to have like a lot of jittery movements in your scene- and you want to really uh make, the viewer feel like they're there, and it's very action-packed- and it's like jumpy think, like you know, like I said, saving private Ryan you're going to want to increase that shutter speed to like 1 over 250, maybe even higher, and then you can come in and adjust your ISO to compensate for that higher shutter speed, if you're in a lower situation. But you can see how there's like no motion blur now to my hand, it's literally like removing all the motion blur giving you a very I mean jittery, buttery action, type of look. That's the best way to describe it um. But if you want just a very cinematic, more realistic, look you're going to want to double your frames per second and then that's going to be your shutter speed and just like in photo mode once you dial these things in manually.
If you want to quickly just go back to the default state or go back to manual or go back to auto, just tap up here where it says manual, and it will switch it back to auto the biggest difference here is when you're inside of pro video mode, and you manually dial in your shutter speed. It's automatically going to kick you into manual mode for your ISO, so you can't really go into like shutter priority or anything like that. So, if you're in manual for your shutter speed, you're going to be manual for your ISO, if you're manual for your ISO you're going to be manual for your shutter speed, it's kind of a downside, because I wish you could just go into shutter priority mode, but I guess without aperture control, it's really difficult to do this, regardless pro video mode is still worth it. Even if you keep everything in auto simply because you can control everything with the exposure compensation, slider just like in pro photo mode, it's a little easier doing it this way versus in the regular video mode, and you also have full manual control over your focus, which is going to be huge for mobile or smartphone videographers and just like in pro photo mode. You do have focus peaking as you can see that green light around my hand right there um, so you can really dial in your focus here in case it's messing up, and you're trying to take a video of a subject.
That's really tiny, and of course, if you want to go back to autofocus, just tap up here where it says manual and boom manual focus is now turned back on now, right above the autofocus or focusing selection. We have our white balance and again just like in pro photo mode. We can dial in our own white balance in case the automatic mode is not getting it, or you can let the auto mode tell you what it should be and then just lock it by tapping on auto and now that white balance is not going to change right above our white balance settings we have the same fine tune, controls that are in pro photo mode, so we can adjust the contrast and all that. However, it's grayed out due to the resolution selected, so you need to be in full HD in order to do the fine tune, exposure and contrast controls. So now we can, you know, dial in our custom contrast.
Custom highlights custom, shadows, saturation and tint settings, but you just cannot do it in 4k, so you have to be in full HD, and you have to be in full HD 30, full HD, 24, full HD 60, but full HD 120. You cannot use these fine tune controls so stay below 4k or full HD, 60, and you'll be able to use this fine tune. Controls, for contrast, shadows highlights saturation intent so going back to 4k at 24 scrolling up above our fine tube controls. We have our uh zoom, which is going to be how you can zoom in slowly during video or fast. So you don't have to pinch to zoom.
You can just simply use this zoom slider right here to do a nice, slow zoom, but just remember that this is not taking advantage of the telephoto. It's actually doing a digital zoom, so you're going to get uh, probably some artifacts, some noise, and it's not gonna, be the best overall image, simply because you're, just cropping in on the image more or less, and you're going to get some degradation in terms of image quality bouncing up to the top. Here we have our option to disable or enable the histogram below that we have all of our resolutions and frame rates, and we have a lot to choose from. We have HD at 30 frames per second full HD at 24, full HD at 30, full HD at 60, full HD at 120 4k at 24 4k at 30 4k at 60, and we have 8k at 24. , so even at 8k 24 frames per second.
If we tap on 16x9, you can see, we have various aspect ratios all the way up to 21x9 for a very cinematic widescreen look and of course you can access. These aspect ratios no matter what resolution and what frame rate you're in, so we could do 4k at 24. It's going to be at 21 by nine. We can do 4k at 60 and still 21 by nine. So we have quite a bit of choice here when it comes to frame rate resolution and aspect ratio, and you do not get these options inside the standard automatic video mode now below that we have our flash.
So we can turn on the flash, and it'll act as like a flashlight or just a LED light to light up your subject. It's really harsh, don't really recommend it, and if we dive into the settings, you're going to see a lot again of grayed out stuff like auto HDR. Um tracking autofocus will sometimes be grayed out. If you're in a resolution that does not support it, like AK, does not support tracking autofocus, let's see going under shooting methods you can see. These right here are not supported inside video mode or pro video mode going into advanced recording options.
You see, hdr10 plus videos is grayed out and zoom in mic is greyed out, because these will not work inside of pro video mode. So one thing I forgot to mention that's also applicable inside of pro photo mode is: if you tap anywhere on the screen, you can use the autofocus to simply focus on your subject, and then you can lock it. So you can lock your autofocus that way versus having to go in and do it manually. However, if you're inside these pro modes, it's probably the best just to manually dial it in and then lock it that way it just- I don't know you're in pro mode, so you might as well take advantage of that, but um, that's a quick walkthrough of pro photo and pro video mode. Let me know if you have any questions down below.
I know that was a lot of information. The last thing I want to touch on is when or why you should not use promote if you're, in a situation that you can't take the time to dial in your settings. For example, your kids are running around, or you're at a party, it's best just to stick to auto mode. Also, if you want the easiest, workflow possible and just a great looking image without having to do hardly anything in post, stick to auto. Another thing to remember is that the telephoto camera and front-facing cameras are not supported with pro mode.
Lastly, if you want to use AI and scene detection to take advantage of things like moonshot or night mode, you're going to want to stick to the regular photo mode and ensure scene detection is turned on other than that. I highly suggest all of you dive into both of these pro modes and play around try to shoot some stuff manually and see what you can come up with. This is a great stepping stone before moving to a more professional camera like a point-and-shoot, a DSLR or mirrorless. If you're on Instagram make sure to give me a follow and be sure to tag me in any shots that you take using these promos, I really enjoy seeing the things that you guys create. It always puts a smile on my face if you have any questions, be sure to comment down below.
If you enjoyed this video, consider giving it a thumbs up subscribe for more videos. Just like this, and I'll see you beautiful people in the next one.
Source : Jonathan Casey
Phones In This Article

Related Articles


Comments are disabled
Latest Articles


