Apple Watch Screen Replacement—How To By iFixit
The front glass in your Apple Watch Sport might be extra strong thanks to its Ion-X glass, but it's not indestructible. Whether it's due to gravity or clumsiness, cracks and scratches happen. And when they do, it's time to replace your screen. If you're one of those unfortunate souls with a broken Apple Watch, quit your fretting because today I'm going to show you how to replace the screen in your Apple Watch. Hi, I'm Gwendolyn with iFixit, and for this repair you're going to need protective eyewear, a curved razor blade, opening picks, an iOpener, a set of plastic opening tools or a spudger, a pair of tweezers, and a 1mm flat head screwdriver. Before you get started, make sure your Apple watch is completely turned off, and as always, make sure you check out and follow our step-by-step guide on ifixit.
com. Not only does it walk you through the complete repair, but you can also see comments and notes from other users who have tried this repair, which is really cool and very helpful. Let's get started by heating up our iOpener. Just 30 seconds in the microwave should do it, but while it's heating up, go ahead and pop off the bands. Once your iOpener is nice and warm, place it on the face of the watch and leave it there for at least a minute.
I'd time it on my watch, but... And now for some precision work. We're going to use our curved knife for the next step, but there are a few safety rules you should keep in mind before you begin. Always keep your fingers completely clear of the knife. Be careful not to apply too much pressure, as you might cause the knife to slip and cut you, or damage the watch.
And finally, wear eye protection. The knife or glass may break, sending pieces flying. As you are prying the display up, keep your eye on the force touch sensor cable that sits in between the screen and the watch's case. If you see the top layer of the cable coming up in your display, it means the two layers of the cable have separated, and you're gonna need to replace it, or repair it. Enough about your safety, let's talk about the safety of the watch.
Using a curved blade minimizes the chances of scratching the case, or cracking the glass. Only pry with the curved section of the blade and not the tip or the flat section. And once the gap opens, if you're pressing too hard on the knife, it may slip and cut the battery, so maintain complete control of your knife at all times. Let's start on the lower edge of the watch face and press firmly down into the gap, creating a thin gap. When the glass has lifted, gently rotate the knife down, opening the gap more and pushing the glass up.
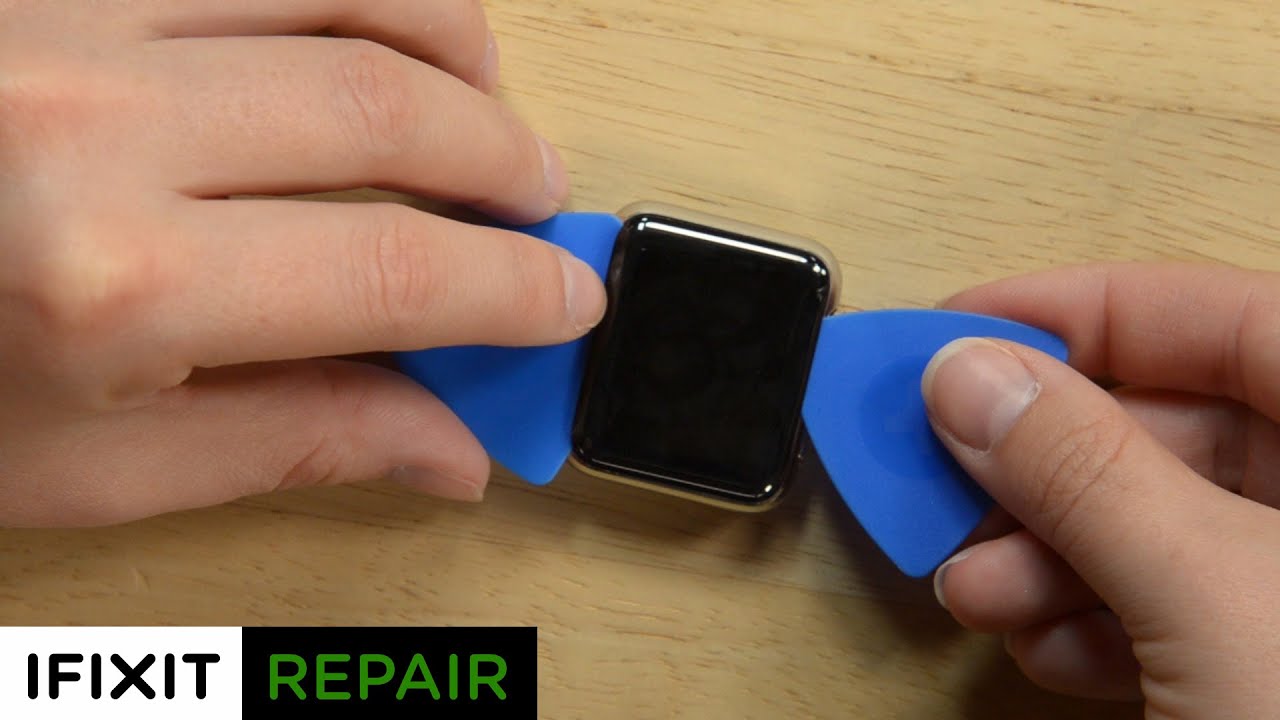
Now we're gonna use opening picks to cut the adhesive and prevent it from resetting. Make sure you don't insert the pick any more than you have to, and remember to use a rolling motion rather than dragging it along the edge. This will ensure you don't push the pick in too far, damaging anything on the inside. Work your way around the face of the watch counterclockwise. Is there a joke there? Watch, counterclockwise... Leave this pick in place to keep the adhesive from resetting.
While holding the first pick, work the second pick around the perimeter to ensure that all the adhesive is cut. Then you can start prying up on the right side, and then move to the left. But, don't try to remove the screen just yet—it's still attached by two cables. To avoid any damage to these cables, lift the screen up and shift it to the left. Now we can elevate the watch so the face can hang and we can work on the battery.
We're using a small box, but you can use a book or anything as long as it's a half-inch from your table. Just be careful not to bump the screen or string the cables while you work. Get your opening tool out and use it to wedge up the battery on the right side. But remember, it's still attached, so don't take it out all the way. To disconnect the battery, lift up a little and rotate counterclockwise, which should give you a clear view of the cable.
And now, you can use your plastic opening tool to pry against the bottom of the case and separate the battery cable connector from the watch battery cable. Then you can lift the battery right out of the watch. With the battery out of the way, now we can focus on the screen. Fold the screen up and over to the right to expose the cables underneath. Now we can see the small metal bracket that is—you guessed it—adhered to the speaker.
We're going to pry the bracket up with our opening tool. Quick warning though: If you're prying towards the watch band, you may tear the cables, so use your opening tool and flip the bracket towards the display. This bracket is a little tricky, but nothing we can't handle together. It's made up of an upper and a lower piece. The connectors are secured to the lower, and the upper has to be removed to disconnect them.
To do this we're going to hit it with a couple of tools: the fine tip tweezers and a small flathead bit. Use the fine tip tweezers to grasp the lower half of the bracket, then insert the small flat-head screwdriver between the tab and the lower bracket, and rotate the screwdriver to spread the gap. The last step before you can disconnect the screen is sliding out the metal tab that fits into the slot of the lower bracket. To do that, grab the upper bracket with your tweezers and slide it towards the top of the watch to disengage the tab and free the brackets. Now we can see those cables and disconnect them with our opening tool.
Finally, lift the display from the watch for reassembly. We recommend you follow the step-by-step guide in reverse, and we also have a video guide on reapplying adhesive. You can find all the parts and tools you need for this and many other repairs at ifixit. com, and let us know how it goes. You can find me on Twitter @gwendolyngay and follow iFixit @iFixit.
Don't forget to subscribe to our YouTube channel to stay up to date on all our latest teardowns and repair videos, and give us a like on Facebook at facebook. com/ifixit.
Source : iFixit
Phones In This Article

Related Articles


Comments are disabled
Latest Articles


