50+ Tips and Tricks for the iPad Pro By sakitech
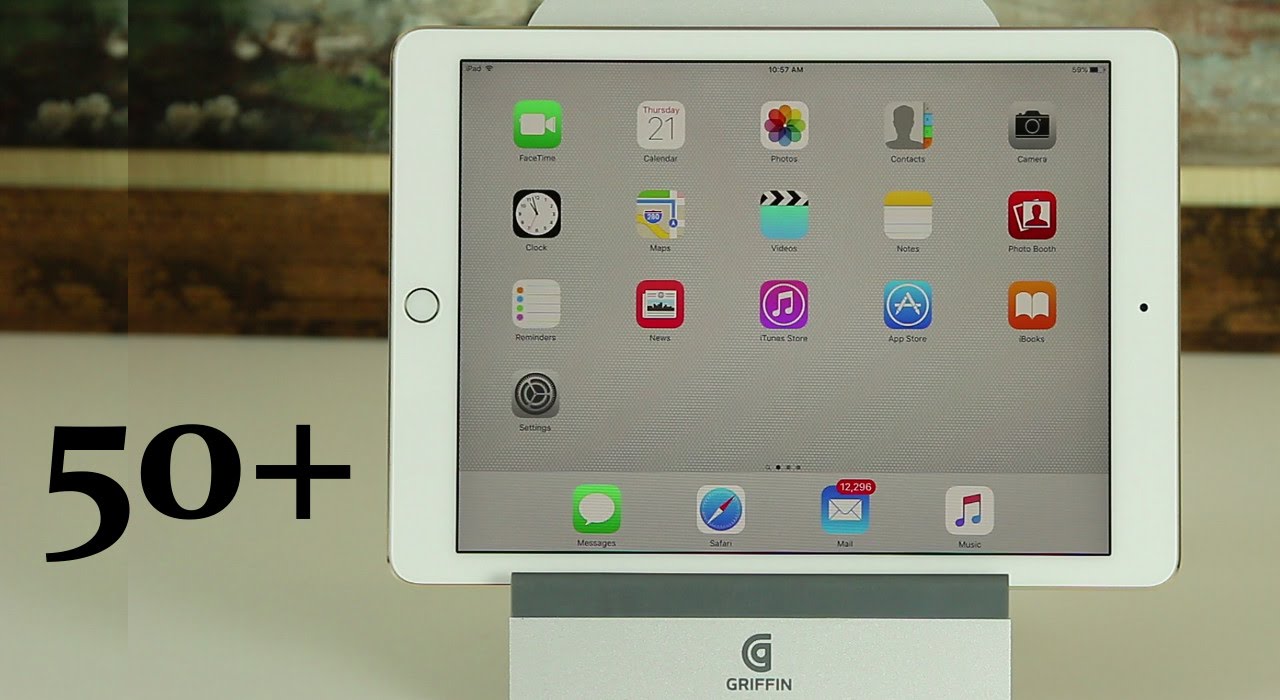
Hey there sake here from sake check it in today's video I want to share over 50 plus tips and tricks for the iPad Pro. The iPad Pro is a powerful device and iOS is full of tips, tricks and features which will enhance the use of your iPad Pro. So let's not waste any time and dive in, so you can master the iPad Pro. Meanwhile, if you want to buy the sturdy Griffin iPad stand seen in this video see the links in the description below let's dive in alright. So here is one of my favorite tips, which you can do is you can actually lock down individual notes? As you can see in this demonstration now before, we can actually lock the notes you do have to go into the settings you have to scroll down to where it says notes, and then you have to go into the password and from here you can set a password, and you can also enable touch ID. So you can actually use your fingertips to unlock the notes that you have previously locked so now.
Let me show you how to lock and unlock note alright. So once you set up the password go back into the notes, pick the note that you want to lock and then tap this share icon on the top right over here and, as you can see, there's an option here that says: lock, note tap it, and it's going to say lock added now, lock edit doesn't mean that the note has been actually locked. You do now have to press this button over here. That looks like a key, lock and tap on it, and then it's going to say this note is locked and of course, when you want to view this note, you either tap over here or you can actually tap on the key lock and that's going to ask you to enter your password or use your touch ID. So, let's use our touch ID and there we go.
So the note has been now unlocked fantastic way to hide your notes, alright, so the next step. So let's say you were in Safari and you were browsing. The web, which you can do is in Safari in maps and in some other applications. You can save a note about what you're. Looking at without leaving this app, so let's say you are reading this article, and you want to make a note of it, so you can take a look at it later.
All you have to do is tap this icon on the top, the share button, and then click Add to notes, and that's going to save that into the notes. It's even going to give you an option of what it's going to look like when it goes into your note, so click Save, and then you can now move on to something else. But when you come back later to your notes, application you can find that note that you saved, which is over here and if you click it. It's going to take you straight to that last page that you want it to come back to later now. I'm 100% sure that all of us know about Siri, but you do know that Siri can do a lot more than you think.
Three things: I use Siri is to convert numbers to do mathematics and to toggle settings on and off just by using my voice now before, I show you guys some examples. I want you guys to go into settings, go into general, go into Siri and make sure this option over here is in fact enabled this is going to allow you to launch Siri hands-free without having to press and hold this button, which is a usual way to bring up Siri now I can just say, hey Siri, and it comes right up. So let's say I'm working a project and I want to convert inches into meters. I can just be sitting on my table and say: hey Siri, convert 20 inches to meters and, as you can see, you get the answer right on the spot, and next you can do some math and that doesn't just mean two plus two or five plus five or 20 times 55. You can actually chain these together as long as you want.
So take a look at this: hey Siri, what's five plus six plus seven plus 25 times 50 divided by 25, absolutely fantastic and finally, just to give you an example: if you pull up the control center, as you can see, have some quick toggles you can enable or disable Wi-Fi you can enable or disable Bluetooth, and if you want to disable Bluetooth, you just tap on it and that's off right now. Siri can do this, for you us by using voice, commands so watch. This hey Siri turn on Bluetooth, fantastic, let's move on, so you may or may not know that your iPad Pro nine point. Seven inches come with a fantastic camera. In fact, this is a world-class camera that you can also find on the iPhone 6s.
As such, you get some powerful options now. The first thing I'm going to talk about is, if you launch the camera, as you can see, by default, there's no grid on the camera. It's always a good idea to enable the grid, because it allows you to align photos much better when you want to take that dream shot. So, let's go into the settings and let's scroll down to our sis, camera photos and camera tap it and at the bottom here with this camera enable the grid. Now, if you go back into the camera, you'll see that there's a nice little grid, that's going to allow you to align photos much better and, of course like we said this is a world-class camera, and it comes with amazing video recording options such as being able to record in 4k at 30 frames per.
Second, let's go into the settings I'm going to show you guys how to actually toggle between different video recording modes, so go back into settings again under photos and camera and under camera over here go into a record video and from here you have four options, so you can pick 4k at 30 frames per second, you can do 1080p at 60 frames per second and also 1080p at 30 frames per second, and if you look at the bottom over here, it even tells you that if you record one minute of video at 4k, you're going to be taking 375 megabytes of space. So that is a good reference point. So if you record three minutes of video in 4k, that's almost one gigabyte, so just be mindful of your storage capacity and quickly. If you go back into the camera icon over here, you can see that if you scroll over to the video option, it will say 4k over here. So you do know that you're recording at 4k.
Now, if I go back into the settings and if I pick 1080p at sea frames per second and then, if I go back into the camera, you can say that you can see that on the top here says 60fps and you know by default, that that is 60fps at 1080p and if you go back into the settings and if you do 1080p at 30 frames per second, it's not going to show anything. So if you don't see anything that means you're recording at 1080p at 30 frames per second now the same thing applies to actually on slow motion video. You get two options. If you go back over here, it says record slow motion. If you tap it, you have the option to record in 1080p at 120 frames per second or 720p at 240 frames per second again.
It will tell you how much space it's going to take if you record one minute of slow motion video in any one of these two options. Now let me quickly go to the camera. I'm going to show you something really quick, so camera oops camera and let's go to slow motion video recording over here, as you can see on the top, it says 120 frames per second, which means we are in fact in this mode. If you put this mode on and go back to the camera, it's not going to say anything. So if you don't see nothing, it's 240 frames per second next option: the secret menu that a lot of people do not know about.
So, let's go into the settings to enable this menu settings go to general, go to accessibility, scroll down to where it says, assistive touch tap on it, so enable assistive touch and, as you can see, there is now an icon that you can grab and float about on the screen. So, let's go back out here and see what this thing can do. If you tap on it, it's going to give you a bunch of options. Now the most important option is obviously the HOME key okay, so let's say I was in Safari instead of pressing the hardware. Key I can actually press this and then press home and that's going to serve the same function, but it's going to be a software key, but that's not everything.
So let's say I want to pull the notification center down. Normally, what I do is I would pull it down from the top or, if I want to pull control center. I pull it from the bottom. Okay. Now with this, many over here, I can tap on it, and I can actually just tap the notification panel.
It brings it right down, and I can do the same thing with the control center. So if I tap this and tap control center, it brings up the control center, not bad at all, and you can go much deeper again. If you tap this thing, you can even bring up Siri if you tap this. What's 2 plus 2 and then let's go back home from here home tap it one more time, tap device, and now I get the options you can lock your screen. You can decrease the volume or increase the volume you can rotate the screen.
You can lock the rotation and again, if you tap more, you get even more options and here's how you take a screenshot without having to press the hardware buttons so normally when you want to take a screenshot, you have to press the home button and the power button at the same time and that takes a screenshot. But with this many of the secret floating mini of the assistive touch, you can tap right here and boom. It takes a shot for you. Now you can even go a little deeper. You can go to the settings and if you are in the assistive touch menu, as you can see, you can customize the top-level menu.
Now, if you tap this, this is the top-level menu all righty. If you click this, you can see the replica over here. So let's tap this, and this is the same thing, but the good news is you can in fact customize the top-level menu, so ? and the icon disappears. If you say, plus you get a plus symbol, you tap it and from here you can pick whichever option you want. So let's pick home fantastic.
So, as you know, the iPad Pro is a powerful device, and it allows you to do multitasking. There actually are three different ways to multitask. Let me show you all of them. One by one I do have a video that goes into the details of complete multitasking tactics, so you can watch that video. The link is in the description, but I'm going to give you a quick overview over here.
So let's just launch Safari now. The very first thing you can do is called slide over. You can slide over from the right to the left, and that brings up a quick window that you can work on really quick and when you're done, you can tap over here, and it goes back into the Safari or any other app that you are working on. So this is in fact slide over. This is not real multitasking, but it allows you to quickly peek at an application.
Now, if you pull from bottom from top to bottom, you get some other apps you can play with. So let's say: I wanted to look at the clock or set an alarm. I can just tap this. Do what I have to do tap here, and we're good to go? So that's slide over now. What if you want to do split-screen multitasking, meaning you want to work on two applications at the same time, all you do.
Are you bring up the slide over, but this time you tap this bar? You see that white bar over there, you tap it and that activates real multitasking. Now you can adjust the size of the apps, and you can work on this one and this one simultaneously, and this is what we call real multitasking, and again you can scroll from top to bottom, and you can go into any app that is supported. Okay, there's a lot of apps. You can do so. Let's just show you the Maps application, so there we go.
I can be working on the Maps, silky-smooth and I could also be looking at a website. Fantastic next multitasking option is called pip, it's called picture and picture. So what you can do is you can actually watch a video while you're doing something else. So this feature is compatible with only certain video apps. So, for example, if you had any movies in your videos' application that would be working perfectly fine, but in this case I don't have any movies.
So let me use the Crunchyroll application to showcase how the pip works. It is called picture in picture viewing. So let's launch Crunchyroll over here and let's just play any video. Let's just tap this go over here. Let me lower the voice all right, so here's what you have to do.
You can either press the home icon or you can press this icon on the top over here. So, let's press the home icon and see what happens so as you can see that video is now playing on the side on a tiny screen, and you can take it, and you can put it anywhere and while you're watching the video, you can go to Safari and you can start doing stuff. You can go to your mail and start checking your emails. Whatever you want to do, you can also increase or decrease the size of this window simply by pinching out or pinching in. This is the maximum size you can have, and you can put this into any corner, and you can also pinch in to minimize it and then, when you're done, press X and that's going to kill the video.
So here's one way to reduce the eye strain. If you're reading a book go to settings, go to general, go to accessibility and simply invert the screen to the grayscale mode and that's going to disable all the colors. So now, if you go to anywhere on your iPad, all you're going to see is black and white. If I tap and go to Safari, as you can see, all the colors are gone, so you can read this website, and it's going to produce less eye strain on your eyes. The next thing you can do is, if you go back into the settings same options, let's just disable this for a minute.
You can also invert colors. So when you tap this, it's going to invert the colors of the entire iPad, so the complete color scheme is inverted. No matter where you go, everything is going to be reversed, so let's go to Safari and, as you can see, it's all reversed I. Don't know why you want to do this, but it is an option you have so, let's undo this while we are here, let's also look at all the other tips that are possible so over here you can actually enlarge the text, let's tap on it, and you can use the slider to increase the size of the text. So if it's hard for you to read this stuff, you can increase or decrease the size, and you can also bold in the text now, if you tap this, it's going to ask you to restart your iPad, and you probably don't want to do that right now, but if you do want bolded characters across your menu, you can bold in the text and of course, we tap on button shapes that's going to actually give you a button shape on your menus already.
So just take a look at the difference. Tap this no button tap it. You get a little button. So if you like that option, you can play with that as well. Okay, so the next tip has to do on how you can change the background color of your notifications panel.
So as it is right now, if you pull this thing down, it's actually transparent, so you get that sense of translucency. So whatever is in the back over here kind of reflects through the notifications panel, and you get that sense of transparency, the one option you have is you can actually change this color to a solid black. So how do you do that? Let's go back into settings, let's go to general, go to accessibility, go into increase contrast and simply reduce transparency. Now, if I go back out here and if I pull the panel down as you can see, it is solid black. Not only did this change but, as you can see the bar over here, this bar horizontal bar is now gray and then, if you pull the control center, it's going to be solid gray.
So if I go back over here disable this, as you can see, everything is much more transparent and if I pull this down, you get that sense of translucency over here too. But if you do want solid colors, that is in fact an option. You have next tipped, allow your iPad to read for you. So let's just go into notes just to show an example and here's a little quote over here and let's say that I want this quote to be read by the iPad. To me all I do is I select the paragraph that I want to be dictated so press and hold.
Let's just select this whole thing over here, and then I can tap on speak. The desirable kind of discipline is the kind that comes from within, which consists in the power of, and that's going to start to read the whole thing to me now by default, this option is actually disabled and if you want to enable it go into the settings, go to accessibility, go to speech and make sure speak selection is in fact enabled. So when you select any text, you can tap on that speak button, and it's going to speak the whole paragraph for there's also a little curious thing over here. That says, speak screen now, if you tap this and enable it all you have to do is use two fingers to swipe from top to bottom Steve selection on a stick bug and that brings up a menu that allows you to allow Siri or the iPad, to read to you about. What's going on the screen over here, and you get the speak button, you can go forward, you can make it go faster slower, and you can cancel it out.
Nothing special, but it's an option that you have so next up is one of my favorite features. So, as you know, the iPad Pro is your personal device, but a lot of people want to grab it, and they want to play with it. So you want to make sure that when you give your iPad to somebody, not everything is exposed. So to do so, you have to enable restrictions, and let me show you how to get that done by using restrictions. You can actually hide applications.
You can restrict certain things from happening on your iPad, so let's go to the settings, I'll go into general and simply go to where it says: restrictions now, the first time you click, it is going to ask you to pick a password just pick a password by tapping enable restrictions, and let's do something simple for now for this demonstration and there we go so. The first thing you can do is the top block over here you can disable Safari camera Siri, FaceTime and airdrop. If I go back out here, as you can see the camera icon, the Safari icon, they're all locked away. So if I go back into settings, I can't just go right back in the settings. I do have to tap on restrictions and put my password okay.
So the iPad is smart enough to know that and from here, if you want to re-enable the things you can just re-enable them, if I go back out, as you can see, Safari is back. The camera is back, I can now use Siri, but that's not everything. Let me show you one more thing. Let's say I want to delete an application. All I have to do, is go over press and hold, and that starts the icon start to wiggle, and you can press X and that deletes an application.
So what? If you don't want people deleting or installing applications on your iPad? Again you go into the restrictions. General restrictions put your password in okay, I'll scroll down and make sure you enable this option. Deleting apps is not permitted. So if I go back out here and if I try to delete something, the icon still wiggle, but there's no X symbol for me to actually delete the icons. So, let's go back into settings when I show you a couple more things over here, and then we're going to move on to the next step, but you can not.
You can also disable people from installing the applications and the biggest thing is you can disable in-app purchases? Okay. So if you give your iPad to a kid and the kid is playing a game, a lot of games have the option to purchase an app purchases, and before you know it, it could cost you hundreds of dollars so make sure that you have this disabled, especially if you have kids and of course, so this whole thing is about restrictions. You can go in here, and you can take a look at everything that is possible. You can restrict multiplayer. Furthermore, you can restrict people from adding friends in the multiplayer in the game center, so you have all these beautiful options to restrict access to your iPad.
So let's enable everything over here and go back and move on. So if you're, looking at your screen at nighttime, the brightness and the color is going to actually penetrate your eyes, and you're going to get eyestrain. So iPad has a new option. If you go into settings and if you go into display they're going to see two options, one of them is true tone, but true tone is not for eye strain. It just allows colors to appear more consistent in different environments.
Okay, so you should always enable true tone, because it is a very good option, but what I'm talking about for the eye strain is called a night shift. So if you tap on night shift, you can create a schedule so tap on this, and you can tell the iPad to actually activate night shift from X amount of time to Y amount of time when the time hits 9 o'clock, your night shift activates changes just as the screen, so it produces less eye strain, whether you're watching a movie reading a book or browsing the web. And of course, if you tap on these, you change the time of when you want nightshirt to activate already fantastic feature. Alright, so the next tip has to do with security. So basically, if you turn off your iPad and if you have a security, the reason you have the security, the password is because you don't want anybody accessing your information.
However, you may not be aware of this, but people can still access your notifications panel and sometimes over here, and here there might be some sensitive information. They can also access the control center from the bottom and this is happening. While your iPad is locked, you can in fact disable these things just to be fully secure. So all you have to do is go into the settings. Okay, now for the control center, you simply go into control center, and you simply disable the option that says access on lock screen.
So if I go back out there, control center is now not accessible, but the notifications panel still is so. Let's fix that as well- and this is slightly different, so you go into settings you scroll down where it says, touch ID and passcode, you tap it. If you do have a passcode, it's going to ask you to put it in. So, let's put that in and there is our menu and scroll down and over here it says, allow access when locked to the Today screen and the notifications view. So you can disable both of these guys.
Now, if I turn my iPad off and turn it on, I cannot get the notifications panel and when you pull the notifications panel down on the left side, you have the Today screen on the right side. You have the notifications panel, so, as you can see, you can individually lock those two guys, as you can see over here today, notifications view. Okay, so if you want to enable one of them, you can do so just so. You guys see what I'm talking about here. It is so now you get access to today's screen, but not the notifications panel alrighty, let's go back in and while we are here, I want to show you one more thing under touch: ID and passcode.
It says fingerprints and over here it says, left thumb right index, and then it says finger 3. So what is finger 3? Sometimes you may forget. So what I do recommend is when you scan up your finger in- let's say you click add a fingerprint, and you start the process, make sure at the end of that procedure. You go in here, and you actually rename the finger that you use index whoops index. Okay, so that's that allows me to keep better track of which finger I scanned in if I want to go in and make a change.
I can do so, especially if I'm going to delete a fingerprint, all righty, and while we are in the touch, ID and passcode section I want to show you guys, one more thing relating to security. So if you go down over here, it says require passcode, make sure this is always set to be immediately. What that means is, if you turn off your iPad, it quickly locks. There is no time frame where the iPad is on secure. So if I go back in and if I try to go in, it is locked on the spot.
You have to put your fingerprint or your passcode to go back in and finally, under the same settings, touch ID and passcode. If you want to be a hundred percent secure, if you want to protect your data- and you want to prevent somebody from guessing it by repeated attempts, you can set this option on. So basically, this is going to erase all the data on this iPad after 10 failed passcode attempts. If you do want to enable something like this, you want to make sure that you have a backup on your computer or somewhere off your iPad, because if you enable this- and if somebody does put that code wrong ten times, the iPad is completely erased. All your information, all your apps are gone, so be very careful when you're making this choice and, of course, if you have a backup, then you're fine, but if you don't have a backup, I wouldn't touch it now.
One thing I always do when I purchase a new iPad is fight. If I go into my emails and if I swipe an email to the left, it actually trashes that email I prefer that option now by default. What happens is when you swipe to the left? It actually archives that email it puts it in the archive folder, so to change that option. What you want to do is you want to go into settings. You want to go into mail and pick the account that you want to make a change on.
So in this case it's going to be sake, tech and then click account and then click. Let's go over here advanced and from here it says, move discarded messages in to delete or archive. So if I pick archive, if I could go back and click done, if I go back to my mail, this time when I pull over is going to archive the message and that's something you may not want. You may just want to delete that message so always go back into settings advanced and make sure you pick delete mailbox all right, the next option. If you go into Safari, if you go to the tab over here, and you type in anything, let's say how to customize.
Whatever right and, let's just say, customize iPhone 6, you tap it. The default search engine for this search that you type in onto the top bar is actually Google. You can in fact change that. So all you do is you go into the settings over here, I'll scroll down where it says Safari and then tap on search engine and from here you have four options: you can do Google, Yahoo Bing and something I've never heard of duck go, but let's go to Yahoo, and I'm going to show you how that works. So if you go to Safari and if I search for something this time, how to custom, as you can see, this time is going to be using Yahoo as the default search engine and here's a quick tip for Safari, let's say you're you're at a website, and you have scroll down all the way instead of scrolling up all the way, all you have to do is tap the white bar on top here twice and that jumps to the top of that page.
Alright. So, let's talk about storage management, let's go into the settings and under general, what you want to do is you want to go to storage and iCloud usage now the first block is your local storage and the second block is your iCloud account which lives in the cloud. And if you look over here, you can see some quick stats so right now, I'm using 9.3, gigs and I have available 104 gigs on iCloud I'm using I have three point: three, which means I'm using one point: seven gigabytes and from this mini you can dig deeper to either one of these guys. So you type tap on manage storage and from here you get a full detailed view of which application is taking. How much space I have never touched.
GarageBand in my life, so I can delete this application. Let's go back here and simply click delete app and that's now gone so now. I have one point: two gigs of extra storage, as you can see it says, used, is now 8.1 gigabytes and I have 105 gigs available. If you were back out there, you can do the same thing for your iCloud account, so you can tap on manage. It takes a couple seconds because it does have to log into the cloud and again from here.
You have all these options. You can go into notability, for example, and you can delete the things you don't want by tapping the Edit icon, and then you just tap this confirms deletion. Everything is gone or you can delete everything now. As you know, iOS allows for Apple Pay. What it allows you to do is in certain applications.
You can use Apple Pay to make a payment so to set it up, you go to settings, and you go in to wallet and Apple Pay and all you do, is you add a debit or a credit card? If you tap this, it's going to start to walk you through the process of doing the entire thing. I recommend you guys do this, and if and then, if you go into an application that accepts Apple Pay, you can simply use your fingerprint to make a purchase. You don't have to worry about putting in passwords putting your credit card Apple. Does that for you one time and then, when you go to application, you simply press this touch ID sensor, and you make the payment instantaneously. Next tip has to do with the battery there's a little trick that you can do in the battery section.
So let's go to settings and let's scroll down to battery, and if you wait for a couple of seconds, it brings up the battery usage chart and from here there's a small button here you can tap on this clock icon, and that shows you. For example, if you don't clock, if you don't tap that it says in the last 24 hours, home and lock screen used 41% of your battery. If you tap this, it shows how many minutes home and lock screen actually used.41% of that battery, so I was messing around in the home and lock screen for 44 minutes. That was the own screen time oops right here on screen time and that ended up using 41 percent of my battery life. If you get Safari, it says, Safari took 10 percent of my battery life, and it was on the screen for seven minutes and, of course you can toggle this over here and if you toggle it off it's going to make the percentage and meter on the top disappear.
If you toggle it back on it's going to pop right back, it says fifty-nine percent battery. Well, thank you for watching this video make sure you subscribe to sake tech and give this video a thumbs up. Also follow me on Twitter and Facebook at sake, tech online, for which links are in the description below have a fantastic day.
Source : sakitech
Phones In This Article

Related Articles

![All Pixel 5 camera features as explained by Google [4K]](https://img.youtube.com/vi/PcM5OSphc-w/maxresdefault.jpg )


Comments are disabled
Latest Articles


