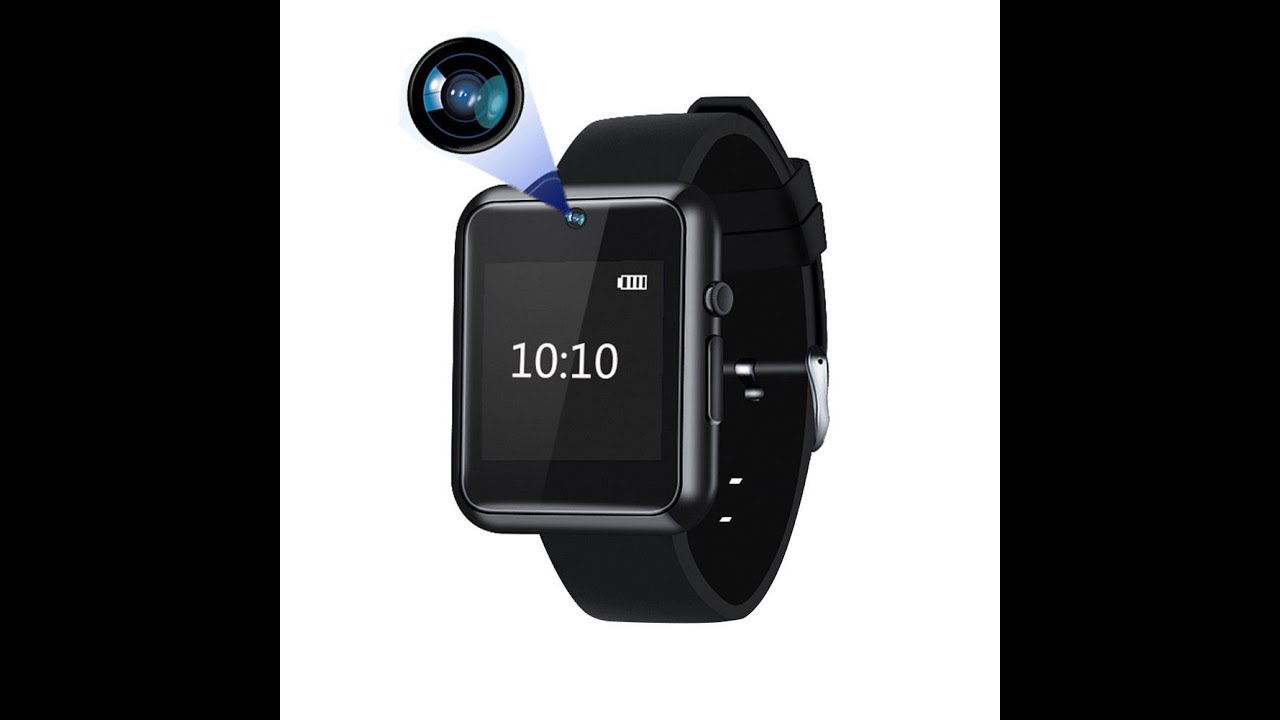
The Wide Angle HD 1080p Watch Spy Smartwatch 1.5'' LCD Camera Instructions Review And Unboxing By DIY University
Welcome to this instructional tutorial review and unboxing of the wide angle watch camera. Okay. So let's take a look at the box: okay, so let's open the box, okay, so wash down with some screws, some charger and data transfer, cable and here's the user manual. Okay. So let's take a look at the menu you. So what's an English as well as Chinese, it's a one-to-one, okay! So I'm going to remove this mist now in order to install the memory card, you have to remove the back to do that.
There are two screws right here, and you know Philips head screwdriver, and it's included with the watch, so I'm going to show you how to do that right now. Now the whole thing comes off with the band. So, okay, now you have to lift the battery right here is where you install the micro SD card: that's not micro, SD card Bay, so to install one right now. This camera takes up to 32 gigabytes of memory. Just now you have an option to where this is a watch, or you can put on another back cover which has a magnet and will allow you to mount this against a metal surface, and it will stick to it still home to install that right now to show you that's right here, as you can see, there's the magnet- and this goes right onto the back like so just replace the screws, and now you can use a couple of screws that this comes with.
It's included in the package that they give you to read where they actually give you, four of them, so I'm, going to install those two screws right now: okay, so I'm going to mount it on the metal service. Just to give you an idea, just has a metal surface. Here's to show you right here is the speaker at the microphone. So now, if the memory card Still, I'm, going to power on pressing hold down the power button for about three seconds, okay, what makes this hammer watch different from other ones is that it has a built-in LCD screen. So you can actually monitor the footage.
As you take it, okay now the screen shuts off there for just a few seconds, so I'm going to set it to stay on for longer, I'm going to go to sending this order screen off. Okay. Now it sets you stay on for one minute straight I'm going to go through the other features that system reset. This is where you restore the camera to factory settings its frequency. The default is 50 Hertz, it's time setting.
So here's where you set the time motion detection so to set motion detection it's off right now you just go to open, and our motion detection is activated loop recording. So you can set that as well from three to five to ten minutes. Yes, volume, you can even turn it on or off, there's no volume setting to turn it to a desired setting it's either on or office. If it's sound, you're hearing that was allowed us to get, so we could just turn that off okay burst. So you have two settings.
You have three shots of five shots for the camera. Now, there's a delete function over here. You can remove everything. That's on the camera! Here's the language sitting hole closer to the languages they set at you, okay, okay, let's take a video of this quarter. Video and, as you can see here, it shows everything that's in front of it on the LCD to start taking the video you just press the record button, which is right here, and you can see it's recording right now to stop recording press the record button again and to go back to the main screen, just press the button right here.
You know you can take photos if I take a photo press. The camera button now to take a picture press. The camera button right here to take another photo press, the camera button again to take another photo press, the camera button again and so on and so forth. Now to watch the videos and see the photos that you took on the camera, just go back to the main screen go to photo and there you go here are photos that you took and the videos that you took. Here's another photo, here's another photo and here's a video I have to play back a video press.
The play buttons. There you go now, you can manually, delete photos and videos right here by just clicking on the trash, can icon right there, and you just go to the trick, and it's deleted, and you can do the same thing with the photos, or you can just go to the delete function and options that I just showed you before, and that's another way to do it as well. Okay, to go back to the main menu just go to the corner or you and press the button. So what I'm going to do is right now I'm going to set the screen the auto screen off to three seconds, because for two reasons, if you want to use this as a spy camera, while it's recording, you don't want the LCD to show, because then it can be seen once you're recording. So if it just the chords, and it goes off it's going to be recording video while the screen is off and this way people won't suspect that it's recording.
Secondly, it also saves on battery life and that's important, because you want to get as much battery life as you can as you're recording, so I set it to three seconds to go off. You can always change the setting. I showed you how to do it. Okay, to pound the camera off. You have to make sure that clock is showing or something is showing on the screen.
And then you press and hold down the button for about three seconds and then the camera will power off, so I'm going to tap it once and there you go, that's how to turn the camera off. So what I'm going to be doing right now? Is it going to be taking some footage with the camera to see how it turns out? So please stay tuned. Okay. This is a test. Wide-Angle watch camera currently doing a video test to see how the video turns out and to hear how the audio turns out.
So here we go Wow you so the ego. This was an instructional tutorial review and unboxing of the wide-angle watch camera. So I hope you found this video useful. If you have, please show you support on this channel by subscribing feel free to leave comments. Please like up this video, and thank you for tuning in.
Source : DIY University
Phones In This Article

Related Articles


![Xiaomi Mi5 vs Xiaomi Mi 5s Speed Test | Snapdragon 820 vs 821 [Eng Subs]](https://img.youtube.com/vi/q8ddoF9BsC0/maxresdefault.jpg )


Comments are disabled
Latest Articles


