Samsung A10 Not Charging By MST

Hi guys today we have Samsung a10, not charging, let's do it, but the charger on make sure that device is not charging before you're doing this operation. Try one more time now we can disassemble a device remove SIM card slot. You can push using your nail or any plastic tool. There are no screws to the back frame. All you need to do is to push it remove all Scrolls from the top shield, because we need to unplug the battery the flex cable of the battery. It's hidden under the shield.
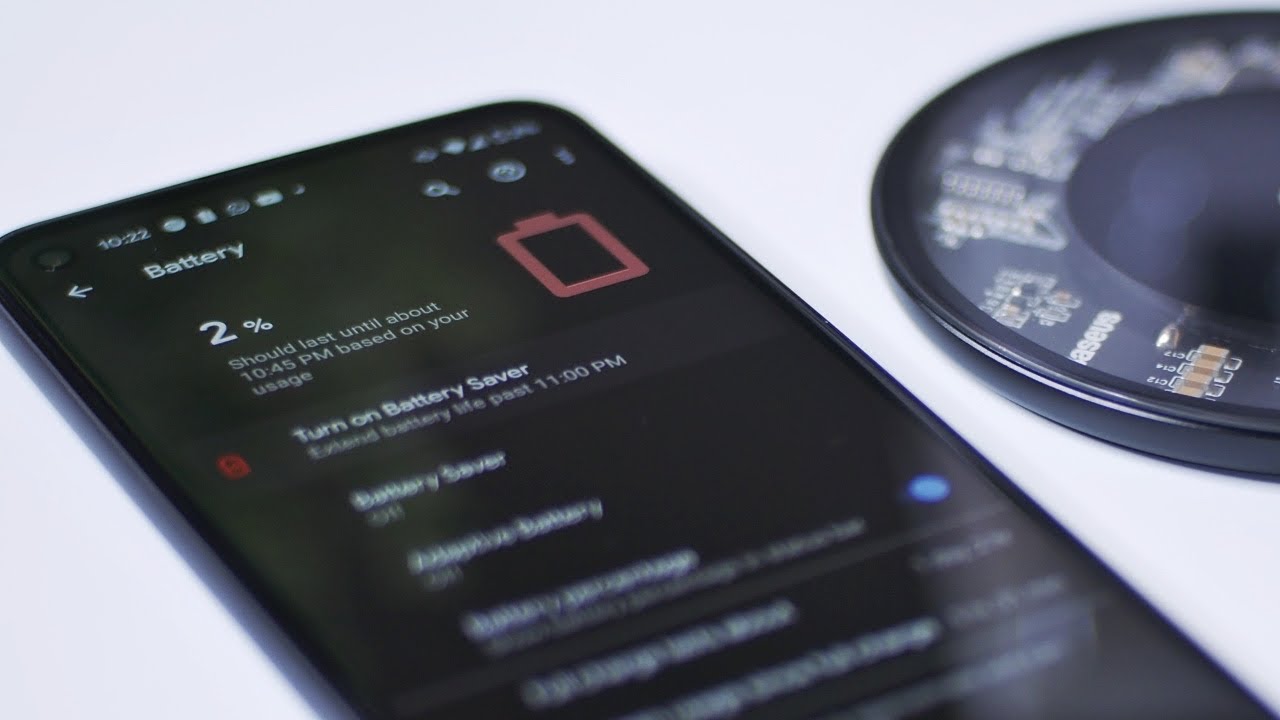
The plastic shield unblocks their battery. A device came dead, so I wanted to make sure the device wasn't bugged, so I try to power it on also no sign check their battery voltage. It's 2.70, and this is a problem. There was a circuit using the battery to be less than 3.2 volt. If the battery is less than 3 point, 2 volts the device won't charge.
The power from the charging board is 2. Volt must be boiled 3 to 4 volts. Ok, now we need to give some power to the battery from the outside. You can lose the charger cut. The wires like I did positive and negative and give the battery some power.
So when we can charge the device normally make the power to 3.50, and then we can let it go. Okay, that's enough! Now we need to replace the charging board. Remove the plastic shield and get the charging board outside can just replace the whole charging board with another one, or you can just replace the charging port with another one. Do whatever you think is best for you or easier for you now I'm going just to replace the charging port, remove their main flex cable, remove the antenna wires. There is tool you can remove them now.
I forgot to remove the other one. Put the charging port and holder get the charging port make some soda to it, but so during pest now bring the boss to remove it easily, we solder the legs. We need to make them in a good shape before putting the new charging port, then clean it with alcohol work, another soldering paste, and then we are ready to proceed. Sorry I didn't see that coming. There is no yo, but you know what is going on you just heal, ?, onion port to its place.
Let it cool down for a few minutes five minutes, and then you can assemble it and try before I. Do that I just wanted to make sure, or the legs are connected. Probably some legs not connected, so I'm going to do it manually, bring the soldering iron and solder them Oh God. Now we can assemble, invest, put the charger on and wait for it. Okay, we have a sign great job.
Now, let's just assemble the whole phone okay, now we can remove it and start assemble that was for today you can now just assemble, as you can see, reverse the operation, nothing to be told more than I told it you before. If you like, my videos, don't forget to Like and subscribe for me, we will see you in the next video see ya. Like/Subscribe enable the ring click subscribe in the circle for any questions, write it below.
Source : MST
Phones In This Article

Related Articles


![Samsung Galaxy M42 5G vs Poco X3 Pro Speedtest [SD750G vs SD860]](https://img.youtube.com/vi/qGRJzpBkE7Y/maxresdefault.jpg )


Comments are disabled
Latest Articles


