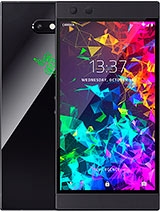
Replacing a Razer Phone 2 Battery and Back Glass / Battery Cover By Rick Aye
All right, so I'm making a little video on how to actually swap the racer phone to battery as there wasn't really any videos on how to do that. Except there were videos on how to disassemble it, but to not actually swap the battery and uh. You can actually watch the video up until this point, the other one which I'll link there. I'm going to continue unscrewing these screws. I would recommend having a plate or like a cup, to put the screws in, so you don't lose them all right. There is a tab right here.
Okay, battery connectors right here, just kind of lift it up gently and this whole unit should kind of slide it up and then out might be some adhesive from the glass which, on this phone, came broken. So for this you kind of just gotta pop it out and work your way out and try not to bend them the metal frame. Then you'll have to bend it back out. You are going to have to work this thing. You also want to try to not uh mess up the wireless charging pad or, like the other wires like going around it, so you are going to have to use force but be careful.
At the same time, the glue will eventually separate I'm actually going to try using a heat gun, see if that helps at all, and it seems to have helped quite a bit now it's coming off. It is bending the frame a bit. I'm usually done some more, that's, okay, you can just re-bend it's like then metal. You do want to make sure you don't mess up the ribbon cable for the wireless charging pad all right. So that's the frame.
Let's try to flatten it out a bit screwing it in will also help with getting it the right shape. There is a crack right here in the frame, but that was like that when I got the phone so for this part uh this wireless charging pad is pretty much just like a sticker, so uh. What I would recommend is actually like taking a picture of where it sits on the battery. So when you swap it to the new battery, you know exactly where it's supposed to sit so that way it doesn't like to obstruct the frame or anything or like the cable go underneath the frame, and you want to make sure that it actually goes around the frame. So that way, there's no obstruction for the pad yeah.
This is a pretty much just a sticker. You just want to pull it gently, I'm actually going to start from down here. So all right, as you can see that this battery is like, I don't know if you can tell really, but it is swollen- and I actually couldn't get a new back glass on it, because the battery was swollen because the phone came with the cracked back glass which we have here, and then the new battery is right here, and I do sell these by the way they're kind of hard to get so yeah. We have our old battery, and then we have our new one. So we're going to try to make sure that it lines up correctly.
You can have a peek at the picture if needed. You can also actually use the frame to help guide. I haven't done one of these batteries in a while, so I'm kind of just remembering it as I go all right, so that's pretty much where we want it. So I'm going to go ahead and take the frame back off, so I can really press down on it. Take the heat gun a little, not too much illusion should be good yeah.
This one is not in the best shape, but it still works. I tested it before taking it out. You see here, oh yeah, so I think, with these new batteries, the little uh connector doesn't always line up, so you kind of have to get the wire and then just kind of pull it out and then shape it to make it fit. I'm actually going to connect it, so I can get the proper placement. Sometimes you have to kinda, look for it foreign um.
So oh my gosh, it's not going as easy as it usually does there we go now that you have the connector in just kind of place. The frame back on make sure the ribbon cable doesn't get attached to the part, doesn't like to snag the ribbon cables. Actually, it's still a little bent, I'm going to take it back out and just kind of like look for where it's bent and then try to correct the bends. It looks relatively straight: let's try it a little bent right there, but that's not a big deal as long as like the main thing is like how the frame going around that's the most important thing. Also, uh.
When you take out the phone, you should probably take a picture of where all the screws sit. So that way you know where they all go. So that way, when you put it back together, you can use it as a reference. Wait that one is just a pin. Hmm, I don't like how this is sitting all right.
That's better! This actually plugs back in right here, mm-hmm, oh shoot! I messed up, so I forgot to actually tuck this bracket. See this bracket right here forgot to actually tuck that in that's annoying oops see if I can put the frame back in without taking out the battery connector yep nice uh man's screw there we go sorry if my hands are covering anything. It's just a weird camera angle, literally sitting on a mug all right, um, a black screw there, a little one there too, and a silver one right here. Remember they're, seeing like uh one link to where there's like pictures of them like taking off the front grills like all this other crap. You don't need to do that.
Maybe it was the razor phone one, but on this phone you don't need to take the front girls enough to replace the battery all right. Let's see here, uh, okay, she got to put this tab in like that, then put the silver screw in oh gotta connect this in first click, the little connector right there and okay. Okay. There we go now it's sitting in good. You just keep going.
Let's keep scrolling hmm there's some locate on this, I'm going to try getting a screw from somewhere else, see if it likes that one more all right that one looks like it grabbed all right and the last two. Let me place the sticker back down and uh. This camera app had a little of a haircut on that camera lens. I could tell had some dust on it: just going to hit it with a microfiber, make sure you don't do some mike nasty microfiber and same thing with the lens uh. Be careful when you do this, of course, but there's definitely probably some dust that came on here, so it was like shattered like the back glass was shattered.
When I got it, so you just place the camera lens after you wipe it down, and the new lens comes like that, just peel it off, and then this has the adhesive on it. So we have to kind of poke. It out place the new glass on, and we hit it with the heat gun he's pretty hot. By the way you may need to go over it a few times. Let it cool first, but we're looking pretty good turn her on yeah.
We got power, and it works see how much battery it came with that brand-new battery came with about 50 charge, sweet all right. Well, thank you very much. You can see me in the reflection of the phone. If you need a back glass or a battery, let me know.
Source : Rick Aye


