iPhone SE Camera: Top 5 Unknown / Hidden Features! By Techisode TV
What's up guys, Eric here from episode TV, and today we're taking a look at the top five unknown camera features on the iPhone SE. Most of these features work with other iPhones as well as long as you're on iOS, 13, 4.1 or higher. I also have a second unknown features: video for the iPhone SE, where I cover a bunch of non camera related features. So if you want to check that out, you can follow the link at the end of this video or the link in the description with that out of the way, let's get started if you're taking a bunch of pictures- and you want to immediately start filming, all you have to do is hold the shutter button, and you're gonna start filming when you're done filming whatever you want just release the shutter button, then it'll save the video. If you're holding the shutter button to film a video- and you suddenly decide you want to film for a lot longer, you can just swipe the shutter button over to the right, and it'll, lock you into video mode. Alternatively, you can just swipe to the right from the beginning, and it will lock you in a video mode right away.
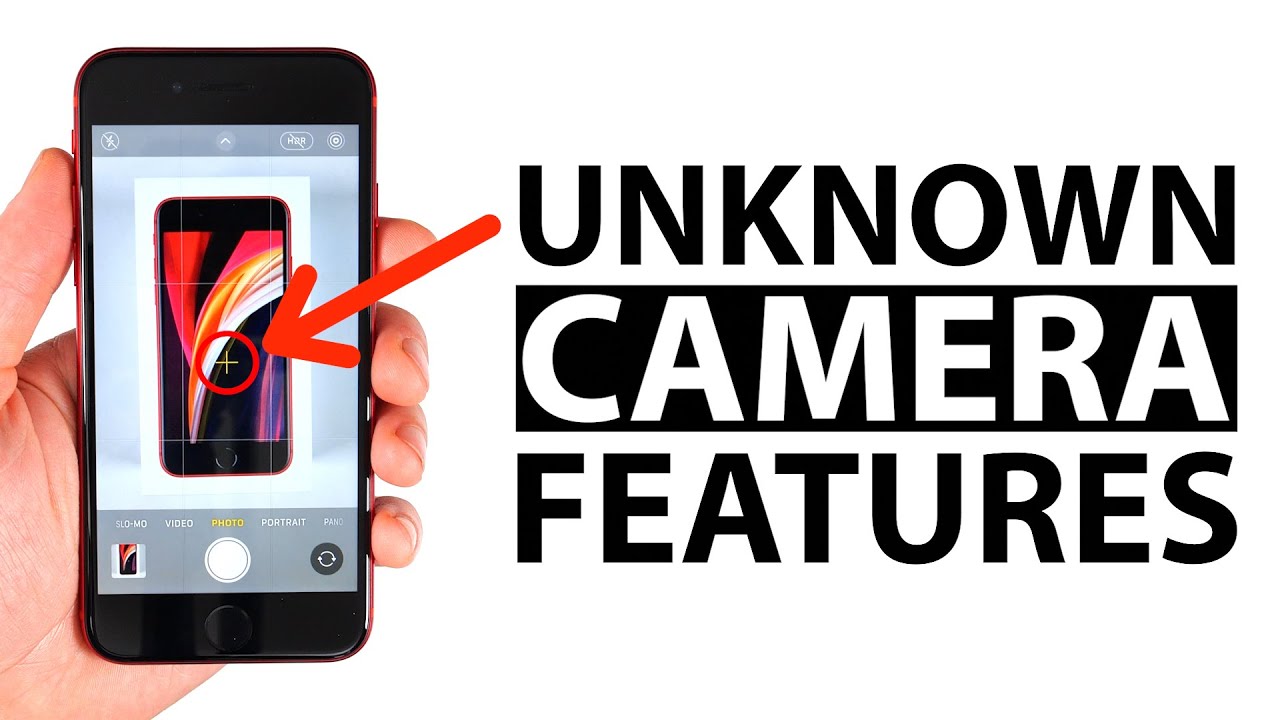
The one downside with filming like this is that you're going to get a 1920 by 1440 resolution, video, which matches the four by three aspects: ratio of the pictures and if you're taking a square photo, which is one by one, then you get a one by one aspect: ratio, video and obviously the same thing goes for sixteen by nine, which is the resolution that most videos are filmed in, and this would give you a 1920 by 1080 video and just to be clear. It's 1920, regardless of what your video settings are set to. So even though I have a 4k video setting in my video mode, I'm still going to get a 1920 by 1440 resolution video when I record a video from photo mode. If you swipe the shutter button to the left, you'll start taking a burst photo while we're here, you'll notice that there is a yellow crosshair, and this is telling you when your phone is level. So if I start tilting this a little.
If I get my hand, bonfire and I start tilting it one way or the other you'll see, there are now two crosshairs moving around and when I get it perfectly level, then it's going to lock in place and turn to a yellowish, color and now. I know that my phone is perfectly level now. This is mainly useful form. You want to take a picture straight down on top, and you want it to be perfectly level. You don't want it to have any sort of like angle to the picture at all.
Then this is a great way to know when it's level, unfortunately, the crosshair disappears when you go to take a regular picture. So if you're, taking a picture like this of a landscape, and you're trying to level that and make sure that's perfectly level, there is no feature to help you do that on older iPhones. If you want to change the resolution and frame rate of your video you'd actually have to go to the system settings and then navigate to the camera application go into those settings and change it from there. Every time you wanted to change the settings on newer iPhones, it is much easier now all you have to do is tap the resolution, and it will change from 4k to HD, which is 1080p, and then you can tap the frame rate as well and change that from 30 to 60 for HD resolution. If you switch to 4k, you can do 20 for 30 or 60 frames per second in case you're wondering this also works with slo-mo videos, so you can change it from 240 to 120 frames per second, but you are stuck with just HD resolution.
If you switch to the front camera, you do not get the option to change resolution or frame rate, because the iPhone SE only records in 1080p at 30 frames per second with no other options. However, if you have a higher-end iPhone like the iPhone 11 Pro Max, then you do get the option to change the resolution and frame rate for the front-facing camera as well. If you want to check if your last picture came out, good all you have to do is swipe up on the preview, and you can quickly preview that image. If you swipe back down, it goes away, and you can go back to taking photos immediately if you were to swipe up and let go it'll, take you into the Photos app, which is the same as just tapping it. If you just want to film a very short video, all you have to do is press and hold the record button, and it's going to record as long as you're holding that button.
If you let go of it, it's going to stop, recording and save the video. Alternatively, if you were holding the button and then later decide, you know what I want to film for a little longer. All you have to do is swipe the button to the right, and you're going to go into regular, recording mode and in case you're wondering this is filming at the resolution that you have your video mode set to. If you tap this icon in the upper left corner, it's either going to turn slash completely off or have the option to turn it on automatically if you're filming something really dark. The problem with this is if it's not super dark, then that flash automatically turns off.
So if you wanted the camera flash to stay on while you're filming so that you could film underneath something like let's say you lost something under a couch or behind a piece of furniture, then the way to do that would be to swipe up while in video mode now you get a new option called on so go ahead and tap that that's going to turn the light on and keep it on, even if you're, not filming, then when you start filming it's again going to keep that light, turn on. So, if you're looking for something in a dark place, this is a great way to keep the flash on this one's kind of bonus feature because it isn't really hidden. Typically, when you go to take a panorama photo, the iPhone will make you take it from left to right, no matter what, if for some reason you want to take the panorama photo from right to left, all you have to do is tap the arrow, and it'll. Let you do that. Here's another bonus feature that isn't hidden at all, but a lot of people don't know how to use this, so I just wanted to share it with you guys.
Anyway, if you tap anywhere on the screen, it will focus and change exposure based on where you tapped, but if you're taking a picture of people with like a sunset behind them, a lot of times that still doesn't work very well and the people are super dark and the sunset is properly exposed. If you want those people to be more properly exposed, so it's easier to see them. Then all you have to do is tap anywhere on the screen and start swiping up, and it'll actually make the entire image brighter so that you can see the people's faces easier. Now the sky might get a bit blown out, and you might not be able to see as many details but at least you'll be able to see the faces of the people you're taking a picture of, and the same goes for swiping down if you swipe down, if it's too bright, and you're, taking a picture of maybe a sunset you're trying to bring it down just keep swiping down, and it'll make it darker. Let me know how many of these were new to you in the comments below and don't forget to turn on notifications by clicking the bell next to the subscribe bike on below.
So you don't miss another upload, that's it for this tea sold! God bless guys, and I'll catch you in the next one.
Source : Techisode TV
Phones In This Article

Related Articles


![Nokia 5.4 vs Nokia 3.4 - CAMERA TEST [Video, Images, Ultrawide,Selfie ] Comparison](https://img.youtube.com/vi/JY5MhLWlAbM/maxresdefault.jpg )
Comments are disabled
Latest Articles


