iPhone 7 Plus Screen Replacement done in 6 minutes By JerryRigEverything
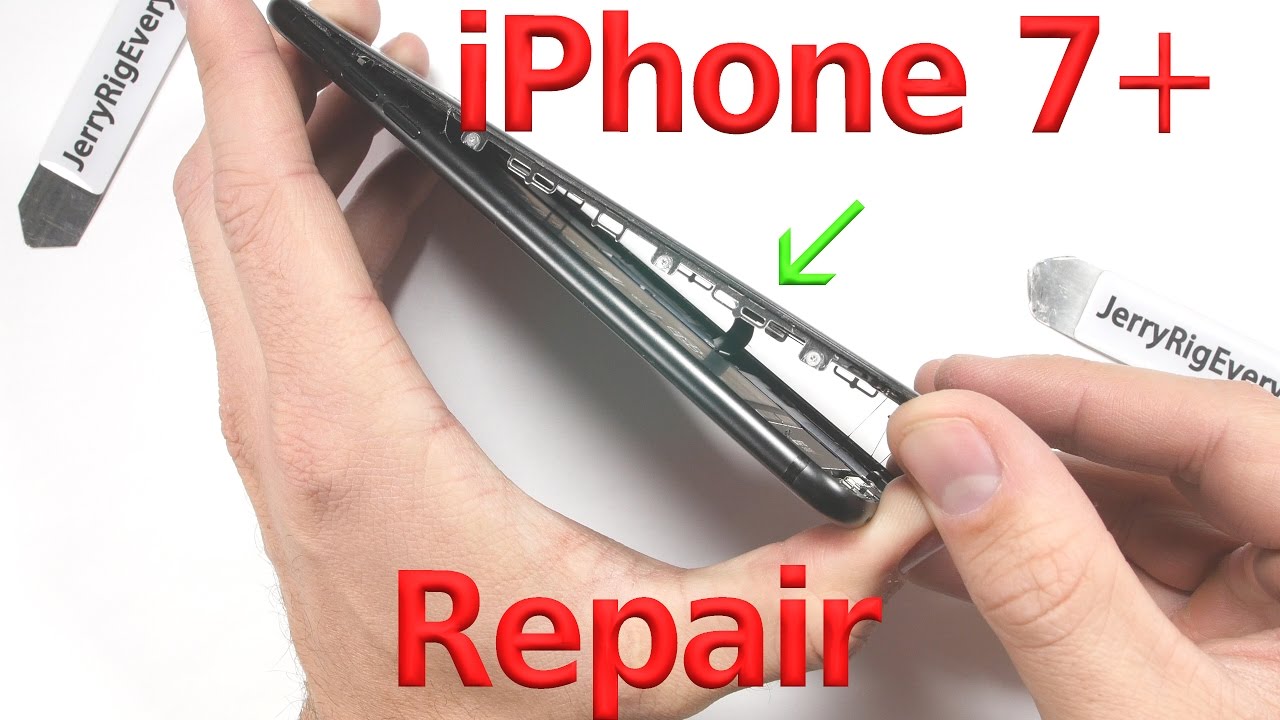
It's time to replace the screen on an iPhone 7 Plus. This is actually my personal phone. The only phone I have ever broken...... on accident. Everything still works great, its just the screen is shattered to bits. I went to hug a friend and her purse knocked it out of my hand... and it was "Merry Christmas" to the ground.
The broken LCD perfectly blocks out my battery life indicator, the time of day, and and the name of the person I am texting. So it is definitely time to fix this thing. Its pretty much the exact same process as the regular iPhone 7. There are two pentalobe screws down at the bottom of the phone right next to where the headphone jack used to be. If you need a screwdriver or a replacement screen Ill link those for you in the video description right below this video.
Now, heat is not 100% mandatory for this repair, but it does help soften the thin band of adhesive that surrounds the screen on all sides. This is a type of waterproofing adhesive. So after completing this repair, your phone will not be water resistant any more. But.. if you screen is cracked, its already not water resistant.
So you aren't losing too much. Im taking one of my thin metal pry tools, and going between the metal frame of the phone, and the plastic edge of the screen and cutting through the adhesive. This makes lifting off the screen a lot easier. Dont slide very deep though, because there are ribbon cables along the right side of the screen that are very important. The bottom of the screen will lift up, and then you have to pull the top of the screen down and out of the phone frame, before the whole thing flips open like a book.
For this next part we need a new bit, its called a y000 tri point screw driver. And Ill include a link for that in the video description. There are 7 of these tripoint screws holding down 2 of the silver plates. It is excruciatingly important that you keep your screws organized. Put them on a separate piece of paper next to you, and draw a picture or label where each screw comes from.
Some of them are different sizes. Ill use a plastic pry tool to unsnap the battery connection. So that there is no power to the rest of the device. And then Ill start uncliping the little ribbon cables. These are just like little mega blocks.
Once the display and fingerprint scanner ribbons are disconnected you can unsnap the top earpiece ribbon. And that will release the screen from the body of the phone. Here is what the replacement screens look like. Remember Ill have these linked down in the video description. It is super important to be gentle to the ribbon cables.
If they get bent or kinked too far in any direction, your new screen will not work after the installation is complete. We do have to transfer over some of the components to the new screen, like the ear piece and the home button. Ill start with the earpiece. There are 5 screws up here at the top that need to be removed. These ones are a regular Philips head screws.
Now that the screws are out, Ill remove the top metal bracket and then slip out the little ear piece speaker, Then comes a tricky part. This little ribbon cable might look complicated, but its actually not. It is fragile though. And while it is very inexpensive to replace... its better to just keep the original intact and not rip anything, so be very gentle with it.
It's about as strong as paper is. And each little segment, like the front camera, the proximity sensors, and the little golden circular contact points have some adhesive holding it to the back of the screen. Ill show you how to oragami it back into place in a second. But first lets get this home button transferred. There are 4 screws that we have down here.
These are the same Y000 screws we were working with before. And once those are out, we can remove the metal bracket. This exposes the guts of the fingerprint scanner touch pad. There is one more super tiny ribbon connector. Remember that this ribbon is also very fragile, so be very careful with it, since the original home button does need to be transferred over to your new screen.
Once the ribbon cable is lifted up the button will just fall out front the front side of the phone. There is only one more thing we have to remove from the old screen and that is the large metal backplate. This also has the Y000 screw on it.3 on one side, two screws on the other side, and one more little screw down at the bottom. There is some adhesive holding the plate to the ribbon cables, you can lift that up, and then slide the whole plate up and away from the back of your old shattered screen. Take that same plate and feed the ribbons from your new working display through the little hole.
Make sure to be gentle with the ribbons, and make sure they are straight, and not kinked before you screw the plate down. Get all the metal frame screws in place.3 on the right, one at the bottom and the two on the left side. Then the home button gets put back to place from the front side of the screen. There is a little plastic guiding pin on the back of the screen that will help get the little ribbon fall in the exact place that it needs to go. Then it can be snapped into the other little connector right next to it.
When you are screwing the screw for the back of the home button, make sure it is snug, but dont go too tight. Its a pretty fragile little piece of tech and a super aggressive screw might cause damage. Now lets get the front camera and ear piece into place. Remember those little plastic pins I was talking about? Those are going to be your friend up here as well. Get the ribbon down, by lining those up, and getting the little box sensor into place.
It'll be like giving a cat a bath, but eventually everything should line up. The speaker gets tucked under the front camera, making sure the gold springs line up on the gold contact circles. And after the camera is tucked into the clear plastic circle, the metal plate can holds it all together. And finally we can attach the screen to the phone body again. I start with the two ribbons in the center , then clip the top ribbon down right afterward.
You'll feel each of them snap into place, just like a little lego. (That has a much better ring to it), The last thing you want to plug in is the battery connector. Before putting on the metal plates, I usually test my screen to make sure everything works. If the screen is grey, or has lines running through it, it might just be a bad connection. So turn the phone off, and reconnect the little ribbon cables again.
If that doesn't work, one of the ribbons might have gotten bent during the installation. Or it could just be a bad screen. Get the 7 screws back in over the metal plates, and then make sure to get the top of the screen lined up with the phone body first, before clamping the rest of the screen. Also, dont put any stress on those right side ribbon cables. Remember they are as fragile as paper.
And very very important to the functionality of your phone. So don't let them rip. Thumbs up for success. I have a working phone again. I'm normally an android guy.
But ive been using an iPhone for the past few months. Ill have my review video posted with my verdict very very soon. Let me know if you have any questions! I try to be pretty active down in the comments. And if I dont respond, someone else sure will. You can usually get an answer pretty quick here on my channel.
My twitter followers heard the story of my broken phone the night it happened, so if you wanna stay up to date on random stuff like that head on over to my twitter. And if you've made it this far in the video... comment your favorite flavor of ice cream... Im always curious as to who makes it to the end of my videos... I personally prefer Oreo Ice cream.
The more Oreos the better. Thanks a ton for watching! Ill see you around.
Source : JerryRigEverything
Phones In This Article

Related Articles


Comments are disabled
Latest Articles


