iPhone 7 Plus Camera "Real World Review": A DSLR Killer? By Jared Polin
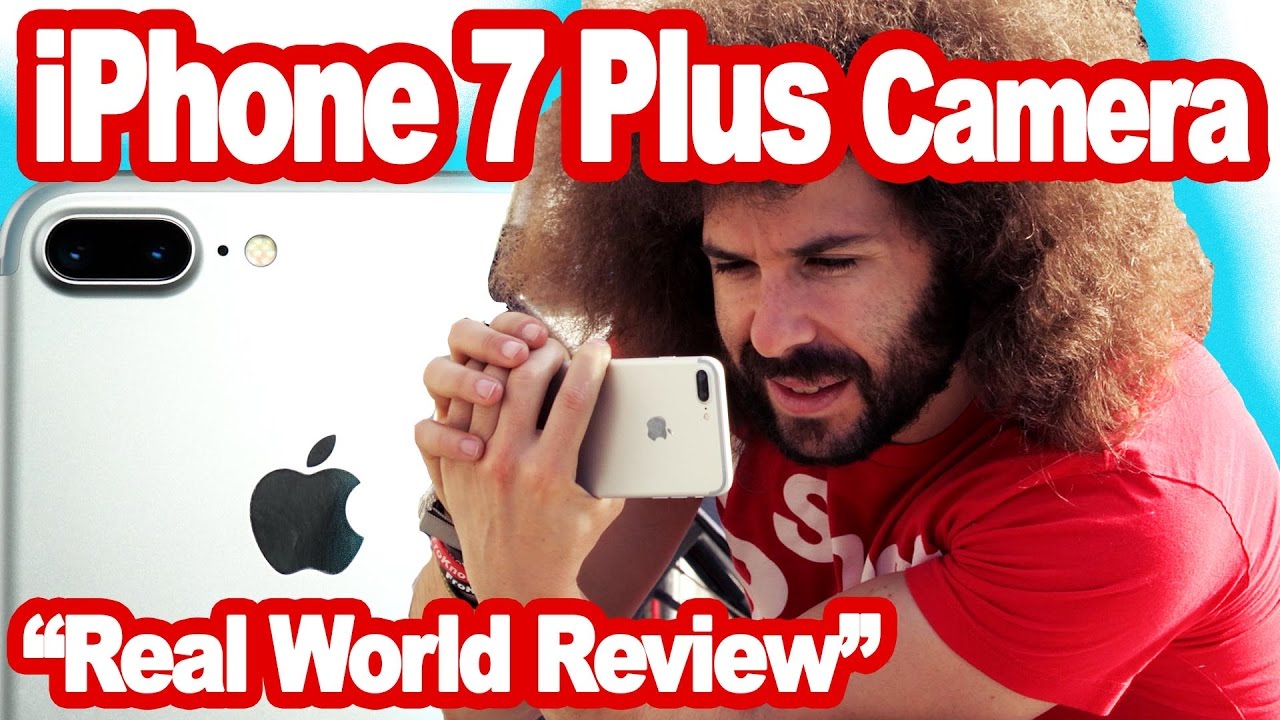
Jared Polin: Right before we start this real world review, if you haven't signed up for the fronknowsphoto email list, just look for this orange box over on the website, put your name, email address in it, hit send it, and I will send you a free guide to capturing motion in low light situations. Jared Polin, froknowsphoto. com, and this is real world review from Berlin, Germany of the iPhone 7 plus dual-camera system. Guten tag. So, the first place we started to shoot was at the Brandenburg Gate. I thought this was a great opportunity, to try and get some very symmetrical shots of the gate.
Now, it's a famous landmark, so that's why I tried to get these perfect shots. We so happen to pick an amazing time to be out here in Berlin to shoot. We were unaware that they were going to be running the marathon, so if you see people running around, well that's what's going on. Now this isn't my normal real world review, because I'm usually doing a DSLR, or mirrorless camera, or something that's more traditionally seen as a camera. But with everybody having one of these, everybody is now a photographer so there is no reason why you can't get quality images with something like this.
So what I'm going to do here while in Berlin, is try and capture some awesome photos, with just this using the ProCam app, because that shoots raw. So an IOS 10 Apple has given third party app developers the ability to allow you to shoot raw, raw DNG. So that's what we're here to do. That's what we're here to test out, and now why don't we get some shots? My goal was to get the statues up top, to get a lot of sky in there, but the issue that I ran into, is that my lines weren't straight. I'd like to get my lines straight, and was finding that I was missing just a bit.
And one of the reasons that was, is because there's a little menu on the screen in the ProCam app that I wasn't sure how to remove. Well, it was actually simple. I swiped my finger up, and it moved out of the way. This way I could get my symmetry better, because I was finding that I was missing it because the lens is not on center. It's off to the side slightly, which means I have to compensate with my body or my hand placement to get the image more symmetrical.
I'm reviewing some of the images, and I'm starting to see that my lines aren't always straight. They kinda look straight as am about to take the picture, but I think part of the problem is I hit the shutter button up top, and I must be knocking it off access just a little bit. So, I may switch over to just hitting the shutter button on the screen, the digital one to hopefully get better results, because if I don't have straight lines, I'm going to have to crop which means I'm losing quality, and I don't wanna to lose quality in the final images. So with the iPhone 7 Plus, you don't have one but you actually have two image centers built in to the phone. You have a wide angle which an f1.8, and you have calling it a 2X time zoom which is a f2.8, which means, when you switch from one lens to the other, you gonna end up losing a little bit of light. That is not stable.
You have to remember that this camera that's in this phone, you have nothing to grab on to. We don't have a grip. We don't have any sta- way to stabilize it, other than the built in image stabilization in the one lens. This is not easy at all, because normally you have a grip to hold on to, but here you have to hold the phone a certain way to get better stability. Yeah.
Just steal on some photos when I can. They're probably like who is this heavy guy trying to take a picture? But I don't speak the language so it's okay. So what would a cell phone be without the selfie mode? We might as well shoot a selfie with the front-facing camera, because I'm here shooting pictures. Who is gonna shoot pictures of me? There's not like there's a million people around. There actually are, but I made an attempt to get a selfie.
Oh, and again this camera isn't lined up in the middle, so that's not easy. I gotta fi- I gotta find where I'm needing to be. This is not easy. Now my hair just blocks the entire Bradenburg Gate. That's a, that's a terrible thing.
My arms aren't long enough. Oh, actually let's turn the camera upside down and see what we can do. No, just the top of my afro. Anyway, am not really here for selfies. I'm here for better, better images.
Jump. That must have been the worst jump in the history of jump photos. Beautiful. That's not - yeah. Speaker 2: I like your show a lot.
Jared Polin: Oh, thank you. Speaker 2: What are you doing in Berlin? Jared Polin: Uh, we're testing out this, the iPhone 7 Plus. What was pretty cool when a fan came up to me and wanted to get a picture, but I thought he wanted to get a picture with me, but no he handed me a disposable camera, and asked me to take a couple of photos, so I obliged. Just because you may be a tourist, doesn't mean you need to shoot like that. Try to get your composition spot on, because composition is going to help your image be a much better shot.
I wanna to jump in here real quick and say, if you're looking to take your photography to the next level, check out the froknowsphoto guide to getting out of Auto. It is a three hour guide that's gonna teach you how to unlock the power of your camera, so you can start capturing amazing images that I know you can. Go to froknowsphoto. com/guide to get a free preview. Now let's get back to the shoot.
So then we moved over to the corner of the Reichstag. Now, it's a really awesome looking building. The architecture is incredible. It also gave me a great opportunity to shoot up at the corner of the building that was being bathed in beautiful morning light. There were also some awesome clouds to try and capture, and I think I did a fantastic job over there.
They're some of my favorite photos from the shoot. Trying to find my angle. It's like I wish I could cut my thumb off. It's, it's in the way. The thumb is blocking my eye view.
It's like I'd nowhere to p- I've nowhere to p-put it without - I have to - all right uh, I'll try this. My goal is symmetry. Uh, now the flag looks good. So as a professional photographer myself, I'm used to having a lot of different options in my bag when it comes to being more creative. Now using the phone, you kind of lack a lot of options to use.
So you're only limited to the two lens that you have, and it makes it more difficult to be creative. It make it more difficult to get the shots that you're trying to envision, because you know that you could capture something with your DSLR, that you can't capture with this. Looking for dead space. I thought it will be a great opportunity with so many people around to try and steal some candid action shots. Whether they're bikes going by, or people walking across the street, or kids just standing waiting for the light to change.
I thought that was a great opportunity to test out the camera and see how the results would be. The one thing I can't do is really blow out the background with this. I'd love to have that background. That's with a portrait mode for iPhone is gonna come into play, but I wanted to steal that shot. That was awesome.
It's not a good idea to ever drop any of your cameras, but it's probably not a good idea to drop your phone down into the sewer. The goal right here is trying to steal some, some street photos. Street style. People doing things. Kids and stuff pushing the button behind me.
I mean, that's what street photography is kind of all about and yes, the phone is a little more discrete. You just have to be pretty good at what you're doing. Bike, and then you have to also take into account that you don't have a lot of depth or field here, because I'm not using the uh, iPhone app. The, actually the iPhone app for a portrait mode isn't even out yet so I just have to concentrate on, on getting good street photos. Huh, it's so hard to see.
So what these stones signify right here on the street, is the separation point between East Berlin and West Berlin when they put up the Berlin wall. So if I was standing here all those years ago, pre nineteen eighty nine, obviously I would be in no man's land. Not a great place to be, but I thought that this will be an interesting photo. Feet straddling both lines of the Berlin wall, get the shot, and then move on. So, when you go to a city, there is always somebody taking a Segway tour.
Now I will take a Segway tour everywhere if I didn't have to wear one of those bike helmets, but nonetheless I captured some photos. More Segways. I'm going to get some Segway tour photos. Yeah, look these motor lane. Motor lane.
So throughout this entire real world review, I felt like I was leaving something behind every time I moved from point A to point B. The fact of the matter is, I didn't have a camera bag to carry around. This is all I was carrying around. Because I didn't have a camera bag, my shoulders weren't hurting from carrying around 23 different lenses, and a couple of bodies, and a bunch of different accessories, but there's always a tradeoff. When you carry around something like this, there's not too many added accessories you can use on a phone like this.
Whereas with a DSLR of course you can add different lenses, different flashes, different accessories, but other than that it's just a basic trade off. So being that it's such a challenge to capture candid moments, and action shots with just the phone, I thought I'd try to steal some images of bikes chained up against the bike rack. So there was a little girl walking down this wall, and I thought that this will be a great time to try and get a candid moment. Now these are times where you have to be careful when the parents are around of course. That was - tha- that's called faking it, meaning making pretend I'm actually shooting the bike, but am actually shooting the kid.
Stealing a photo. Doing what I'm not supposed to do, but as a photo journalist, I'm doing it. Quick tip, if you wanna blowout the background no matter what camera phone you have, or if you have the two time optical zoom of the iPhone 7 Plus, get closer to your subject. Fill your frame. The closer to the subject you get, the easier it is to blow out the background, and to blow out the background, I mean get it out of focus which separates the in focus subject from the out of focus background.
Adriana:. Jared Polin: Yeah. Adriana:. Jared Polin: Sure. Speaker 3: Hey there? Adriana: Thank you.
Hello too. Jared Polin: Hello. Speaker 3: What's up? No, no, no. You're YouTube all the time. Jared Polin: Thank you.
What's your name? Adriana: Adriana. Jared Polin: Adriana, nice to meet you. Jared. Hey, let's turn this way cuz the sun is over here. Speaker 3: Yeah.
Adriana: Very handsome. You're in the middle. Jared Polin: Oh, okay. Jared Polin: So let's put something in perspective here. The sensor sizes in this 7 plus, are something along the lines of this.
The smaller the sensor that means the higher the ISO you go, the less quality you're going to get out of your sensor. Now in terms of a 35 millimeter full frame sensor, you're looking at something this big. You're not gonna be able to replicate the same thing in a camera phone as you're in a DSLR, but you can get quality results with a phone like this in the right lighting situations. It also comes down to your composition, and the image that you're capturing. Here in front of the United States Embassy, I have the right to bear arms.
It's a red light but any cars coming? No, no cars coming. It's okay. I cross on red lights. I'm dangerous. Just as one person gets out of my shot, a million people get in my shot.
So here in Berlin there's a holocaust memorial with a museum underneath it. Now they've all these pillars in varying size, and they wave along as you go through them. It's kind of like a maze. So that makes an interesting opportunity to capture some interesting shots. You also have to watch where you're going, cuz people are criss crossing all the way through there, but that's where you can get people just thinking, and contemplating, or taking pictures.
So I decided to sit in a certain location, and wait for people to walk by and try to steal their image as they were going by. I think I got some good shots. Now there was an image that I tried to capture that I thought would be pretty cool. It was two girls walking down a corridor, and when I went to take the shot and I captured it, I looked back at it and I realized that they were blurry. They weren't out of focus, they were motion blurred, because the shutter speed was too slow.
That's because I was focused on just trying to capture the image, and in the manual app, I do have the option to control the shutter speed manually, but I can let the app do most of the work for me, so that I could focus on capturing the image. In this case, it bit me in the butt so in the future, if I get into a lower light situation, and have to capture motion, I'm gonna go ahead and control my shutter speed and bump it higher. One of the things you need to be careful about when using the iPhone to take photos, is that you don't have a view finder like a traditional camera. Whether it is through the lens view finder or just an EVF, you don't have it. So sometimes in bright daylight, it makes harder no matter how bright you make the screen, to see the image that you're about to shoot.
One easy remedy is if you have a histogram. If you have the option of turning that on, that's gonna give you a basic representation of your scene, to make sure your exposure is where you need it to be. Here is a quick tip. One of the number one mistakes that people make, is this. What is this? This is pinching to zoom on your phone.
No matter what phone you have whether it has optical zoom, or it doesn't, one of the worst things that you can do is do digital zoom. You're losing mega pixels there which means you're going to lose quality. How do you solve this? Simple, you move your feet. You move forward. You move back.
You get your composition right, and that's how you stop doing this, which is digital zoom. Move your feet. Next, we walked over to a piece of what's left of the Berlin wall. So now it's not the most photogenic thing to capture an image of, but when you travel, it's a great opportunity to go to historic places, and get some interesting shots. Those are things that you can share with the world, and they can say, "Oh, what was it like to be there?" So that's why I took a couple of pictures of a piece of the Berlin wall.
On top of getting wider shots of the pieces of the Berlin wall, I thought it'll be a great opportunity to try and get some detailed shots. There was rebar , there were rocks, there were holes in the wall, and that's a good opportunity to, to try and get those detail shots that go hand in hand with the other wider shots. You still need to have pieces of the wall, so you can't come to Berlin and not go to the wall to at least see it's like, but what I find interesting is seeing the bricks that go all around Berlin where the wall was, that separated the east from the west and now you just see people freely walking through a park stepping over where the wall once was. So that's why I got a couple of snapshots with the phone. Quick tip.
Just because your camera is up top on your phone, doesn't mean you can't flip it upside down to get a different perspective on what you're shooting. Now here's a quick example that I personally did. I turned the phone upside down to shoot a glass of water at the bar with awesome lights in the background. The picture looks immense. This is a great quick tip for when you're trying to shoot smaller objects, and you wanna make them look bigger.
Then we move on to Jugendamt Mitte which gave us an opportunity to get some street performers. While over there, I captured a panoramic. Now I didn't use the ProCam for that. I simply used the camera app that Apple supplies. They do a great job getting you panoramic so that was pretty awesome.
Keep in mind if you're gonna use the camera app that Apple gives you, it's only going to be in jpeg since you can't save it as a raw file. With the iPhone 7 Plus, you're kinda limited on what you can capture, because there were times during this real world review where I would have loved to have blown the background out even more than I was able to do. I would have loved to have that separation where the little girl was trying to chase after bubbles, yet I could read every street sign in the background. If I had a DSLR with me, of course I'd be able to switch lenses. I'd be able to try and capture that image better.
Now, I'm not saying that it's worse with the phone, it's just a little limiting, so keep that in mind. Now we know that Apple is coming out with the portrait camera mode inside of their camera system. That isn't currently out when I'm testing it here. That's gonna give you a digital representation of bokeh, but in this it's very hard to blow out the background especially for shots where the background is super deep, and you're far away from the subject. Trying to get some bubbles.
Gonna lay on the ground, try to get some kids running around. I'm getting a bath. Don't get in my eye. At least my phone is gonna get clean from the soap. Bubblebrothers.
eu. needs to be right there, right there yeah, yeah. Oh, that was a perfect one. Right? So, just because you have a camera phone, doesn't mean you can't get creative with the photos you're trying to take. So that's when I decided to lay on my back, and try to get the bubbles floating over me.
It's an interesting perspective to try and capture. Now I had to be pretty creative doing it. Try to anticipate when the bubbles were gonna float over me, but I think I got some awesome shots. Some of them even have the reflection of myself, and other ones have the reflection of the guy blowing the bubbles. It's not the easiest thing to do, but you can absolutely be creative with a camera just like this.
I've worked out right here. Yeah, it is, it is core, total core. Now the closer you get to the subject, you do give yourself the ability to blow out the background, but it is much harder than if you're using a DSLR in first class. Jared Polin: Let me just turn, have you hold that, and I'll just get a picture of you if you just turn this way. One of the harder things to capture with this phone, are candid portraits.
Tighter shots that fill the frame properly in my opinion. I ran into many issues because the 2X zoom is great for certain things especially inanimate objects, but at certain times it doesn't get the job done when am trying to capture an awesome portrait or a candid moment. So that's something you need to keep in mind when you're out there shooting. Let me cut in here real quick. If you're here on YouTube, go ahead and give this a thumbs up or leave a comment down below, and if you're not subscribed to my YouTube channel just yet, go ahead and hit the subscribe button so you can be notified when all my videos go live.
Now let's get back to the shoot. So I went and took a break because I saw a place that sells cupcakes. How can you pass up a place that sells cupcakes and drink some tea? I picked up some of the most mini cupcakes you've ever seen, and tried to be creative to get some interesting shots. Now that was not easy. I had to spend the time turning the camera phone upside down to try and get a very interesting perspective on the cupcakes, but we were able to blowout the background even without having the portrait mode that Apple has you use.
So am pretty happy with those shots. What I was going for, was trying to get the cupcakes nice and in focus, with the chair out of focus, and the building in the background out of focus, because a lot of people say that you can't blowout the background and get cool bokeh, with a small sensor from a phone just like this. Well this shows you that you can do it. Now whether it's easy or not, is another story, but I was able to capture some cool shots with the cupcakes, and other things out of focus. So part of the battle is capturing the image.
The other part of the battle is how you process the raw files after the fact, because you're getting the raw data out of this camera depending on what app you're using. When you get it into the computer or on your phone and you start processing it, that's where your image can come to life. So you better get good at processing your raw files if you're gonna shoot in raw. I was also able to get some cool shots inside of the cupcake place, of the cupcakes just waiting for their new homes which are in people's bellies including mine, but they were some cool shots. I even got to blow out the background where I was shooting one of the featured cupcakes for the day, and the employee in the background just standing wondering what the hell we were doing.
All right, I wanna give a special shout-out to somebody here. Come on in Jessica. This is Jessica Bunk. She was very helpful. Give me a high five.
Very nice. Now get out of my frame. Thanks. Just kidding. She was of great help.
So I had a great time here in Berlin capturing images for this real world review, but because I shot everything raw, I need to go ahead and process it, but I'm not gonna sit here and it on my phone right now. That's going to wait till I get home and back in the loft to do the raw edit. So why don't we send it back to the loft right now, and see how the results turned out. So here we're back at the loft, and I wanna remind you that if you'd like to download all the , you can do that over on the site as well as download sample raw DNG files to go ahead and edit yourself, to see how the results turned out. Now before I get in here and show you all of the images that I edited, I wanna tell you that I edited in adobe light room back here on the desktop.
Sure on the road I could have edited in adobe light room mobile, but for me it's much easier to sit in front of a desktop computer to do editing. It's much quicker, easier, and I think I can get better results. Now with that said, if I needed to use light room mobile to do editing, I could do it on the phone, or I could do it on the iPad and then turn it out into the world, but being that I had time, I was able to edit it right here. Now the last thing is, I used ProCam 4 app, because at the time of the recording, it was the only app out there that let me shoot raw DNG, but gave me the ability to use both lenses where adobe light room didn't have that capability at that time. Let's turn here and look at some of the images.
Now here you have the Bradenburg Gate. Now you can see that I shot it at 20 ISO. Most of the time I let the camera do all the work, or in essence I let the phone do all of the work. The app that I was using, I let it pick the settings for me, though I still had manual control over it. That's one of the reasons I use ProCam 4 verse lightroom, because I have more control over the manual settings if I wanna make some tweaks.
So I'm happy with the results that I got out of the camera right here. They look perfectly fine to me. The colors look great. The sharpness look great. In terms of depth of field for a shot like this, it doesn't really matter.
Here you can start to see where my lines aren't perfectly straight. I ran into some issues when I was pressing the shutter button, or moving the phone. It kind of moves in lose axes, or moves axes, which means that sometimes my angle aren't perfectly straight. Uh, moving on to a shot like this. Now I printed this photo out.
One way that you can tell if a photo is quality is, how does it look when you print it out? It's one thing to pixel peep on the computer, but it's another thing to see a final print. Now this print I think looks fantastic in the detailed areas of the building. If you hang it on the wall, and you say to somebody, "What was this taken with?" Or if you just let them look at it, they're not going to sit and say, "Oh, did you take this with a cell phone, or a DSLR?" Because a good photo is a good, is a good photo, is a good photo any which way you slice it. Now if we're gonna analyze it just a little bit in, in the print in this area, you can see the defined noise, the defined grain. That's when you're pixel peeping, but again this is 20 ISO.
Keep in mind that the center is super tiny tiny on a phone like this, and you're not gonna get the same quality as you are going to get on a DSLR which we'll talk about in just a minute. Moving on, stealing a candid image. I found that most of the shots that I was taking, I was using the 2X zoom. Why? Because that gave me that 56 millimeter equivalent, to try and snipe some of candid images that I'm used to try to capture, with longer lenses. In some cases, the wide angle came in handy, but you can see for an image like this, that the background isn't blown out.
You don't have that beautiful bokeh. Now it - no it's not even blown out at - one bit at all. Some of the other images coming up will be, but that brings up the question, what do I think about the digital bokeh effect for the portrait mode that the iPhone is going to be releasing shortly. When we were in Germany, that wasn't out yet, and it's still embedded when we were making this video, but from the sample files that I saw, the bokeh looks pretty good. Now on some of them, you could see a halo going around the image, because it's doing some separation there, but for the most part, I think the digital bokeh is a pretty good representation of what actual bokeh looks like, and I know some traditionalists in the world, they could be like its digital.
I don't want to do it. It looks terrible. No, it really doesn't look terrible and I think that it's a good thing, it's a good opportunity for people picking up a phone like this to start to see what bokeh actually is. To start to speak the language of photography. To understand what it is, so that they may graduate to a DSLR or a mirrorless camera.
Now I call this training wheels. A camera like this or a phone like this, is training wheels showing people what the possibilities are, but I think they may run into problems when they do graduate to a different type of camera, because they're gonna take a picture, they'll be like, why isn't the digital bokeh there? Why isn't it working? And they're gonna need to be educated to see how it works. I'm not upset with digital bokeh. I'm actually looking forward to getting it so I can use it to get blown-out backgrounds, but I love a shot like this candid in black and white. You wouldn't be able to tell me that it was taken with what it was taken with.
Just a cool photo of the Berlin wall where it used to be. I'm straddling both East and West Berlin, then we had people crossing the street just basically snipping that shot right there. Bikes. Who doesn't want to take pictures of bikes? But it looks good in black and white. I'll say this, a lot of the images come to life in post processing.
In how you edit them. That's where they come to life. Having the raw file capability with the IOS 10. We know that Apple is not the first phone to go ahead and put raw capability into it, but now that it has it, that's what I'm here testing. Having the raw file gives me such more ability to edit the file after the fact to where I want it to be.
To bring it more to life. It's not about getting the exposure wrong, it's about bringing it to life, and I think I was able to bring these files to life really well. Here is an example of where you can see some bokeh in the background. You can see that I'm focused on the little girl here, and um, the background starting to blur out. If I can blur it out even more with the digital bokeh, I'd be even happier, but that's a really cool shot right there.
Uh, the black and white tones, they look pretty good as well. You can see that with the 56 millimeter lens at a 2.8 whereas the wider one you also i- it- it's a 1.8, but I'm happy with the tones here. Happy with a shot like this. Um, it gives me the ability to be creative. Is it gonna replace my DSLR? No time soon.
Would I use it if I needed to use it to get the shot? Absolutely. This is an issue that I ran into. You can see that these girls are walking away, and this would have been a good shot if it was sharp and in focus. Then I looked back at what my exposure was, was 150th of a second, so my shutter speed was extremely slow, and I'm only at 25 ISO. I could have bumped it a little bit if I was paying attention, but being that it didn't have the exact controls of like a DSLR, I'm, I'm more focused on capturing the image that's in front of me, when now knowing that with that ProCam 4 app, I have the ability to tweak my exposure, I could have bumped my shutter speed up higher, and it would have compensated to hopefully allow me to freeze this action.
Still one of the changes - one of the differences between lightroom mobile, and this ProCam, is that lightroom mobile doesn't really give you a lot in the way of manual controls at least right now. If they do start to offer me more manual controls, I will replace ProCam 4 straight away so that I just live in the ecosystem of lightroom mobile, because I think it's a fantastic way to edit your images. I put this here because it's just the Berlin wall. It's a piece of the actual Berlin wall. Uh, It's not in a great area, but it's a good snapshot.
You know what? This phone acts really well for taking snapshots. In the right hands, you're gonna get great results. With just the everyday people, the 99% of the world who just want to take a picture and share with the world, they're gonna get fantastic re- results with this, and I think they're also gonna end up getting poor results if they think that they're gonna get awesome photos in low light situations where no cell phone is really gonna shine in low light situations. We'll get to more of that in a second. Bubbles.
We got to shoot this guy doing bubbles, and it was a good opportunity to get interesting shots. You can see that the bokeh in the background is nonexistent. If I could said, I don't know how digital bokeh would have worked with especially with bubbles flying around, it may not have been able to do that. And let me reiterate why I didn't use the camera app again that Apple has. It doesn't let you shoot raw.
It's as simple as that. It doesn't give you the ability to save them as raw files, just jpegs. You can see how the background is destructing. This is completely in completely in focus, whereas if I had a DSLR, the background is gonna be obliterated, but it's an okay shot. Uh, I got to talk to him and get some cool shots.
This is one of the only shots I was able to do up close to get a portrait, because when you don't know the people, you have to get a rapport to get a shot like this. Uh, also the 56 millimeter, the 2X zoom isn't long enough, but this looks like it's great quality to me. To get a portrait like this, yes the background that actually has some bokeh in it, that's natural. Um, look how solid the skin tones are. You don't really see a lot of grain and noise.
Yes, it's 20 ISO but it all relates different to a DSLR because the sensor is only that big, but that's a really good head shot done with the raw file. I'm happy with a shot like this. That - Huh, Yeah, I'm just happy with it. Moving on one of my favorite shots from the entire event. The print of this looks incredible.
The tones look great. The girl's look looks great. She's waiting for these bubble to fly. I actually don't mind that the background isn't blowout in this one, because you have all of these other people doing things in it. Sure I would love to isolate her more, but I love the look.
I love the candid moment that was captured and in this case I think the black and white image makes it feel like it was shot with the DSLR verse just being done with a, with a cell phone. But the fact that I'm able to get the quality of an imagine like this with a cell phone is great. Uh, a little bit of motion blur here with this girl running. Uh, then the bubble you can see that I think my exposure was thrown off here. I recall that I had my screen brightness all the way up, and I was going ahead, and moving my manual exposures, not thinking that my screen was overly bright, so things on it are going to look over exposed, and I'm compensating, and because I compensated too much, this is why it looks a little greyed out and not super awesome.
That's something you have to keep in mind when you're edi- uh, when you're shooting those files. Um, but I love the reflection that I'm getting. Look at this. We have the reflection of the bubble, we have my I shoot raw, shot reflection right here, and again you see noise, you see grain, but we're zoomed in one to one. You are going to see noise, and grain in a 5d mark 4 in an icon d 5, it doesn't matter.
When you zoom in one to one it's in the prints where you get the results. Um, beautiful shots like this. Yes, a lot of spraying and praying. I took over 600 photos throughout that entire shoot hoping that I got the right shot, not spraying and praying, but making sure I got the shots I needed for the shoot - um, for this review. Uh, happy with a shot like that.
Printed this out with a metallic print looks really good. When you get up close to the fine details, yes you can see that noise and grain even at 20 ISO. Keep that in mind. Just cool that I'm able to capture that. This is a panoramic shot jpeg, because that's how the phone does it, but man it's actually a pretty big file that's highly detailed except for I cut this girl - this girl's arm got - and her foot got cut off.
She must have been moving or the panoramic was going on, but being able to snap a panoramic that's this large, if I printed this out on this Epson printer over here, it would look pretty good and so having that ability is awesome. So moving on to some of the others. We went to a cupcake place. Thought it will be good to get some detailed shots, the colors, the tones, being brought out in the raw file is what it's all about, but having a nice file to start with definitely helps. Showing you the digital bo- not digital bokeh.
Um, showing you the digital bo- well, not digital bokeh, showing you real bokeh being able to blow out the background. The files handle very well much better than if you were trying to edit a jpeg. So I like this shot. The fact that I was able to be creative and blow out the background. The cupcakes sucked by the way.
They were overpriced, and they weren't very good in my opinion. Moving on, uh, I picked this because this is 125 ISO. Let's zoom in and see the noise. That noise right there looks like something like 32 hundred in a normal DSLR. It's a usable shot in a low light - well it's not even that low light of a situation.
So it's just showing you what happens at higher ISOs, you're going to see more prevalent noise, more prevalent grain, and imagine if it was in a dark area. If this was a dark area, the image would not look this good. The noise and grain is gonna be more prevalent, and you're not gonna get a great shot. Um, bokeh. This is real bokeh.
Again am focused right here on this cupcake and having her out of focus in the background 64 hundred ISO, and then we already talked about this image right here. So what it really comes down to is, how were both of the cameras? I think it handled well in my hands. It always comes down to that is that a good photo, is a good photo, is a good photo no matter what you shoot it with. You should be able to get quality results with whatever camera that you use. In the right hands, somebody is going to get good results with this.
In just the everyday person's hands that's using this, they're not gonna over analyze their photos. They're just taking snapshots anyway, and there's nothing wrong with that. I'm excited to see what people do with the digital uh, bokeh, the portrait mode when that gets released by Apple. I think that's the training wheels to grow people into saying how awesome photography is, and maybe they progress from there. In the end, it's not replacing a DSLR for me, it's not gonna replace a DSLR for anybody else, because you cannot get the same results, but you can get quality photos like I showed from the prints that I did.
That black and white of that girl standing there. Whether that was with a DSLR or a phone it's a great shot and I'm very happy with the results I was able to get including being able to edit the raw files in the computer in the lightroom as well as using lightroom mobile. I love having that ability, and I think a lot of photographers out there will as well. Overall, fantastic results, very happy with it in an - in a great lighting situation. Don't think it's going to do well in a low light situation, but that is the real world review of the Apple iPhone 7 Plus dual-camera system.
Please go ahead and like this video. Leave some comments down below, and also don't forget to subscribe here on YouTube, and if you would like a free guide to capturing motion in low light situation, just look for the orange box over on my website, put your name, email address in it, hit send it, and I will send you a free guide to capturing motion in low light situations, and that's it. Thank you guys very much for watching. Jared Polin froknowsphoto. com.
See you.
Source : Jared Polin
Phones In This Article

Related Articles


Comments are disabled
Latest Articles


