iPhone 7 Plus Battery Replacement By How-FixIT
I welcome you to How-FixIt and in this video I will show how to replace the battery on iPhone 7 Plus What tools you will needed to disassemble the iPhone 7 Plus: Screwdriver set Plastic mediator Tweezers Suction cup for removing display Adhesive tape for restore water protection In the description under the video, I left links where you can buy all the necessary tools and replacement parts for the iPhone 7 Plus Turn off the iPhone and remove the SIM card tray. Remove the two screws near the charging port with a Pentalobe 0.8mm screwdriver Take a hairdryer and heat the display surface for 1-2 minutes. Set the suction cup near the home button and pull up the ring. Next, take the plastic mediator and begin to disconnect the display from the case of iPhone On the top of display, inside there are two latches that attached to the case, so you need to pull the display down and unstick the display from top. The case of iPhone 7 Plus opens like a book, that is, open the display to the right. Now take a Tri-Wing 0.8mm screwdriver and remove 4 screws on the lower metal panel and 3 screws on the upper metal panel. First, disconnect the battery cable from the mainboard and after disconnect three display cables In order to remove and replace the battery on the iPhone 7 Plus, you need to remove these 3 silicone tapes.
These tapes often tear, so I recommend removing the Taptic Engine for successful removal tapes from the battery. Remove 2 screws and remove the plastic part. Next, unscrew the 3 screws on the Taptic Engine and disconnect the cable. Take tweezers and catch on the edge of silicone tape. Slowly pull the silicone tape away from the battery.
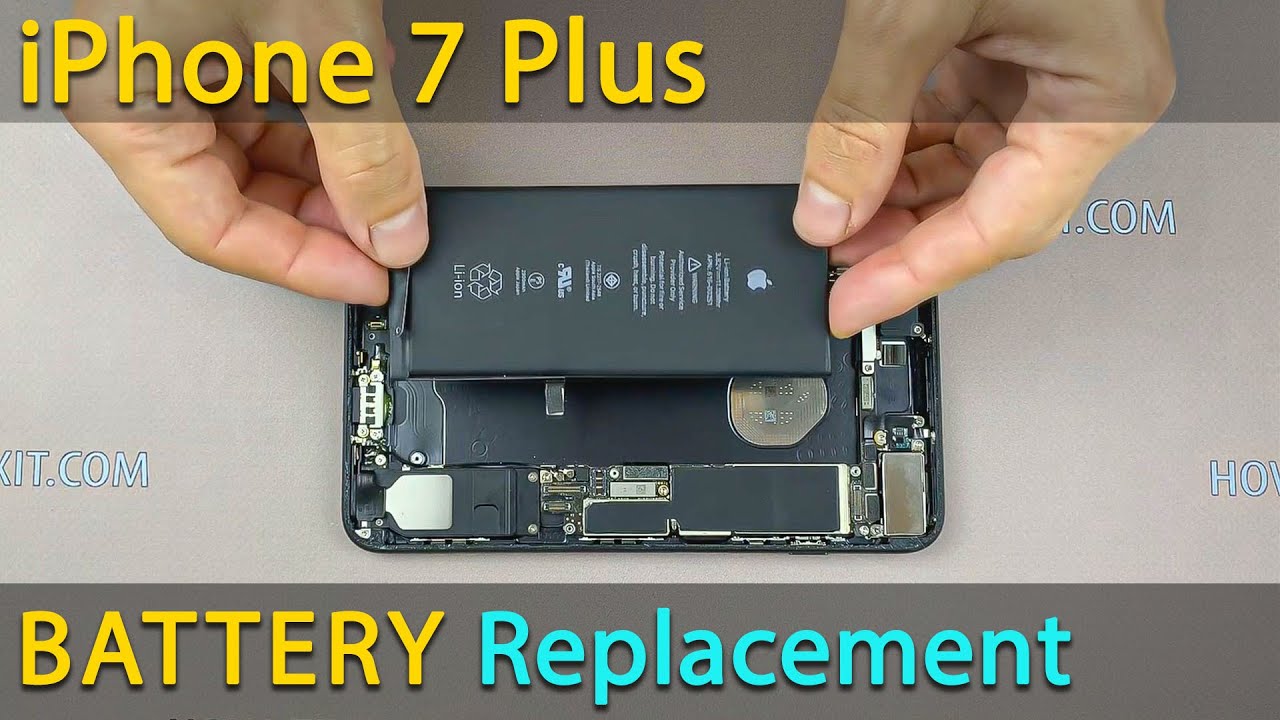
Similarly, remove the remaining silicone tapes. Now you can remove the battery from the iPhone. In the description under the video, I left a link where to buy a new battery for the iPhone 7 Plus The new battery must be glue to the case, for this you can use double-sided tape or silicone tape similar to the one that was removed from under the battery Install the Taptic Engine, fasten 3 screws and do not forget to connect the cable. Set the plastic part and fasten 2 screws. Now you can connect the display and check how the new battery works.
Please note that first 3 display cables are connected, and lastly the battery cable. If battery works fine, you can begin to the final stage of assembly with restoration of water resistance. Remove the adhesive tape from the back cover of iPhone. Now take a cotton swab and medical or isopropyl alcohol, and wipe the iPhone back cover from the remnants of glue. Now take a waterproof adhesive tape and put it on the iPhone case.
Using this adhesive tape, you restore resistance to dust and water. First, connect three display cables to the mainboard of the smartphone, and then connect the battery cable. Install metal panels and fasten the screws. Turn the display over and push it to the back cover. Fasten the last 2 screws near the charging connector.
Install the SIM card and turn on the iPhone. I hope this video was useful to you and helps repair your iPhone 7 Plus. See you soon on HowFixit.
Source : How-FixIT
Phones In This Article

Related Articles


Comments are disabled
Latest Articles


