iPhone 11 Pro Max Battery Replacement By How-FixIT
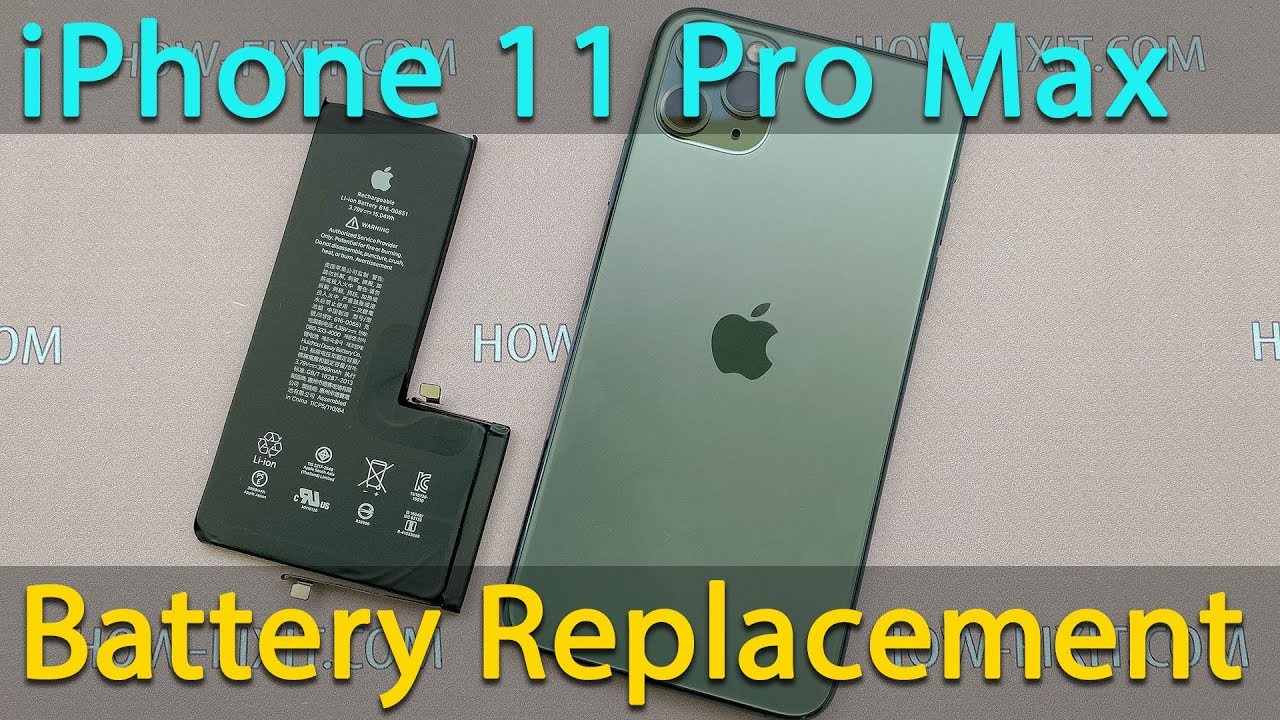
Welcome to HowFixit and in this video, I will show you how to replace the battery on iPhone 11 Pro Max What tools you needed to disassemble the iPhone11 Pro Max: Screwdriver set Plastic mediator Suction cup for removing display Tweezers Plastic opening tool Adhesive tape for restore water protection and Adhesive silicon tape for the battery In the description under the video, you will find links where to buy all these tools and replacement parts for iPhone 11 Pro Max Turn off your iPhone before starting disassembly. Remove the 2 screws near the lightning port with a 0.8mm Pentalobe screwdriver. Take a hair dryer and heat the display surface for 1-2 minutes at a temperature of 60-70 degrees Celsius. Fix the suction cup on the bottom of the display and pull the ring up until there is a gap between the display and the housing. Insert mediator and disconnect the display from the iPhone case on all sides. At the top of the iPhone, do not push the mediator much into the case, so as not to damage the elements from the face id module.
The case opens like a book - the display to the right. Remove the 2 screws on the small panel and 6 screws on the large panel. First, disconnect the battery cable and after 3 cables of the display. To replace the battery in the iPhone 11 Pro Max you need to remove the three silicone strips from under the battery. One tape is located near the Taptic Engine, so let's start by removing the Taptic Engine from the housing.
Remove the 4 screws on the metal panel and remove it. Under the metal panel, there is a second battery cable, first turn it off and after turn off the Taptic Engine cable. Remove 2 screws with a Phillips screwdriver and 1 screw with a 1.5 mm Standoff screwdriver. Now you can remove the Taptic Engine from the housing. Remove the 3 screws on the metal panel, then remove it and disconnect the cable from the iPhone main board.
Let's begin to remove the silicone tape, take the tweezers and peel off the edge of the silicone tape. Now pull the silicone tape away from the battery. If the silicone tape is torn and remains under the battery, there is nothing critical, now I will remove the last tape and show how to solve this problem. One tape torn and holds the battery, take any tool and pry the battery from side where is no tape. Now you have two options, you can add a couple of drops of isopropyl alcohol under the battery where the adhesive tape remains, or take a hair dryer and direct warm air under the battery.
As you can see, the battery removed without any damage. In the description you will find a link where to buy a new battery for the iPhone 11 Pro Max The new battery also needs to be glue to the iPhone back housing. This sticker is the same size as the battery, so you only need to peel off the film and stick it evenly on top of the battery. Now press the sticker on top, so it will be stick better. The iPhone 11 Pro Max assembled and now you can connect the display and check how the smartphone works before final assembly.
To check the iPhone, just connect 3 display cables and a battery cable, but only in that order, first the display cables. Check how iPhone works and if all the functions work fine, you can begin to the final assembly of the iPhone with the restoration protect against water and dust. Remove the silicone adhesive tape from the iPhone back housing. Using isopropyl alcohol and a cotton swab, you can wipe the back housing, this is not necessary, but it will not be superfluous. Before attaching a new adhesive tape, make sure that you glue the right side on the back housing.
This silicone tape restore resistance to water and dust. This doesn't provide 100% waterproof for your iPhone but without this sticker, the display will not hold well and dust will get inside the iPhone. In the description you will find a link where to buy such a sticker. Press the sticker on top, so it sticks better to the case. Let's begin to connect the display.
First, connect 3 cables of the display, then the battery cable, and only in this order. Install the panels and fasten the screws. Turn the display over and push it to the case. Fasten the 2 screws near the lightning port and you can turn on iPhone 11 Pro Max. That's all, I hope this video was useful for you and I helped restore your iPhone 11 Pro Max See you soon on HowFixit.
Source : How-FixIT
Phones In This Article


Related Articles


Comments are disabled
Latest Articles


