iPad Pro (2018) - First 13 Things to Do! By Brandon Butch
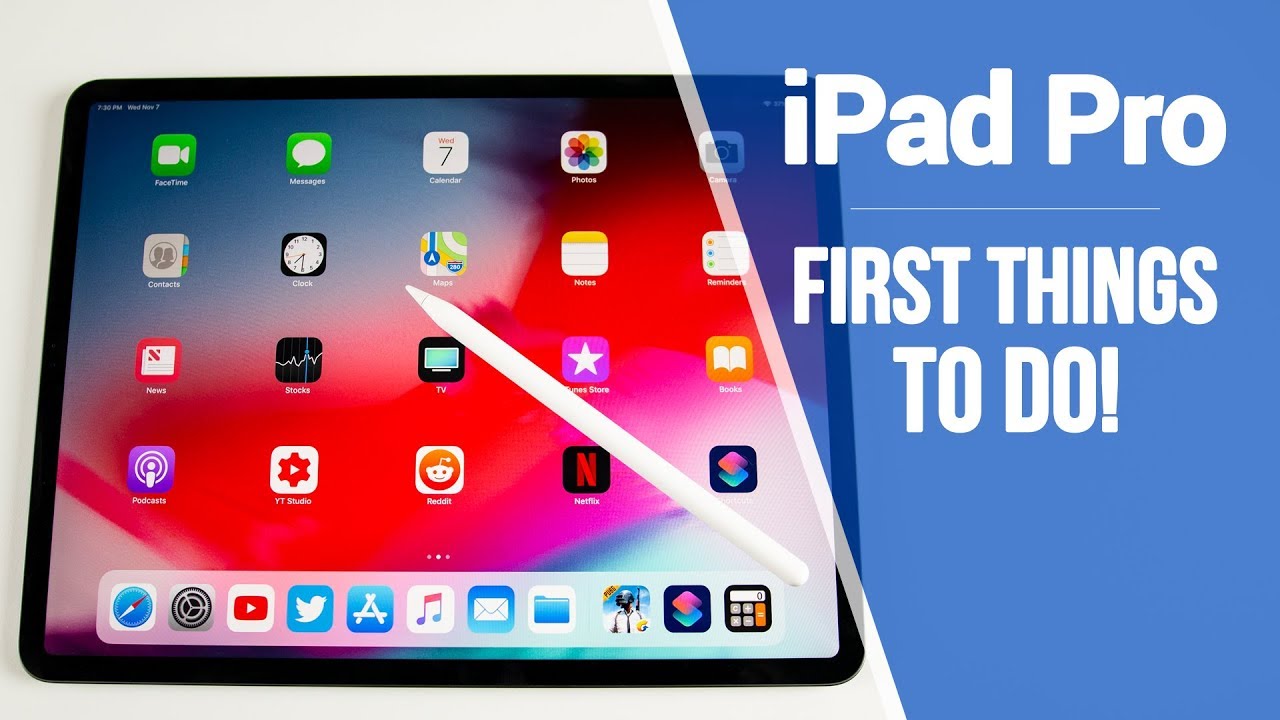
What's up guys, my name is Brandon and you just got your brand-new 2018 iPad Pro. You went through the initial setup process, but now you're wondering how can I get the most out of my brand-new iPad Pro? What should I be doing next so in this video I'm going to be showing you the first 13 things you should do on your brand-new iPad Pro 2018. The first thing you guys should do is get familiar with the brand-new gesture control. So this is the very first iPad without a home button, so you're going to have to learn how to navigate throughout iOS without having that home button there. The gestures are going to be very similar to how they are on the iPhone 10 10 s and 10 are. But basically, if we swipe down from the top right, you always see that we have the control center right there if you swipe down from the top middle or the top left anywhere.
Besides the top right. This will be your Notification Center, and you can also see the time and everything right there. If we swipe up from the bottom and hold that's how we can get into our multitasking, or we can see where all our windows are open, and you can go ahead and scroll in here as well to see all of your open applications, you can also do that by using four fingers and kind of pinching in like that. You can get to there as well, and you can also do that inside of any application. So if we go into an application like Safari, and we wanted to have another application side by side and do multitasking, all we do is swipe up from the bottom to bring up the dock just like.
So, if you wanted to have like messages, we can bring that over just keep holding it and then hold and drop it right there. And then you can use both applications at the same time, side by side and if you want to get home just swipe up from the bottom and just like so, and you can also use the four fingers as well to get home if you want to, and the last gesture I want to show. You are how to get in and out of applications quickly and that's by swiping on this bottom bar right here, so you can get in and out of applications very quickly by swiping on that home bar down there at the bottom. This is probably the most used gesture, besides just going home on my iPhone 10s Mac. So this is definitely a function that you're going to want to get familiar with and use it a lot, because it makes everything very quick.
It makes you be able to basically fly through iOS, you can get in and out of applications just very quickly. The next thing you want to do is set up, face, ID and then configure these settings. If you haven't done so already so good, your settings go to face ID and passcode, and then you want to go ahead and set up face ID if you haven't done so, you can also set up and also an appearance right there. If you want to do so. So if you wanted multiple people to have access to your device or if you just look completely different, if you wear something on your face or on your head, you could set up an alternate appearance right there.
You also have the options to use face ID for iPad unlock, for the app store for Apple Pay and also password autofill I would highly suggest having all of these enabled and if we go and scroll down you can see. We have the requirement attention from face ID, which I would recommend having that as well, and then you have the attention aware, features there as well, and then you have these options down here to have access to certain things when locked you can go and configure those to your liking. So having faced ID on the iPad is just awesome now, for so many reasons, but password autofill is probably my favorite feature to use face ID for now. I know you could use touch ID before, but it just seems to be a lot quicker with face ID and password autofill. So, for instance, if we go into Safari, we can go ahead and move these as well by the way I forgot to mention that earlier, but you can go and move these to your liking.
I just want to have the full view of the Safari right now, so I'm going to do this. If we go to a login page right here, so I'm going to try to log in here to ESPN. So if we get to a login page, you can see. We have this passwords button right here now. Usually, if you do have a password say for this website, and we'll show it right here, so I'll just go ahead and get to a website where it shows it.
So, for instance, you can see we have two logins right here. All we have to do is simply tap on that it will scan our face ID, and then it will log us in just like. So where we'll put on the username and password, then we click login, and we're done so password. Autofill is definitely one of my favorite features with any kind of face. I'd enabled device, including this brand-new iPad Pro, so definitely make sure you have that set up in the face ID and passcode settings.
The next thing you guys should do is go ahead and configure your display settings. So if we go to our display and brightness panel here inside of settings, you can go ahead and enable or disable true tone. I actually prefer to have true tone. You can try it with and without, and then you should definitely change out of lock from two minutes to either like 10 to 15 minutes or even never. So, if you never forget to lock your device definitely set this, never just because you don't want to be like reading an article inside of Safari be stuck on.
You know a couple, long paragraphs for like five minutes and then your device, just locked, it's really annoying, so I would definitely rather have you know, 10 to 15 minutes or Never. And then, if we go back, you can see you also have the display zoom. So if you wanted to have display zoom right there, that's usually better for people with kind of bad eyes. If you want to be zoomed, it looks pretty bad, in my opinion, I like standard, but of course, if you do have bad eyes, definitely check that out and then, if we go back to General accessibility display accommodation, you can see right here. We have auto-brightness I.
Have that turned off. You could turn that on or off I prefer to have mine disabled. You also have limited frame rate right here. So if you want to adjust the frame rate, if you want to kind of clock it out or max it out, I should say at 60 frames per second, you can enable that setting right there that just ensures that your iPad will never have a frame rate of anything over 60 and then, if we go back to accessibility, you can see you have all these other settings in here that I'd highly recommend you take a look at and configure, and the next thing you guys should do is get familiar with the new Apple Pencil. So if you have the Apple Pencil ?, which I have here in my hand, you should definitely connect it and get familiar with how it works.
So the first thing, of course, the first biggest change is that it actually attaches to the top or the side depending on which orientation you're in of the iPad to wirelessly charge, and then, of course, once you take it off, you can use it just as normal. Now. One thing to note is that you cannot actually go home or use any of the gestures with the pin so or with the pencil I should say. So it's a little annoying that you can't, you know, go home, and you know put down the control center and things like that with the Apple Pencil, but you do have to use your finger, sometimes just I guess because it's a pencil, you know it's not really a stylus, but if we go into an application like notes, you can see that you can draw things just like this and if you double tap there are gestures, so you can erase so if I double tap again, I'll take me back to pencil and I can draw double tap, and I can eat race. Now, if we go into these settings, there's actually some settings here for the Apple Pencil.
You can see it right there. We have these settings right here, so the double tab. You can change that to do a few different things, so you can have it switch between current tool and eraser. You can have it where it switches between current tool and last use, or you can have it, so it shows the color palette, or you can turn the Doubleday feature off, which I'd highly not recommend, so I like to keep mine at the default, which is the current tool and eraser. But if you use this in other applications which I'm sure later on, there are going to be more applications that implement compatibility with the Doubleday feature on the new Apple Pencil, then I'd recommend using this one.
I'd say that this is probably going to be the most popular one with time, but for now, if you're, only using this for drawing and just handwriting I would definitely use tool and eraser, so yeah just get familiar with the new Apple Pencil 2 and how it works, how the gestures, work and things like that. The next thing you guys should do is go ahead and to the App Store and start installing applications like your social media applications or your net or YouTube. All those applications go and get those installed on your device. Of course, this is only if you didn't already restore from a backup of an iPhone or something like that. Otherwise, you probably already have a lot of applications on your device, but there are a lot of awesome games and applications that are just for the iPad, so definitely go into the App Store and explore around some iPad applications and once you've installed those applications go back to your home screen and start organizing it.
So if you tap and hold this is how you can actually move your applications. It does take a little longer than it does on the iPhone, and you can just move these around on the home screen, or you can also move it down to the dock. You can fit a lot of applications down in the dock and if you want to move multiple at a time, just go and tap on that, while it's in wiggle mode, you can see, you can move multiple applications at once, which is nice and just move them around like that. If you wanted to create a folder, you can just put them on top of each other, and it will create a folder and by the way, one application that would recommend you install is some sort of calculator, since there is no calculator built in to the iPad for some reason still and 20:18 going into 2019. You should definitely install a calculator application, so you can see right here.
There's an application called the calculator. If you go ahead and download that you can see, it just gives you a fully functioning calculator on your iPad. So that goes hand-in-hand what the next thing to do, and that is to organize your dock. So this is where most of your important applications are going to go. So we want to put all of your most important applications down here now.
You can adjust these over here on the left, but on the right. Is it going to be your most user? Your recently used applications, so you can actually disable this feature if you want to, but actually like it, because it does give you access to recently used applications that you may not have in the dock, and they may not be as easy to access. So, like I mentioned, you could just pull an application down from the home screen into the dock, and you can move them out the same way as well, but you should definitely change it from the default look. You should definitely customize it to whatever applications you use the most, because once again, this is what you're going to be able to get into when you're inside other applications. If you pull up the dock, like that, you can get to all these applications without going back to the home screen and by the way, if you wanted to disable those recently used applications.
If it goes into settings, multitasking in dock you can see down here, show suggested in recent apps. You could turn that off. If you do not want that, you also have these other settings. You can take a look at as well. The next thing you guys should do is get familiar with the battery and the screen time charts inside of settings.
So if you go into settings and go to battery, this is going to show you a great breakdown of the way your battery life is actually going to. So it's going to show you which applications are using up the most of your battery life, and you can get very specific with this by clicking on the bar chart right here at certain hours it will show you from 12:00 to 1:00 p. m. you can see, settings and home and lock screen we're using most of my battery life for 22 minutes was the amount of time that my screen was on. Now.
If we go over here, you can see that from 3 to 4 p. m. photos and home in lock screen were taking up the most of on battery life with one hour of screen on time, and you can click on this top chart as well. If you want to- and it breaks it down by the hour and then of course, you can get an average over the last 10 days, which is really useful. You can see.
I only have one day, of course, but once you get more days in there, you'll start to see more data, and it's very interesting to see where your battery life is going. And then, if we go up in settings you can see. We have screen time right here. This is essentially the same thing, but there are a lot of other features in here like downtime, applets always allowed and then also restrictions, but basically, if I click on the iPad right here you can see it shows what our most used applications are today and over the last 7 days, and also it shows how long you've been using those applications. If we go into settings, you can see, we've been using it for this long, and it shows you a chart right there, which is really nice, but you guys should definitely go ahead and take a look at downtime which lets you schedule time away from your screen.
You can also set limits for applications. So if you have like your kids getting on your iPad, you definitely want to check out app limits and applications that are allowed as well. You can also check out the privacy restriction, so you can block certain websites and certain applications and then, of course, you can use a passcode to get into the actual screen time settings what you definitely want to do. If you have kids, who are maybe a little older and smart enough to figure out how to disable some of these features in here so definitely play around with it, there's a lot to see and a lot to do inside of screen time and speaking of battery life. The next thing I want you guys to do is: go ahead and watch my battery saving tips, video to optimize your iPad for full battery performance.
So in that video you're going to find things like disabling email, fetch and email push. So basically, if you have your email setup, you want to go to settings go to mail. You want to find your account and disable fetch and push. You want to make sure that you get your mail manually every time you go into the application. That's the only time it's going to refresh and then, if we go to privacy, location services, system services, you definitely want to disable a good amount of these.
So you, the first thing you want to disable is significant locations, and you will need to put in your face ID you def. We want to go ahead and disable significant locations, especially on an iPad I, would disable any location-based alert ad or suggestion, so I'm just going to go ahead and disable all three of these right here. I do want to have Found My iPad on, though just in case I do get my iPad stolen, or it gets lost. I want to be able to track that, so I do want to make sure that's enabled, but most of these you can disable I'm going to disable routing in traffic, because I'm never going to use this. For you know GPS or anything like that popular near me off iPad analytics off and then, if we go back, you want to make sure that things like the weather application are only using well in the app not always and the same with all these applications.
You want to make sure most of them at least are well using, instead of just always, and if we go back to settings and go to Syrian search scroll down, you want to make sure that these Syria suggestions are turned off, because these do eat away at your battery life and I give a ton of other tips in that video. There are over 20 tips in that video, so definitely check it out. I don't have time to go over every single one here, but it's definitely a video worth checking out. The next thing you guys want to do is go into your notification settings right here and configure all of your notifications, so you're not getting barrage with notifications left and right from every single application, so, for instance, for something like pub G. You don't want to allow notifications for any type of games or anything like that.
Netflix, you don't really need notifications for an application like Netflix, so definitely make sure those are off. Of course messages you do want to have notifications enabled for, but some of these other things you really don't need a notification set for something like Twitter. If you get a lot of notifications, maybe just go ahead and disable these sounds and maybe disable all the alerts, but only enable the badges. So you can see you actually have notifications waiting, but you don't get a sound or any kind of intrusive banner or anything in the Notification Center or anything like that, and this applies to any social media application or just any application in general, you should definitely try doing maybe only badges or maybe only showing alerts, and that sounds just go into all your applications and configure how you want your notifications to show up, because a lot of notifications is going to eat away at your battery life. It's just inevitable.
So you also want to check down here at the other options. Notification grouping is an interesting one, so in iOS 12, when you get a notification, they will show up as multiple notifications and one. So it's basically going to be grouped, so you're going to have multiple notifications in just one notification bubble and if you actually get multiple bubbles for an application, you may want to go into notifications settings and do notification grouping app instead of automatic, but that's only if you have an issue right there, so you also want to change, show previews to either when unlocked or Never so yeah I just want you guys to go into your notification settings and configure it to your liking. The next thing you guys should do is go ahead and configure your control center and also your widget, so starting with a control center. Again you get there from swiping down on the top right of the screen.
You can see. We have all these different toggles right here, and you can also a 3d touch on these to get more options. You get 3d touch on the platter right here, but basically, if we go into settings you'll see we have a setting here for control center, let's go to customize controls, and this is where you can add in other toggles right here. So if we wanted to add something, we just click on the plus icon right there, and it will show up right away. So you can see we have that added in right there and if you wanted to move it around, you can do so just like that, and you can see it will change in real time, which is pretty cool.
And then, of course, if you wanted to delete it, you can click on the red button right there, and it will delete it. And if we go back to the home screen and swipe over, you can see. This is where we have our widget section right here, so you can see. I have my batteries up top I have my screen time my weather up next, my news, all that good stuff to go all the way down to the bottom. You have the edit button right here, and this is where you can add and remove certain widgets.
You can also move them around by clicking right here and dragging over here to move the position of the actual widget, and you have all these other widgets down here that you can add. Furthermore, you also get more widgets for the applications you install. So if you install an application that supports widgets, you could also have a widget over here that you could add, so I would go ahead and configure these to your liking. Definitely go ahead and remove some of the ones that are there by default, because you're probably not going to use all of them, and they can't eat away at your battery life. So maybe I want to have serious shortcuts a little higher, maybe right under screen times.
Let's do that, it's good or done you can see it does change in real time just like so we definitely not recommend you put a ton of widgets in here because it can eat away at battery life. I mean you are pulling data for things like the weather, the news and things like that, your calendar, so I, wouldn't do too many widgets in here, but definitely go and configure it to your liking. When you first get your iPad, the next thing you guys should do is go ahead and download series shortcuts from the App Store. So if you go to the App Store and just search for shortcuts, you will see series shortcuts in there definitely go ahead and download this. This is one of my favorite features by far, if not my favorite feature overall in iOS 12.
So of course, if you have an iPad you're, a big fan of multitasking and just automating and getting things done quickly, that is why serious shortcuts, as a have application for every iPad user, so I remain multiple videos on how to use Siri shortcuts. Both basic and advanced tutorial so definitely check those out. Those are down in the description right now, also up in the cards up in the top right of this video, so go ahead and watch those videos also watch my video on the top 18 Siri shortcuts. You will get all these shortcuts. You see on the screen right now, but I would definitely go ahead and download.
So your shortcuts right once you get your iPad and watch those videos, so you can get familiar with it. The next thing you guys should do is consider upgrading your iCloud storage plan to make room for other things. On your iPad, so me personally, I only got a 64 gig variant, just because I know that all my storage is basically offloaded onto things like iCloud, google photos and things like that. So if we go to our iCloud settings right here by clicking our name and the settings and then going to iCloud manage storage, you can see right. There, I have the 200 gigabyte plan, which is only $1.99 a month, and if we go here to change storage plan, and actually it's $2.99 per month, my apology so $2.99 a month for 200 gigabytes, you can see there. I can go to up to 2 terabytes for $9.99 a month if I wanted to, which is probably gonna, be my next purchase once I use all of this up because see I'm not really that close I'm about half way, and I've had this. You know upgrading for like over a year now, probably two years actually, and you can see what using most of my stores right here.
Of course, most of it is photos and backups, but yeah I would go ahead and consider upgrading your iCloud storage plan. Just so, you can make room for things like movies, and you know if you want to have music on your device. I would recommend actually not downloading music onto your device. I would recommend paying for something like Spotify or Apple Music. That way, you don't take up a ton of storage on your device.
I mean you, don't really need to download movies either because you do have the offline feature inside of Netflix and things like that. But I'm going to be downloading movies to watch while I'm traveling and things like that. So I will need all this storage I can get, especially since I only got a 64 gig model I will be able to load. You know probably 10 movies, at least onto here without a problem, and the final thing you guys should do is consider purchasing a USB to lightning cable to be able to charge your iPhone from your iPad Pro. So, as you guys know, the iPad Pro now uses USB-C to charge, and that means that you could actually plug in a USB-C charger to lightning charger and charge your iPhone any iPhone with the Lightning port from the USB connector of the iPad.
Now I have not personally tried this, so I, don't know how much drains the battery of the iPad itself I will have to test that in the future. But this could be a great way to charge your iPhone. If there's no like an outlet nearby or anything like that or if you don't have a portable charger. This is a great way to be able to do so, so yeah. Those are the first 13 things you guys should do after purchasing your brand-new 2018 iPad Pro I hope you guys enjoyed the video.
If you did make sure you give it a thumbs up also make sure to subscribe for a lot more iPad Pro coverage and speed tests. A lot more stuff on the iPhone 10 are the 10s all that good stuff. If you're a fan of Apple, if you have anything, Apple, definitely go ahead and subscribe to the channel, you will not be disappointed also make sure to leave a comment down below if you've got a brand-new iPad and if there's anything else, you would like to see added to a list like this. What is something that I may have missed, or what's something that you do when you first buy a brand-new iPad I'm, really curious to see what you guys have to say down in the comment section below anyways guys, thanks again for watching this has been a very long. Video I will see you guys in the next one.
Source : Brandon Butch
Phones In This Article
Related Articles


Comments are disabled
Latest Articles


