iPad Pro 10.5" Screen Replacement - Tips and Mistakes to Avoid By NorthridgeFix
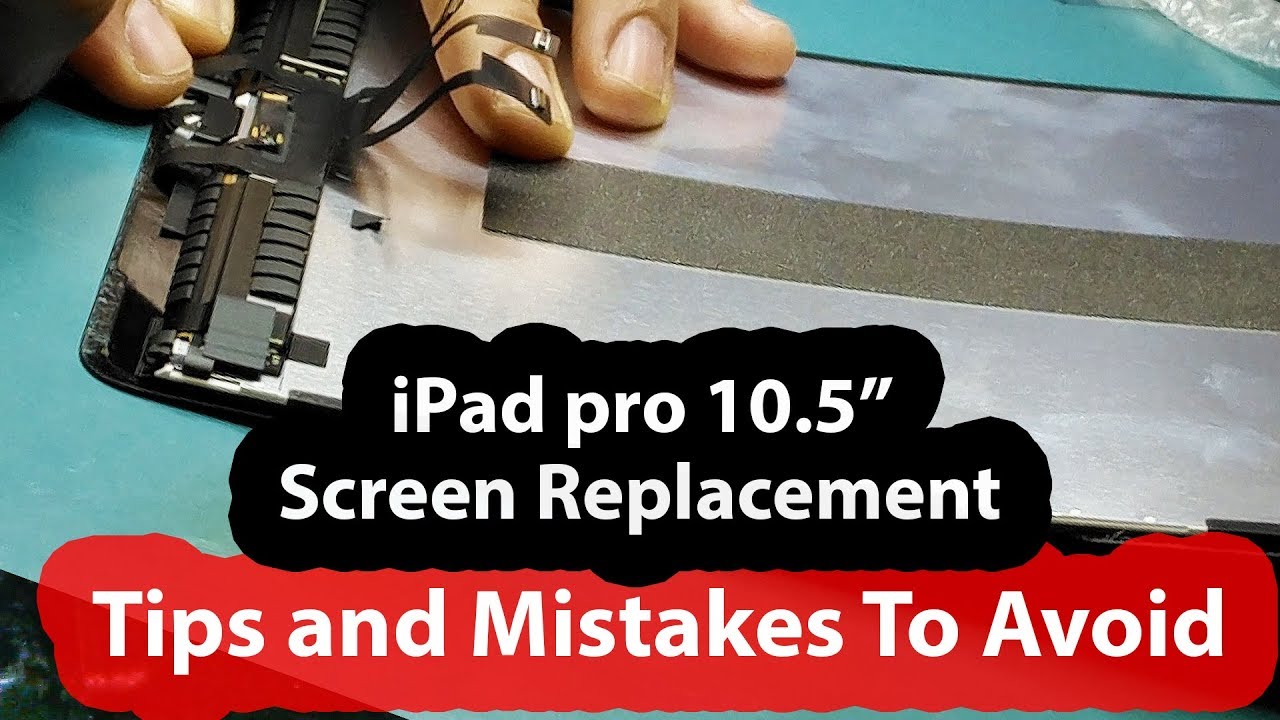
Alright, so in this video we're going to be changing the screen on the iPad Pro 10.5 inch. The screen is really not that bad only has few cracks on it. Like a tiny hairline crack that you can see here and a little on here, really not a big deal, the iPad works. Everything is good, but the customer wants it changed. So we do have a screen in stock, and it looks something like this, so the screen has four places: to connect to we're. Gonna, take the home button off this iPad and put it here, as you can see on the sides, there's not much to the sides.
So when we want to pry the screen open, we should not go deep on this screen because there's only like a tiny surface area on the edges on the top I would say about half an inch surface area. So when we get our plastic card inside, we should not go deeper. Then we have to be careful when prying this area, because we have the home button here now any time you are dealing with such an iPad. You have to be careful if you damage the button game over. You cannot get another button.
This button has a touch sensor. So the only way to get the touch sensor for this iPad is to change the screen at Apple Store, since Apple does not sell buttons to the public. There's no way for us to get a home button. In case you damaged it. We can only get one where it will click, but not act as a touch sensor be extremely careful at the button area.
The rest of the screen I do not care about we're. Going to change it anyway, but we have to be careful. At the home button area. I saw a couple of videos on YouTube people use like 6 million guitar picks they put them on the sides in order to pry the screen open, we do not need to use guitar picks. We only need one plastic card, and we can pry the screen open.
That's number one number two before you disconnect the screen. You want to disconnect the battery, you can risk damaging the backlight filter, or you can even damage the touch of the iPad. If you do not remove the battery first, you may get away with it if you do not remove the battery, but you're taking a big chance and fixing the backlight on this tablet. It is not something you want to do if this iPad came here for screen replacement only so you need to be careful. The first thing I want to do is heat up mainly the top and the bottom, because there's not much surface area on the sides heat up until it's hot to the touch.
So what I want to do is just put a plastic card inside here. When you see a person using a lot of guitar picks. You know that that person is a beginner. It's okay, if you want to use guitar picks, but it's really not needed. We'll do the sides and the surface area on the sides, extremely thin I would say 0.1 inch or 0.2 inches. So we do not need to go deep with the cord.
If you notice, I did not even put it on the side, because I cannot happen, so we try up I, think of the cord underneath the LCD. So the part is going underneath the LCD, and you can't just go like this- see how it's open- it's also cracked from here and from here. It's a hairline, but it's going through here and through here. So we're going to have three pieces of glass at this point now, I can easily break the screen off and take it off, shattered and broken, but I did not want to do that for the sake of showing you how it's done. That's number one, and the second reason is we can refurbish this screen and use the LCD, or we can sell it for another company to refurbish.
We have a person that comes in here, and they buy screens with good LCD's. They refurbish them and we sell. We have the machine to refurbish the screens, and we used to do that. We really do not have time to do it now, and we get paid good price for the broken screen. So why waste of time I'm avoiding breaking the screen or breaking the glass just for the sake of showing you how it's done? Okay, so this side is open.
The right side is open. I'm. Just applying heat as I fry up, the screen should come out by itself just like so. We use the power of the heat to pry the screen open, and we do not even have to cry I. Just I just loosened the glue on the top there's not much on the sides.
I heated the sides and the bottom at the same time and the screen came right off, and we must take the battery out first now on this tablet. We cannot take the battery out, but what we can do, if you look here, that's where the battery is right here we have to remove a screw, and then we can slide the cord between the board and the battery Apple doesn't make it easy, but we've done it a lot of times, and we have to do this, so there's a school that we take out and then slide the plastic card in between the battery and the mother. Would that's it? Oh, that's disconnect the screen is disconnected. Ok and you can see the plastic piece in between the board and the battery. Now we have to remove the home button, which is right here.
This is the most delicate process you do not want to damage the home button. Remember the home button has a built-in fingerprint sensor. If you damage this button, you cannot buy it from anywhere else. The only place to get it is, if you go to Apple, and they change the whole screen for you, and they will have a button in with the screen. So just be extra careful when removing the button.
Ok, so there's a piece of tape we have to take out, and the purpose of the piece of tape is, so it holds the connector in place, so it doesn't get loose. We fry the latch up and very gently. We have to take the cable off the connector. I do not know how much you can see, but this is how the home button looks like we removed this cable here, and now I'm trying to remove the home button holder. Okay, so the home button is out and that's how it looks like, so we are ready to put the home button on the new screen all right.
So our home button is in, and all we have to do now is we connect the connectors on the iPad, and we seal the edges, and we should be all done so. The first two are connected, and now we're doing the other two. The cables on the screen are extremely fragile, so just do not bend down too much do not force them in. If we damage the screen by mistake, we are responsible for it. If we damage the iPad by mistake, you have to buy the customer and no one, or we have to fix it.
So being careful will save you a lot of problems and a lot of hassle with the customer. We're going to take the plastic card out, and we have a working I pad. We going to seal the edges and hold the customer to pick up.
Source : NorthridgeFix
Phones In This Article

Related Articles


![Xiaomi Mi 10T LITE - Full review with photos, video, audio and more! [Xiaomify]](https://img.youtube.com/vi/SgdI2UE9prA/maxresdefault.jpg )

Comments are disabled
Latest Articles


