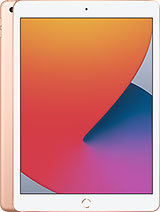
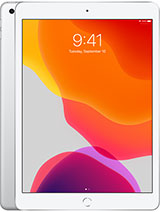
iPad 7th Gen 10.2" 2019 Screen Replacement. A2197 A2198 A2200 By UberGeeks
Hi, welcome and I hope you're doing well. This video here will be a tutorial on how to replace a cracked screen. This is the iPad 7 generation. The number here is all the model number here is a 2 1, 9 7. So let's get started. There are a few things you need to pay attention to.
So this iPad here is the touch ID home button, meaning that it senses your thumb or fingerprint, and you need to use and keep the original home button. When you replace the screen, if you break it, you would have to get a third party home button which the touch ID will not work. You only work on the original home button. As you can see, this is iPad 7 generation, and it has cracked screen here, so I have a new screen that is ready to go, and you can see the screen table is located on the right side of it, meaning that the screen will be going from left to right. Okay, so you're going to be like this and when you open up you're going to go to your right and the cable will be connected to the iPad and same goes for the home button, so the home button would be located, I mean the cable will be located underneath the iPad screen, where the home button is gonna, be on the right side.
So when you remove the glass make sure that you pay attention to this area, do not break the cable, save the original home button. Okay, there are few things you need to be prepared. You need to have a heat gun. If you don't, you can get a hairdryer, a painting tool, tweezer a piece of double-sided tape and, of course, a safety goggle. The glass is very sharp and very find when it cracks so make sure you protect your facial, get a safety goggle very important.
Okay. So, let's get started pretty much. You need to heat up the iPad. For now, you want to make the tape softened. The adhesive tape, then, is easier for you to remove the glass.
So if you feel like the tape is still very sticky, and you can get into it, you can always come back and reheat. So, as you can see, the tape is right about this much okay. So when you stick the prying to try not to go all the way deep, you don't have to go all the way that deep you'll be damaging the LCD. So you just need like about this much that's enough to cut through the adhesive tape. Okay, they're very sticky, so always come back and reheat it.
If you need it, okay, so as you can see I'm getting towards to the right side of the iPad way, I mentioned earlier, the home button flex cable is right underneath here so make sure you have enough heat too slowly. Remove the glass do not break and do not break the cable. Okay, you're almost there, so yep everything looks good so far and while this thing is still warm, let me go ahead and remove the home button and, as you can see the home button bracket, they have some sort of adhesive glue on it and if you can see this is the white stuff so later on, we will be using this adhesive gel, and we'll be gluing that home button bracket. Here you can push from underneath to remove that home button and at this moment be very gentle, and you went try not to break the cable okay, so we have the home button original still in a good condition, and we'll be reusing. This button on a new screen, and you can go ahead and cut off the screen because we will be using the new screen, as you can see the two flex cable right here, so you can go ahead and cut off this one you're not going to use the original screen.
Okay, now you can go ahead and remove the entire piece of it. Okay. So let's put this on the side. If you have any broken glass on the table, go ahead and clean it up. First, okay and, as you see, I still have the original adhesive tape here on the iPad go ahead and remove them all right.
So we have that all taken care off, and you want to come back and do a finer final check. What I'm checking right now is I just check in and see if there's any broken pieces, the glass that left on the iPad. So if you do see them go ahead and remove it because you do not want to have any pieces that get stuck around the iPad. The reason is that when you put the adhesive tape on it, it doesn't have a good contact. If you have broken glasses all round so clean it up, make sure you have clean surface or around the iPad, and when you put a new screen back on, you would have a good contact to get stick together.
Okay, so mine looks good, so I'm going to go to the next step. There are four screws that holds on to the LCD screen two on the top two at the bottom. We are just regular Phillips screwdriver and the two on the top is hidden underneath this black tape so go ahead and remove the black tape. Okay, at this point, what I wanted to show you is: the screen is still somewhat glue on to. If you can see, this is black gooey stuff black tape or glue that is still holding the LCD screen.
Going to come in and scrape it off. Okay, once you get that black gooey stuff remove, then the LCD screen can come out at this point, removing the four screws and remove the LCD screen so go ahead and get a tweezer something like that to remove this black goo and if you know the reason why Apple does that? Please comment below I just find it hard to believe that you already have the four screws that screw onto the LCD, and why do you need the black glue, the glue, the LCD? Still so I don't get that part, but if you know the reason, please comment below. Okay, have one site ready to go? Let me work on the other side. Okay, and this side is clear, and you have to work on the bottom left and the bottom right. Misspelled, okay, I, think that should be it and, as you can see, I can leave my LCD screen, and it's kind of open towards you.
So you flip backwards. Okay, so you flip the backwards not backwards, but towards you. Okay and the three screws that hold onto the bracket go ahead and remove them, and you get a plastic pry tool. I pry, open the LCD screen. Okay, so we're going to reuse.
The original screen. Remember the two flex keyboard that we cut off. So it's easier to just cut off the screen and come back and remove the connector after okay, that's pretty much it. So we still have the home button here, original home button, we're gonna, reuse them again, and we're going to install the new screen. So here's the new screen, the first thing I need to do- is to make sure remove the plastic.
The discovering inside the screen and what I'm doing right now is to tape the flex cable onto the LCD. So just going to look something like this just tape it here: okay, okay, so I- have this thing tape on to the screen trying to remove this plastic okay, so we have that going now. What I'll be doing next is to get the home button making the center on the screen. So at least you guys can take a look okay, so I'm going to remove this. For now at least I can feel the button come over here and that's about the right area for this okay, so I'm going to come over.
The other side make sure your feels like the click is looking good. Okay looks like this is the right angle. I can feel like the home button is clicking. Well, so, like I said, you need to put adhesive gel on it to hold the bracket, so just a little. Listen after whole, you don't have to put a lot.
It is about the right position, I'm just going to hole into the bracket. It gets dry very quickly, so just put some pressure on for a few seconds, maybe up to a minute or so or less okay still kind of trying to get dry. Okay. Well, the thing is drying up. What we can do.
We can continue to work on some other stuff here so come again and try the button. Okay, it looks good feels good, it's clicking. Well, so, lets this thing dry, it's kind of still too moist I think I put a bit too much, but it's getting dry now, all right so go ahead and install the home button cable. This is the longest one goes here: okay, yeah in place and then go ahead and install the LCD screen. Okay in place, oh go ahead and get the bracket back on and three screws that holds the bracket.
Okay. If the screen goes back on here, go ahead and get the four screws back on to hold the LCD screen. Okay, so far, looking good, so the next step I'll be doing is to install double-sided adhesive tape, and you just want to go ahead and install all around the base of the iPad. We can see it, so it makes a tape at the bottom here now I'll be working on it top okay before I do the one on the right side. Let me go ahead and turn on the iPad make sure everything works.
Okay, the iPad is turning on. Okay, I'm gonna cover up the iPad a little just because they have these customers picture on it. Okay, so, as you can see, I can go ahead and press all the numbers. One two three four five they're all working here within this on the right side of the iPad screen. Okay at this point is pretty straightforward: I'm not going to finish up the rest as a tutorial, but I think you kind of get the picture on what to do.
You can go ahead, and you know peel off the adhesive tape plastic here and get all around the iPad and sim goes onto the new screen. Peel the plastic off here right and just kind of tape it together and that's pretty much it. So if you see any dust on the screen, go ahead and clean it up. I just hope that this video helps you at least, if your guidance on what to do. But if you like the video, give a thumbs up and take care, and always until next time.
Source : UberGeeks


