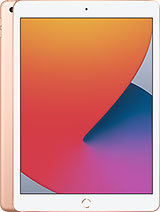
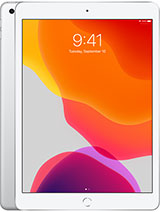
iPad 10.2” Set Up Guide | iPad 7th gen Set Up Manual By Tech & Design
Hey guys in today's video we're going to be setting up your brand-new iPad. So very briefly, this is your charger. So this you would connect up here. It's your wall outlet and then this will go down here below to charge up your iPad. Now what I suggest doing with any iPads putting a screen protector first and getting some type of case for it. So just be aware of that, you do not need to charge you right away unless it comes without any battery charge, but usually they do actually in 99.9 percent of the time they come charged up. So the first thing we're going to do is power.
It up your power button is up here, so it's the only button that you guys will see on top of your iPad, so just hold on to that. We're going to see in the Apple logo loading up in just a little and there we go, so we should see an Apple logo, and that means it's starting up. If you guys have an iPad before you can transfer everything throughout iCloud or you can hook it up to your computer in order to transfer everything that way, you don't have that five gate limit that iCloud gives you for free, so we're just going to press the home button, and then we see this screen once we see this screen we're going to select English. If that's the language you guys want to set it up as, and then we're going to keep going with the whole set up. Let me just zoom in a little more for you, so I place the iPad just like this horizontal.
We can also do that. We're just going to select any country so doesn't really matter. I'm, just going to pick Canada. For now, you guys can switch that up later on, if you like to but pick you and say that's where you're at so, if you guys have an iPhone or something like that, you can do this alright, which is the Quick-start or you can set up manually, I'm going to assume you guys don't have for this video, specifically an iPhone nearby or another iPad. Okay, there will be a second video, I'm going to show you guys how to do this quick start for now.
We're going to set it up manually so set up manually, that's assuming that you guys never had not with device before, and then we're going to go into whatever Wi-Fi network you guys have once you join that network. This is the next screen. You will see the whole setup process actually quite easy, so we're just going to go continue and then setup such an if you guys want to, so that would be pressing right here, and it's going to tell you to press a bunch of times, so I'm going to do that right now, so I'm, just gonna press, the home button press, the home button, so I'm, just placing my finger I'm, not really doing that clicking sound on it, I'm just putting up and down up and down up and down to it gets it. And then it's going to ask me to just adjust my grip exactly this, but I could continue so finish that by the way you guys can always skip this. You do not need your fingerprint if you guys don't want to put in your fingerprint okay, so we're just gonna press continue.
Then we're going to create a passcode again. You do not need to put a passcode. If you guys don't want to there's always going to be other options so down here, you below you guys will see passcode options. We can tab right there and then here we're going to see all these options right. So if you guys want to put a different passcode or just skip this all together, you could, but we would have to skip already the fingerprint.
However, we did the fingerprints right now. You can't skip this part, so let's just create a passcode for now, I'm just gonna call and create the most the easiest passcode in the world, then I'm going to use anyway, I'm going to reenter. If I suggest using something better than this and, as you guys don't care, if you guys don't care, it might as well skip the passcode at this point. It's going to ask you if you guys want to transfer anything from the past iPad if you guys had one before or really from anywhere. However, we're assuming you guys are brand new for this particular video I'm going to do another one where it's going to be different.
We're going to set it up with your iPad or your iPhone, and that way it's going to be much faster, so we're going to choose, don't transfer anything and right here this is important. So if you guys don't have at this point in time, an Apple ID, you guys can always go right here- use different Apple IDs for iCloud and iTunes. You can always choose that. Okay, if you guys have an Apple ID, we just put it here. If you guys forgot or don't have an Apple ID, as can we create one right here, okay, so I'm, assuming most of you, wouldn't have an idea at this point.
So again, you would choose this option and then create Apple ID, which is your second option and just fill up all the information that it gives you once you guys create that just put it in, and you guess what it will take you into this okay. So let's say you guys want to use different up IDs for iCloud and iTunes. You guys can choose that option down here, I'm, just showing you all the options, so you guys have. However, for most of you this will not be eight by the way. That's only for some of you who have different employees, this one I'll go back and if you guys have that point D, like I mentioned just put it right here now, although I highly suggest putting in your app ID our Creator one right now, you could set it up without an ID, that's another option, so it's actually the same way that we go right here, but this time we're going to see in the bottom it says set up later in settings.
We can always do that, so we can just put don't use, and from here we just put our green. We go on to continue. This is up to you guys can enable or disable I say, go ahead Siri. This is really cool because hey Siri should work right away, so you guys should be able to say hey Siri, and then this will recognize your voice without you guys having to touch or press on the home button like we used to do before. So it's pretty cool.
If you guys want to set this up, if you don't, you just can always skip that. So I'm pleased to show you how to set that up, and then we might skip it in the end. But who knows, let's just go to continue: hey Siri, hey Siri sent a message: hey Siri how's, the weather. Today, hey Siri set a timer for three minutes: hey Siri play some music and that's how you guys setup hey Siri for the first time on an iPad, then you guys can just want to continue screen time. This is one of those things that I would suggest not set up, because this set up is only if you're giving this to your kids.
I would suggest it because most of you wouldn't really care much time. You're spending on your iPad, that's what this is. It also enables restrictions, so you guys can restrict downloading apps or restrict content, there's a lot of parental control that you guys can do with thin screen time. If this is for you guys not for your kids, then you guys can set this up later or never set it up, since it's only for you, so I'm just going to put set up later in settings, because that's really only if your parents, you would set that up, we're just going to go share with Apple. If you guys want to, you, can choose not to share I'm gonna, put share now, there's the light appearance and then the dark I'm, a fan of the dark appearance.
To me, it looks a lot cleaner. This now hurts my eyes. This is so much better for me, particularly so we're just going to go for that, so I just recommend it see. It looks a lot sharper nicer, we're going to go continue to continue, so this does give you a quick guide into what you guys can do and some of the things that you should know when you're getting to my iPad. So at this point we are actually all done.
Your setups done. You guys can go ahead and use your iPad now for you guys that haven't used in my pad before there's a few things you should know. For example, if you slide your finger this way, you won't get this stuff, which you guys can miss her wrong with. So you guys could have your calendar here and you guys can have all the widgets. You guys like right here on the site window.
It's going to put that back. Something else to know is if you slide your finger this way, you will see this, so you can control your volume. One of the options come for your volume. Obviously you guys have, but since you're a brightness, Bluetooth airdrop, which is the coolest thing ever, so I'm going to put that to everyone. For now, you guys can also airplay.
If you guys have not to be you guys clear plates that camera in their airplane mode, okay, so it's perfect to know that stuff, there's a lot of gestures that you guys can do, there's also gesture from down here below. If you go up, if I have apps open, let me just open some apps for you to do it so yeah I'm going to open this up as well. Okay, so far, it's light up right now, I should be able to see my ABS here. That's one way. You can also do this and that's another way to view them.
You can close them like so because, if you guys just close them by doing this, for example, pressing your home button- which you can do that, meaning my sister app itself, but you're- not really closing it right now, if you guys really want to close it, you do that and then just swipe up and that's how you're truly closing that. So this is a really quick rough tutorial into getting started with your iPad, but I don't have a full one here, my channel, so don't worry about it anyways. That would be it for this setup video. If you guys have any comments, questions you guys can come to ya, don't forget subscribe and rate. Thank you.
You.
Source : Tech & Design


