How To Use The iPhone 12 & 12 Pro Camera Tutorial - New Tips, Tricks & Features By DHTV
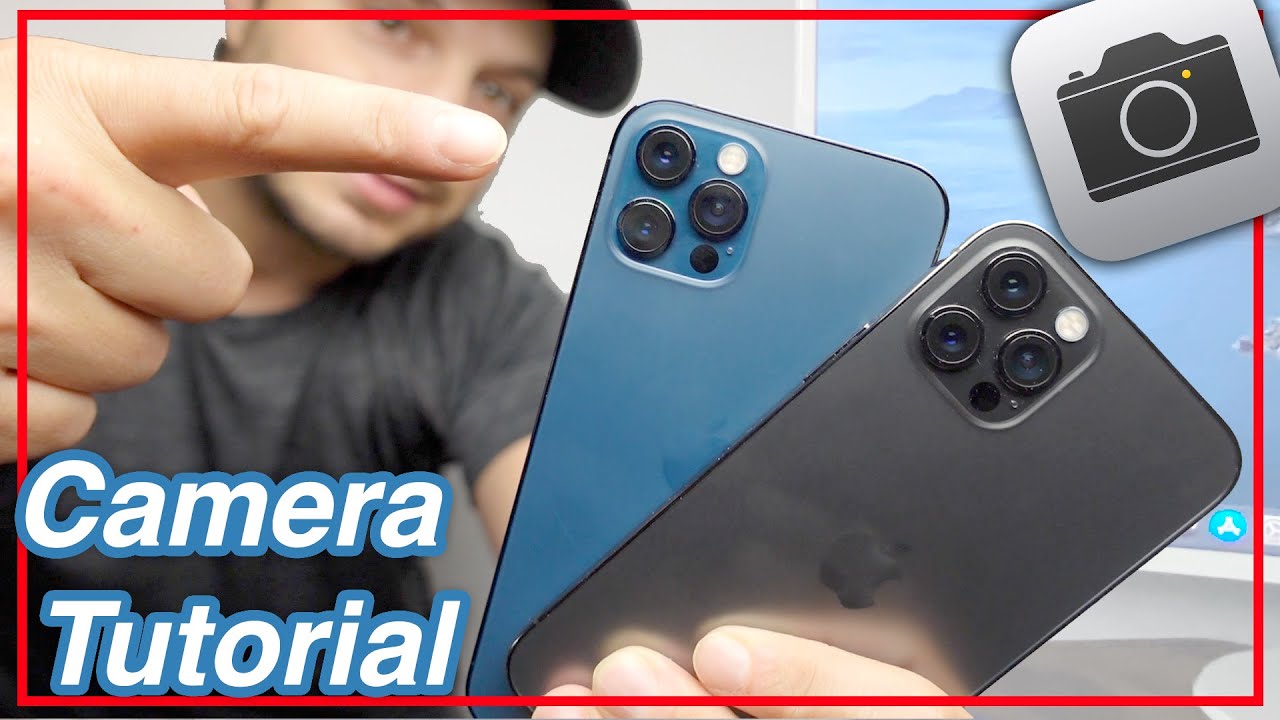
Hey everyone welcome back. This is Dan from AHTV, and today I'm going to be showing you how to use the iPhone 12 and iPhone 12 Pro cameras. Now I'm going to be going through everything you can do with them, so definitely watch all the way to the end of the video and as always, if you're looking for more great iPhone tips and tricks, videos there's a link in the description to the full playlist. Let's get started now, I'm going to be using the iPhone 12 Pro for this video, but you can use pretty much any iPhone 12 device and the instructions should be pretty much the same. We're going to start, though, by opening our camera application at the top here and by default. Mine has opened up to photos if yours is open somewhere else.
Just you know swipe across that's how you navigate through the sections and bring yourself to the photo section now we're going to start off by going through all the photo options. But if you do want to skip ahead to something specific, I put some chapters timestamps in the description. You can click on them and learn exactly what you want to learn and skip ahead. So what we'll do first, in the photo section, is tap this little arrow at the top, and this is going to bring up all the options that are available to us in the photo section. Now it's always important to set these things up before you take your photo that way, your photo is going to be taken exactly how you want it.
So the first option that we have here, if we just give it a quick tap, is going to be our flash and there's three options auto on or off now I traditionally leave it on auto or off and if you do set it to on you'll, see the little flash icon at the top left is now yellow. You can always come back down here and set it back to auto or off as well. The next option is the live photo and if we tap on that, you can have live auto on or off and a quick demonstration here, if we turn it on, what's going to happen, is any movement. In the background. It's going to take a second before and a second after and create a short sort of live video photo, which you can then edit with later we're going to use the shutter button to take our photo, and I'm just going to kind of move.
My fingers around here and I'll take my photo, and now we have a little preview. If we tap on the preview here, and then we tap and hold on the previewed photo you'll see my finger is moving, and this is really great just to have a little more of an experience when you're taking your photo, but also, if you tap the edit option and then tap on the little live icon at the bottom, you can actually move the key frame around. So let's say somebody blinked you can kind of move to where they're not blinking, make it the key photo. And now you always get the perfect photo every single time, we'll just tap back to go back to our photos, and I traditionally leave it on live auto and what that means is that Apple's technology in the phone is going to decide if there's enough movement to justify taking that live, photo or not. Now the option that you see between live and the flash is your night mode now this is going to appear whenever the camera determines that a low light situation is present, and it's going to use night mode to sort of enhance that and make it look perfect in those low light photos.
Now you can configure how much or how little you can see. It just disappeared there, because now it decided it wasn't too much of a low light. But if I put my hand over the camera and darken it, you can see that feature appears. So it's determining this based on the light in the room. Now when it is available to you, you can tap, and you can actually configure how much or how little it's going to need now when you turn it on full.
For this specific photo, it's two seconds we tap, and you can see it goes through that night mode process. Now it's done, so that is night mode, and it's only going to pop up, like I said when it's needed. The next option is the size of your photo. So by default it's set to 4x3. If you tap on it, you can change that over to a square photo.
So if you take Instagram photos, or you can choose the 16x9 which really takes advantage of the full screen real estate of your phone- and you still have all the features and options there as well, so for the video I'm going to leave it at 4x3, which is the standard, it's also easier for you to see the options there as well now. The next feature is the exposure. You now can lock up the exposure, so you can really expose the photo or take that down to a really dark photo, and it's going to hold that exposure, no matter what you're doing in the photo, and you can see a little icon up here at the top as well letting you know, and that way you don't have to worry about the exposure changing in your scene, and again you can just tap the shutter button and take that photo now, keep in mind whenever you do adjust the exposure here, it's going to stay this way until you bring it back to zero. So if you do modify it, and you want to go back just make sure you do so, but we'll revisit this in a little. The next option is our timer and if we tap on that, it's going to take a timed photo, and this is great.
If you have groups- and you want to be in the photo, or you have your phone on a tripod, you can set it to 3 seconds or 10 seconds I'll, set it to 3 seconds to show you, so everybody's in place. We take our photo. You can see the little countdown, and it'll take the photo again once you have this feature enabled here you'll see the option appear at the top, and that means it is enabled it's giving you a little reminder. So you don't forget, you can always tap up there as well to turn them off in the same fashion. Now the last option is the filters, and these are live filters.
So before you take your photo, you can actually set up one of these filters and there's a lot that apple has here and once you've chosen the filter you want, you can always tap away, make all the adjustments on all the other options as well and then just take your photo, and that is it again. The option is appearing up top, so we can always tap on it here, just to quickly turn it off, and then we'll tap away, and we're back to the original photo now additionally in photos here we have this little option at the bottom right and this switches it over to the front facing camera. So now you can see me here, and basically you have all the same options here. You actually have night mode now on the front-facing camera as well. You can see the different options that are available here, pretty much all the same, we're just in our front-facing camera this time when you have the front facing camera, and you're looking at it when you take the photo my hand is here.
If I look at the preview, my hand is now on the other side, a lot of people don't like this. You can tap edit here and then flip that around just by tapping the crop option here and then using this flip option up top, and it'll flip the photo. But if you open the settings application here, and you go down to the camera section here- there's actually an option that you can turn on to mirror the front-facing camera. Now, when we open the front-facing camera my hand is on the right. If I take the photo my hand, stays on the right so totally up to you, I'll talk a little more about that in the settings section of this video, but it's an important tip as a lot of people.
Ask me about that. Now, let's go over taking a proper photo with all the options you have on screen. So we know that when you press on the shutter button, it's going to take your photo, but you can actually tap to focus, and you can see a little square is appearing. So if you want to focus in on a specific area of the photo, you can just tap to do so. Keep in mind if there's any movement in the background, the autofocus will come back, and it'll, remove where you tapped.
So if you want to lock the focus and exposure, you can tap and hold you'll see the leaf lock appear and from this point you can swipe up and down to even lock the exposure for that specific photo. You can take the photo and then to remove all of these options that you did on screen. You just simply tap away, and you're back to how the photo would look originally. Now there are some zoom options here. You have the 0.5 wide angle, the one times and two times zoom on the iPhone 12 Pro now, depending on which iPhone you're using you may have less or more the iPhone 12 Pro max, I believe, has a 2.5, and these are your optical zoom options and optical zoom is going to give you the best quality when you zoom in or out of the subjects. If you surpass that two times for this one, so we can actually zoom with a pinch as well.
So if we surpass two times zoom we're now into digital zoom and that's when you start to see graininess in the photos, and they start to look kind of dull and not the greatest. So if you want the best photo, don't surpass your max here on the two time zoom and if you do want the wide angle, you can always zoom out all the way out to 0.5, and you can see how much real estate we can get into that photo. Another quick tip you can just swipe, left and right here in a circular motion to activate the zoom as well and see exactly where you are in your zoom. Now, let's tap the arrow option again, and we'll bring up all the different options we have at the bottom. So I'll just take it to the left here and show you.
We have time, lapse, slow motion, video photos, portrait and panoramic, so we're going to move to the portrait mode. This is extremely popular mode here, we'll take away one of our subjects here as well as this one, and we'll focus on that main one. There and portrait mode allows you to use these really cool professional, looking sort of features here like natural light, studio, light, contour, light stage, light stage, light mono and then even the high key mono, and it actually works with the front front-facing camera as well. So if I flip it to the front, we can utilize these exact features here and what it does for the main feature, I guess, is the blurred background. That's what everybody loves with these.
So we'll take a quick look here at how it works, so we have a zoom here at two times. It's a little too close for this particular feature, so I'm going to bring it back out to the one time zoom we'll take away this duck, and you can see the background is already blurred now. If there wasn't a table here, you could get a really cool effect with that as well, but from here we can choose one of these options, and we can also control how much of that background is going to be blurred. So, for starters, we're on studio light, it's showing us that we're on studio light here. If we tap the little option for studio light, we can control how much light is going to be in the photo as well, and if we tap that little f here, this is going to allow us to control the depth and that's how much or how little blur is going to be in the background.
So I've taken it away completely. If I swipe all the way to the left, I brought in as much blur as possible into this photo, and this is going to be the same for pretty much any one of these options. You'll see that the blur or the lighting, you can control that in each one and let's just take the photo right here, so we're in natural light with full blur we'll take our photo once it's taken. We can tap on the little preview, we can tap edit, and we can see exactly what mode that we use, so we're portrait mode at the top. We can tap on it to turn it off completely.
Furthermore, we can also control it. You can actually change which mode you're using right from this section and look how cool that looks so, there's a lot of cool features. You can use with this portrait mode and then editing the portraits after the fact, as well. Now, within your portrait mode, you have a few options available here again now. A new feature is the ability to use night mode with portrait photos and that's drastically going to improve how those low light photos are taken.
In portrait mode, we also have the exposure, so you can control that as well and pretty much all the same features here. The main difference is this one right here, which is the amount of blur that you're going to use within the photo moving on. We will tap the little arrow there again and this time we're going to work our way to video, because that is a huge feature with iPhones and there's a lot to this. Now videos are taken pretty much the same way as your photo rather than your shutter button. Here we have our record button.
You would tap on that to record now. There are options that you can set up beforehand and to access those in video you're going to swipe up on the screen, and we only have two here. The first one is the flash and instead of it just flashing, you can actually turn it right on, so that you can see the light is going to stay on throughout that video. You will burn through the battery fairly quick by leaving that on, so I leave it to auto or off most of the time. The other option is your exposure.
Now this particular video, for whatever reason is over exposed. It seems, so I'm going to lower it down a little here, and you can see it's much nicer, much more pleasing to the eye and I can have it set that way same things. You can tap to focus on screen. You can lock your focus just by tapping and holding it's going to lock that you can also play around with the exposure here as well. This is temporary, though, when you do it this way, as you can see it's still set, and when I tap away, it goes back to the exposure that I had preset at the bottom, and we have some HD and frame rate settings on the top right.
So this is something that's very important that you configure first, so that way you shoot the video in the proper format. Now HD is 1080p and 30 is 30 frames per. Second, we can change this from HD to 60 frames per second, and we can change back to 30 frames per second just by tapping on the little number, and we can also change HD over to 4k and 4k is going to give you a much larger video. So keep that in mind. If you don't have a lot of memory, and it's going to give you better quality as well, and we can switch that over to 60 frames per second as well, all the way down to 24 frames per second, which I never use.
But it's there. If you need it to take your video, you just simply tap and in your video you'll, see the time at the top. You'll also have a shutter button here, where you can take your photo as well. You can access your zooming out and zooming in, and you can use the pinch zooms as well. Keep in mind that video only has a six times zoom in on the iPhone 12 Pro, and I wouldn't suggest using it again after the second or two times zoom.
You really start to lose quality and I wouldn't really be bouncing around like this. It just doesn't look good when you're shooting video when you're done simply tap stop and your video will save at the bottom left. If you tap on the video there, you can edit it just like you do with photos tap edit. This time you have a timeline at the bottom. You can tap the play button to view the video you can also clip the beginning or the end of the video just by dragging it inwards from here.
You can also change the exposure and all of these other options. Brightness highlights shadows and all of these things. So if you did want to make some modifications you could, you have filters that you can add, and then you can actually crop this down so that you can pull this down here and just get what you want in the clip tap done when you're ready. You have two options: save video as new clip or save the video. Whatever you'd like to do once you're done, you can go back and that's pretty much the video section now, let's swipe down we'll move to the slow motion, videos which is a very popular feature, and I'm gonna just quickly turn off the flash there.
I don't want it on during this demonstration. You have all the same options. Pretty much you can swipe up. You can see flash exposure set that as you'd like we'll swipe back down, you can zoom in and out this time at the top you have HD at 240. So that's going to be the 1080p at frames per second.
You also have the ability to switch it over to 120 frames per second, and there are settings that we'll talk about later. That will show you how to modify those even further. So we'll just take a quick look at the slow motion video here, so we're going to basically tap on the record button, and I'm going to throw some of these ducks, and we'll see them in action. We'll tap stop and now, when we go to view the video you can see the slow motion effect right there again, you can edit it the same way. We talked about in the video section, but that's pretty much.
How slow motion will work now time-lapse? This is a cool feature and night mode is now involved with time-lapse as well. Now what time-lapse actually? Is it's basically taking a video, and it's going to drastically speed it up. So you leave your camera on, let's say overnight, and it'll speed up the night turning today, which may be over a span of 12 hours, and it'll, put them together and speed it up into something like maybe 30 minutes. So it's a really cool feature and on screen here, you can kind of see how it works. It's basically going to speed up time to give you a really cool effect.
Moving back down here, we'll move to the panoramic photo. Now I've moved the ducts so that they're out of the frame- we don't see them here, but using this feature is going to allow us to grab them and then show them off in that one photo now you can use the zoom effects here too. You can also use the zoom out effect and really make a large photo. The options you have here been very limited. You can see.
I can't pull up or anything so once you've chosen your zoom, you can tap to focus as well. There isn't any exposure we're just going to move this camera like, so we're going to tap on this, and we're going to slowly move this around. You want to keep as steady as possible, so you can get the nicest looking photo. So I'm actually going to drag this way, because I just want to keep it straight, and we're just going to pull it across like so, and then I'll tap stop now. What we could see in the camera was pretty much this one duck in the camera of the phone, but because I used that mode.
We got all the ducks in there, and it looks really cool, especially when you turn your phone now you can see in the background how messed up those ducks kind of got little jitters in your movement will kind of mess up the photo. So you want to try to keep as steady of a hand as possible and using something like this dragging across the table. Isn't the best way to demonstrate it, but I've taken some great photos of lakes and cities using this feature, and it really pops. Now, let's go over all the settings within the camera app. So once again, we will go down to the camera section, and we'll take a look at all of these at the top.
We have formats and high efficiency is what it's set to by default. Most compatible is another option. Now I prefer most compatible because I like the fact that it's most compatible when I upload it to my computer. If you use the high efficiency mode, it does take a little of time to load and to convert it from this HEIF sort of format. So it's totally up to you: you'll reduce file size with the high efficiency.
It just won't have as much compatibility and sometimes even sending them through text has problems as well. Next is the record video so, like I showed you earlier, you can actually configure the 4k options and the 1080p options right from the camera app in the video section. Keep in mind that if you want to use 4k at 60fps, you need high efficiency mode enabled, which I just turned off right now, but you also have an option here to shoot at 720p at 30 frames per second. So if you want to turn that on, you can- and you can see right here- what the file sizes are going to be for those specific formats. So if you want to save the most space, you want to shoot at 720, and you're going to use the most obviously with 4k video right there.
The HDR video is going to need the high efficiency mode enabled as well, but when you turn that on it's going to record up to 60 frames per second in 10 bit high dynamic range, including Dolby Vision. That's what apple has written there- and this is just going to give you a better overall photo- and this is stuff- that's in like DSLR cameras, and now it's packed into these phones, auto fps. So this is going to reduce the frame rates to improve the light in the video. So it's going to optimize the size as well, so you have it set to auto by default. You can turn that off or auto 30 and 60.
, so it'll determine when it's best to use whichever frame rate and allow you to kind of move on and off. Based on the scenario you're in now. Locking cameras is pretty interesting here when you take videos with the iPhone camera, because it has three cameras: it actually switches between them as you're shooting video. If you want to lock to the camera, you can turn this on, and it's not going to automatically switch between the cameras while you're recording for myself. I leave that off.
The next option is the record slow motion, so we're recording by default at 720 at 240. You can shoot 1080p at 120. , then again you will need high efficiency mode to utilize 1080p at 240 frames per second. So if you want to take advantage of all the best features of the camera, you're going to need to leave that high efficiency mode on record stereo sound just leave that on for the most part, unless you have a specific reason, why you won't, you don't want stereo sound on preserve settings. This is interesting as well, and what it's going to do is preserve the last setting for your camera mode and creative controls.
So traditionally, when you open the application, it's just going to open up in photos, but if you want to always open in the last option, you were in so video here. So if I turn this on in the settings all right, and we go back in, so we're in video, if I close the app- and I open it again- it's going to open in video this time instead of defaulting back to photos, so you can do that with the creative controls as well. If you like to have specific filters, aspect, ratios lights and such all there, you can enable that as well. You have the exposure adjustments which is going to preserve the exposure adjustments rather than automatically resetting live photos. The same thing there uses volume up for burst.
You can change this so that when you turn that on now, when you take the photo with that option, enabled here, so we'll go to photos, and we press and hold on here, it's now going to take the burst photos rather than the video. Now, with that enabled you can use the volume down rocker still to take your video. So it's a suggestion that you might want to take to turn that on just to get more functionality out of your camera, so I'll leave it on. For myself, there scan qr codes is going to allow you to use your camera app to actually scan those qr codes on various products or listings, and what it's going to do is pop up with a notification at the top, and that way you can open that specific website rather than having to type it all in next is grid. I always turn this on.
People always give me problems because of the reason why it's going to give you a grid, and I use the grid to keep things centered on the photo. Now there may be a more specific reason for it, but that's what I use it for, and it gives you sort of way to like kind of level everything off. That's the reason I use it and again, I'm not like super professional photo taker here, but it makes things easier, especially when you're holding your camera having those grids mirror the front camera. We talked about this if you want it to mirror that picture so that you're not flipped, make sure this is enabled view outside the frame. Now I had this off by default, and I was testing this.
So when you turn it off, for example- and you noticed this for sure during the video that sometimes when I would zoom in you- could see the outside of the frame, so I'm going to go back turn that on and now when I zoom in you're seeing extra real estate at the top and at the bottom. Now when I take the photo, what I thought was supposed to happen is: when you tap edit and the crop option, you would be able to edit and access that extra real estate. For whatever reason it's not working for me here, and it's never worked for me and I could never figure out what was going on with that. If anybody knows, let me know in the comments, but that's how I understood how this worked when you zoom in or out maybe the out, but it just does not seem to work for me. I can never access that extra real estate, but that's what I think it's for it's either to turn that on or off, so it can grab more information.
The next one is scene detection, so this is going to automatically improve the photos in the different scenes using intelligent image recognition. So you can turn that on or off, if you want to prioritize, faster, shooting, again more intelligent kind of stuff, it's going to try to adapt the quality of the image when you're rapidly pressing the shutter button. I mean these are things I always leave on lens correction. It's going to try to correct the lens distortion on the front camera and the ultra-wide cameras smart HDR again, so this is going to be using the intelligence in this system to blend the best parts of separate exposures into one photo. This has been around for a long time, so I leave those on these.
Are the settings that you can utilize here? Configure them for yourself. First then go into your photo app and then play around with the features within each option that way you're ready to go, and you have the best chance of taking the best photo. Now, let's go over some tips and tricks and the first one here is in the photo section of the photos app, and it involves just pressing and holding on the shutter button and what it's going to do is start taking a video. What's called quick video and when you let go it's going to stop in that same fashion, you can hold on the video and pull it to the right so that it continuously takes the video until you tap stop, and if you want to take burst photos you can pull the shutter button to the left, and it'll continuously take photos until you release also you'll notice at the top here anytime, you have the camera on it's going to show a green notification. So if ever you see that green notification, it means that some app or something is using your camera.
So keep that in mind, if you ever see it on when it shouldn't be now I've been getting a lot of questions over the years about photos being grainy and things like that. The culprits, like I said, zooming in too far bad lighting and when lighting is flashing from behind the subject. So, if I'm shooting this photo of this duck, if there was light coming from back here behind them, the light would shine right into this lens and cause the camera to really have trouble catching what you're looking for so try to have lighting that's good and not behind the subject. Unless that's your specific reason, you can shoot in this vertical mode. This is called portrait, and you can also shoot in this landscape mode here.
If you take videos in this angle here, if you watch them or upload them to a computer, you'll always have those black bars, especially if you make YouTube videos, you want to be shooting your videos in this direction tying in with this. You can actually use these buttons at the top of your phone to take your photo or video, so we'll just swipe back over to our video, and we'll just press on the volume up rocker, and we can take our photo like so now. I know I covered a lot here, but I really do hope. You guys found it useful and if you did, let me know in the comment box below. If you have any questions, let me know and if you figured out how to use that outer area there, when you can access that, let me know as well: I've been trying to figure it out for years now.
I can't figure it out anyway, if you did find this helpful or enjoyable click. The like button subscribe to the channel for more videos and click, the bell notification box, so you're notified on your phone. I've got a bunch of iPhone 12 12 pro videos coming up, and I'll see you guys in the next one.
Source : DHTV
Phones In This Article
Related Articles


Comments are disabled
Latest Articles


