How to Teardown & Replace the Battery on a iPhone 11 By Serg Tech
Hey there, everyone in this video, I'm gonna, show you how to take apart and replace the battery on your iPhone II 11, hey there, my name's Sergio, with surge tech and in this channel I do tech reviews and tutorials. So if you haven't subscribed already go ahead and do so now hit the bell to receive notifications on my future videos, there's going to be links to all the information that I talked about in this video down below in the description. Alright, let's get right to the video now alright. So in order to open up your iPhone 11 first thing: we're going to do is we're gonna, remove the two pantalone screws at the bottom. So another thing we are going to have this tool set link down below in the description where you can get all the premium tools to repair your iPhone, 11 or 11 Pro, so we're going to be using the pencil up screwdriver and removing the two screws at the bottom put them somewhere organized so that you don't lose them once you have the two screws removed: let's go ahead and power the phone off- if you haven't done so already and then what we're going to need to do is we're gonna need to give it heat here around the screen assembly around the corners here, because it does have a small amount of adhesive around the edges here, holding the screen down to the frame. So you can either give it some heat with a hairdryer or heat gun by just moving it around the edges here to loosen up the adhesive, or you can go ahead and set it flat on a hot plate, which is what I prefer to use.
So let me go ahead and show you. This is the hot plate here: I set it to about a hundred degrees, Celsius and then just place the iPhone flat on it for a few minutes until it's hot enough to where you touch it, and it burns just a little. So you may want to use some rubber gloves so that, once you grab the phone now since it is gonna, be a little hot so that you don't burn your hands so once the phone is hot enough, go ahead and grab it, and we're going to go ahead and use this suction cup place it towards the bottom here of the screen, and we're gonna lift on it. Until we see a slight opening once you see that slight opening we're going to insert this prying tool in between the plastic frame here of the screen and the metal frame bezel. So, as you can see, there's a slight opening there.
I was able to wedge it in there, and then we're gonna kind of just gently. Go around it. Removing the adhesive, that's holding the screen to the housing of the phone. We're going to use this second, a prank tool to help us out. This is a plastic leg tool which is a lot safer, so we're gonna just go around the entire housing here, the screen assembly of the iPhone and then once you have most of the screen lifted like this, you can remove the suction cup, so the iPhone 11 screen is gonna.
Have the Flex cables over here on this side, just like the previous iPhone, 10 and 10 s. So what we're going to do is we're gonna, just wiggle the screen to remove the adhesive here at the top, and we're gonna, lift it sideways to this side, and the iPhone will light up completely so now. The next step is we're. Going to have to remove these pro-tips screws here, so we can go ahead and disconnect the Flex cables connecting these screen to the motherboard. So we're going to be using this pro-tip screwdriver, which comes with the set to remove the pro-tip screw and then once the pro-tip screws are removed, you can go ahead and pry up on the metal bracket all right.
So then, we're going to go ahead and disconnect these two flex cables right here which connect the screen, and then we're going to go ahead and disconnect this last cable down here, which connects to the ear speaker here on the screen. So if what we want to do is replace the battery on your iPhone 11, what we're going to do next is we're. Going to have to go ahead and heat it up, so that we can soften the adhesive. That's holding the battery down to the housing of the phone, or we can also remove these three stickers right here, pulling on them, and it will remove the adhesive as well, but it will remove it completely. So I prefer to heat it up for a few minutes on the hot plate or if you don't have one, you can do it with a hairdryer heat gun back here where the battery is and then pry up gently on the battery.
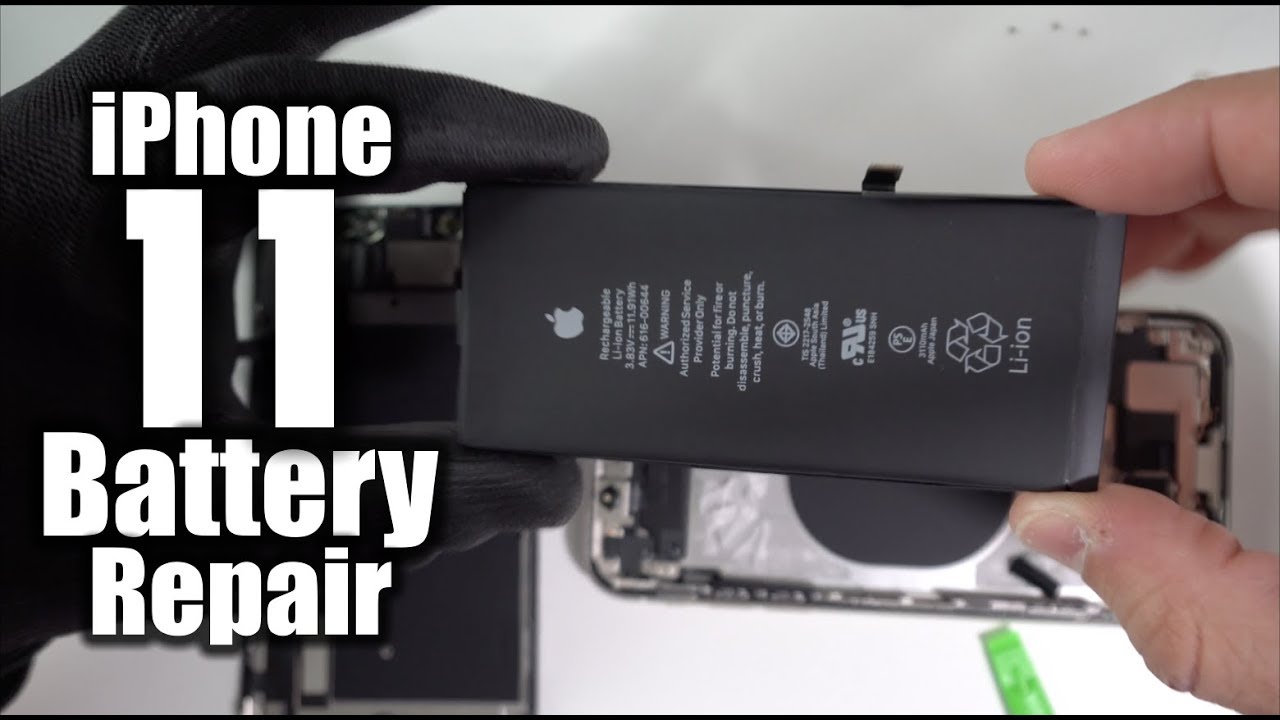
So let's do that now place it on the hot plate for a few more minutes at 100 degrees, for about four to five more minutes all right. So once you feel that the battery is hot enough, go ahead and stop hating it all right, so use a solid prying tool to wedge up on the battery and there you go. It will come up pretty easily. As you can see, the adhesive is still holding down the battery, so we're going to go ahead and just clip this knob and then the battery will come out completely. So there you have your iPhone 11 battery, so make sure you go ahead and place the adhesive back on as well as you can so that it can hold the new battery down in place so that once your ready go ahead and place the battery back into the iPhone position.
It correctly then go ahead and grab your screen assembly and let's go ahead and connect the Flex cables here for the screen. We're going to connect this one up here at the top. First, let's go ahead and connect the two flex cables down here for the LCD and then let's go ahead and connect the battery flex, cable, connector and then finally, let's go ahead and place all the brackets down here and the pro-tip screws. And then let's go ahead and grab this metal bracket right here and place these screws on as well, and once you have all the tried tips on the brackets back on, we can go ahead and close the phone up, so we're going to close it from the top first so position the top in first like this push it in at the top, and then we can go ahead and pushing it in on the sides first and then here at the bottom and there you go, go ahead and place the two pantalone screws back in at the bottom and there you go. That is how you take apart and replace the battery on your iPhone 11.
Source : Serg Tech
Phones In This Article


Related Articles


Comments are disabled
Latest Articles


