How to Set Up a iPad 2017 (5th Gen) for Beginners By My Mate VINCE
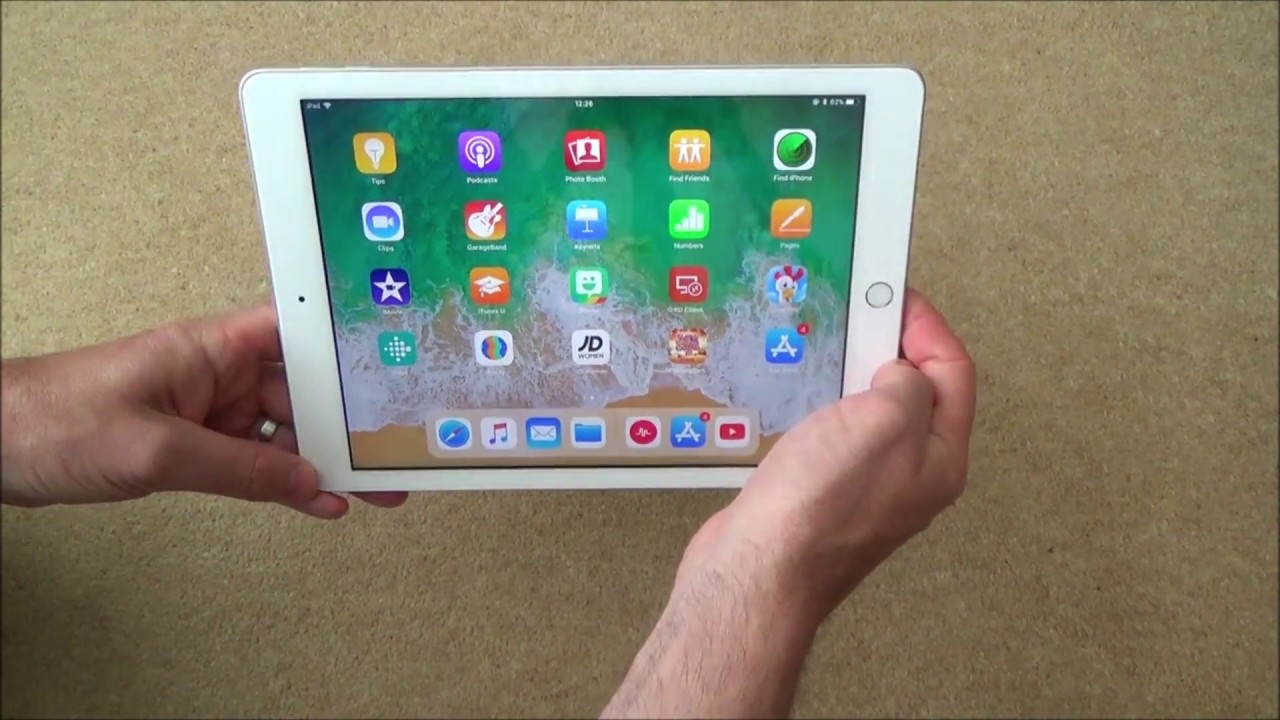
Hi there, my name's Vince from my mate Vince common in this video today we're going to be setting up an Apple iPad. So this is a 2017 model. This is nine point seven inches and is also called a fifth generation iPad now I've already got an iPod, so we're going to be using the same Apple ID from the iPod onto the iPad, so this video is going to be intended for beginners, and it's going to show you the initial setup for when you get it ? getting it up and running, you know connecting up to Wi-Fi, etc. and then there's going to be loads of other guides on the internet, about how to do different things on the iPad once you've got it up and running. Well it so, let's unpack it alright! So here it is here, so we have a charger here so just take off all the covers from it. This is the UK one.
So that's the reason it looks like this, and we're just going to slide that in from the top down like that and just click it into place right now in here we've got a Lightning, USB cable here. This is what you're going to need to charge up your iPad with now. Hopefully, when you get it, there will be a bit of charge to it. So you're just going to be plugging that in to this side here now, we'll only go in one way around. If you have a look, you can see that there's a gap up the top, so the gap marries up with the white bit there like so don't force it if it's not coming in nicely flip it round and then push it in again and that size beside that we're going to clip into the iPad and with this it's reversible, so it doesn't matter which way it goes in the pins, do the same on both sides so to turn it on.
If you have a look at the top, you will see that there's a little switch here, so you just need to hold that down. For a couple of seconds, and you'll be greeted with the Apple screen there right now, you need to pick your language, so I'm going to do English. Remember it's obviously touch screen and select your country or region, but for me, I'm going to go down to the United Kingdom. Obviously you will be picking your country right. If you have an iPhone or iPad running iOS 11 bring it nearby to sign in automatically.
If you want, you can also set up this iPad manually, okay. So what I'm going to do is I'm actually going to do this manually so now, I need to choose my Wi-Fi network. Now. Let me explain what that actually means. Okay, so you need to grab your router or, as you may know it in the rest of the world router in the UK.
We call it a router, so what you need to do is have a look at the back of it. This is basically the thing that gives you the Internet in your house, and you will see that your route will have an SSID. That is the name of the router, so you want to be connecting to your router and not your neighbors. It will also have a wireless key. It might be called a passphrase.
Furthermore, it might be called a password either way you're going to want to find out what that is on this one here. Furthermore, it makes it nice and easy, because you can bring this to the gadget that you're connecting up, if not take a picture of it from your phone or scribble it down on a bit of paper, so we're going to have to enter these details here now. This is just a test router. This is not the one I'm using in real life, so here I'm going to be connecting to this SSID, because this is my router, and it's going to ask me for my password. So obviously I have to do this off camera.
Okay, so I've entered in my password now. Obviously, if you want to use capital letters if any or fit in these capital letters, then you just need to hit this little up arrow here, and then it puts everything into uppercase press it again, and it goes back to lowercase. So I've done it there, so I'm just going to hit join, and now it should connect up to that Network. You can see that it's just whirring around in the corner there, and now you've got a tick. So we have connected to the correct net.
So now we're just going to go to next. In the top right hand, corner says it may take a few minutes to activate your iPad. Okay, so it says: touch ID use your fingerprint in place of your passcode or Apple ID password for purchases continue, so I need to place my finger. So you need to decide what finger you want to use, whether that be your thumb or your finger. So with me now, I'm just going to use my thumb because realistically, when I'm holding it I'm going to be carrying it like this.
So okay, so it says there oops, you've, clicked rest. Your finger on the home button without clicking it, so you don't need to click down. You just need to rest it on there and then, as it fills up the red lines, just lift off again and what it will do is because you're making tiny minute adjustments. It means that when you come to do it, it won't have to be exactly in the same spot every single time. Right now, it says, adjust your grip, keep going to capture the edges of your print.
So now we're going to go to the edges, so you can see now it's taken it from all different angles. Right now, I need to create a passcode. Now, as you can see at the moment, it's one two three four five six digits long, but you can change this. If you go to passcode options, you can change it, for example, to a four digit one, and then it will go down to four digits. You also have other options here as well, where you can just, for example, type in a name, so I'm going to go to four digits, and I'm, just going to put in my code.
Off-Camera now it's just going to ask me to re-enter it again, so you do the same one again right, and it says absent: data restore from iCloud backup, restore from iTunes backup set up as a new iPad move data from Android. So this is up to you. What you want to do now. I won this one, because I've really got an iPod. All my family's already got an iPod I'm, just going to be doing restore from I cloud backup.
Now it's going to ask me for my Apple ID and my password, which I already have obviously, if you're completely new to Apple you're going to be setting up as a new iPad, and then you would be activating a new Apple ID, because you want to be able to have the full access of features, and you will need the Apple ID for that. Alright, so again, I'm going to be doing this off camera. Now, when you're looking for the out sign, you've got to hit down in this bottom left-hand corner here, and you can see it will change, and then you will have the out sign there right when you're done with that. Just hit next right, so it says here and a message with a verification code has been sent to your other devices, so I need to now go to my iPod, and it just says on the iPod that an Apple ID has been used to sign in to an iPad near where I live, and it's just asking me to allow it. I'll show you on camera, because it's got all the details, and it's come up with a verification code.
So it's come up with a six-digit code that I then need to put in to the actual new iPad. That's what I'm going to do now? What I was just saying, updating, iCloud settings, so now we need to go through all the terms and conditions says this may take a few minutes to set up your Apple ID. Obviously, if your battery is low, then you need to plug in your charger to get it charge up. If you're wondering how to do that, it's really simple! You see the charging ports down the bottom here you get your lightning connector, and you just plug it in, and you hit here. It will go nice and firmly into place like soap again, it doesn't matter which way you put it in to take it out again.
You just need to firmly pull downwards right. Now, it's going to ask me to choose a backup so with this one though I've run out of iCloud storage a long time ago, and this one here so the last backup I can do- is the 17th of January 2018. So obviously, if there's been other photos and stuff that have happened since January, then they're not going to be included on that, but I'm just going to click on it, then I'm just going to go to continue. Now, it's just going to ask you different options. For example, pay you can add your credit or debit store car, sir Apple Pay to make secure purchases in shops in apps and on the web, or you can set it up later in settings.
So I'm not going to do this now, so I'm just going to go to set up later in settings if I was to go to continue. This is where you were added your card on to here, but I'm. Just going to go to the back just have to block that, because it's got partway details now set up later in settings, so I'm going to worry about that later, iPad analytics help Apple improve its products and services by allowing analytics of uses data right. Well, it's up to you whether you want to share the information and stuff with Apple or not I'm. Just going to hit don't share, but read that and decide for yourself.
Ok! So now it's going to restore from the iCloud- and this has time remaining, so we're just fast-forward through all this to see that it hasn't frozen up on anything because. If you look up here, you can see it's spinning around well, so we'll come back to that when it's done alright, okay, and it says here- restore completed your iPad was restore successfully. There are just a few more steps to follow than you finished, so let's go to continue right now, it's just going to give you some instructions, so you can read through these in your own time, access to dock from anywhere, so we're just. You can watch the video up top there to see what it's going to do and there we have it. You can see how easy it is to set up the iPad now these that are all in black, and it says waiting.
These are the apps that are currently on the iPod, and then they will get transferred over to here as and when bit by bit, they will all download on by water all right. So if you have a look there, if you swipe up from the bottom, it will bring up this menu here. You can see you can adjust the brightness on this one here so late at night. You can lower it down a bit. If you want to save battery life on this should last around about 10 hours.
Obviously, you can control your volume from here as well. So it's all pretty self-explanatory. When you look at the buttons here, it will give you an idea. For example, airplane will mean airplane mode I'm, not going to tell that now because, it will cost the Wi-Fi Bluetooth symbols their screen mirroring, for example, if you want it to mirror onto your Apple TV, then that is possible to do camera, for example, and then you'll be able to take pictures with it. If you want to get back to the home screen just hit the home button down here, you will feel that it's the actual clickable button and then, when you come to turn it off.
All you have to do is hold down this power button for a few seconds, and you will see, then it will ask you to swipe to power off so just swipe over to the right hand, side, and then it is now powered off and then to turn it back on again. You just need to hold down the power button for around two or three seconds, so one and two, and you see it, will light back up, and then we will have to put in our passcode now, because we've restarted the iPad okay, so touch ID is not going to work on this part. Now, because there we restarted it, so I just need to put in the passcode, and there we go straight back on again and now, if you just finish with it for a short time, you don't have to fully shut it down, and you can just put it to sleep, I, just tap him. The power button like that and then to turn it back on again. You can hit the home button down here, or you can just tap the power button again, and then you will see it will say press home to unlock, so I'm going to use my thumb, and you will see it's allowed me into it, because my thumb is the one that I registered if I was to turn it off and do it with my finger, then it wouldn't allow me back in, and it would ask me for my passcode.
You see because I use my thumb, it will allow me in there you go now if you want to move apps around the place. For example, if you don't want down here, you can just press and hold it for an extended amount of time involve a start. Wobbling around the place, and now you see I- can move it on to a spare part on the screen and let's say if I want to put the App Store down here. I can then just move that down to here, and you can see it will drop to there and then, when you finish with it, just tap the home button, and it will all go back to normal again, and this will work no matter what page are runs now. Let's say if there's an app that you don't want anymore.
What you can do is you can just again hold it for a prolonged amount of time, and they will all start wobbling like this, and they will have little X's next to them. And then, if you were just to tap the X, it will say if you want to delete it or not, and then you will just hit delete and then that app will be gone. I'm just going to cancel that to get it back to normal again, just tap the home button. So now, if you're using the Internet, you will go to this icon down here and then, for example, if you want to zoom into something, if something's a bit small you're, going to basically go out with your finger, so your thumb and finger at the same time and just move out, and you can now see that it makes it big and if you want to make it small, you just go in with those fingers like that. Now, if you hit the home button twice well, if you hit it once, it will bring you back to here, but let's say now: if you hit it twice, it will show you the other things you have opened yeah, and then you can, for example, go to all of your other things.
Now, if you want to get rid of some of them, you can just flick them away like that. If you want to use Siri you're, just gonna hold down the home button for a couple of seconds. What time is if it's 1222 there you go, and you can just ask it whatever you want to ask it. Also, apps, that's the main thing with this: you can just download numerous apps. So what you do is you need to go to the app store.
So if you just have a look around the place, you will find that the apps, or is this one here which, like a on a blue background, and when you tap that, then you can then look through all the apps. Some are free and some you have to pay for and now to adjust a volume on it. We have two little buttons on the right-hand side, so you can see now moving the volume up and moving the volume down and all the way to mute. If you want to have it completely quiet now, let's say if you want to view something in landscape, obviously its portrait when you hold it like that, and it will automatically flip over to landscape. But let's say now: if we want to keep it in landscape, then what we would do is we will put it on its side, and we're going to move up from the bottom.
So, even though this is the size you're still going to move up from what is now at the bottom, and we're going to hit this little icon up here, which is to the lock, and now it will stay in that position there. So if you have a look now back here, it doesn't matter if we go there, so if you're watching something on YouTube or Netflix, then we can keep it in landscape mode, and it won't keep moving every time you move it now. If you find that this signal is not very fast on it, it might not be anything to do with necessarily that there's something wrong with the iPad or even there's something wrong for your internet connection. It could just be that you're far away from your router. So if you have a look here at the very top corner here, you will see that there's like a kind of upside-down triangle, and that is the Wi-Fi signal.
So if you find that you've only got one bar, then it is gonna, be a lot slower when you're using the internet or Netflix YouTube etc. Then, if you have a good reception, so right now, that's a full reception there, but if that was to go completely immediate, just out of range of your routers, so basically just move it closer to your router or your router. However, you pronounce it in what country you come from, and then it will get a lot quicker. The nearer you are, the more bars you have now. If you have loads and loads of loads apps on here, you're, not sure where something is, if you don't use it very often, then what you can do is you can search for it very easily.
So all you have to do is just touch somewhere on the screen and just pull down a bit a little. So let go onto an empty part of the screen, for example here and then just go down a bit just like that, or you can go near the top and go down, but not from the very top. If you go from the very top down, it's going to bring up like your notifications, so just go anywhere on an empty bit of screen down a little, and then you can type in what you want there. So, for example, if you wanted to look up Netflix, then you would start to go in for Netflix, and then it will automatically bring up the things and on their. So it's just a nice quick way of searching for your apps.
Now when it comes to the camera, just tap the camera icon and then basically to zoom in on it, you can use this little slider at the side. Here you can see we're going in, or again you can use the pinch technique. So watch this. You see I'm going out with my fingers, and now I'm zooming in and then, if I was to go that way on the zoom in there. So it's up to you, whatever you feel more comfortable doing same effect.
If you want to do a video, then you just tap video instead of photo, and then you will see that icon will change they're more like a red button on a video camera and then there are other effects that you can have on it as well. You can play around with that when you have type so, let's say if you need to set a timer for whatever reason, you've got something in the oven or maybe the timers broke on your oven again, just go up from the very bottom like, so it brings up this page here. You just need to go to this icon. That looks like a timer tap there, and you can see now you can change this for, however long you want it so, for example, if you wanted to ten minutes there, you then just go to start, and then it's going to count down from ten minutes, and then you can choose to sound. It makes when it goes off like a kind of ringtone you can choose different sounds the ones that you like now an easy way to check.
Your latest news stories is from the home screen, just go to the left, sober swiping to the right. So if you have a look there you will see, then it will tell you the top stories now. Obviously, it's not just swiping to the left. If you're on this page here, and you swipe to the left, it's going to bring you to the previous page, but if you're on the pages over here, you can just tap the home button which will bring you back to the first home page, and then you see we can go there to the new stories. So, on the top right hand, side, you will see, you have a battery symbol, and it has the percentage next to it.
That basically means how much percentage is left on the battery, so we've got 61% left, which in normal use, will be around about six hours. So it's got a long battery life. If we need to charge it up, we just need to plug in the lightning connector into the port at the bottom, which you've seen earlier on in the video, and if you have a look, there now have a lightning strike mixed to it, and it changes to green, which means it's now charging that little symbol next to it. There it just means the Bluetooth is turned on so with Bluetooth. All that means is that sometimes you will need to connect things up, for example, your Fitbit or you might have a controller that you want to connect up to your iPad that uses Bluetooth.
So there you go. That is just a very basics just to get you up and running with the Apple iPad. Obviously it does so much more, but now you've got the basics. You can now go into the settings, and you can start exploring different things. You can go into the App Store and you can start to learn all the different things you can do with your Apple product.
So hopefully you enjoyed this video. Please give it a thumbs up. If you did, and please subscribe for more how-to videos, take care bye now.
Source : My Mate VINCE
Phones In This Article
Related Articles


Comments are disabled
Latest Articles


