How to replace the battery back glass door cover on samsung galaxy note 10 and 10plus By iSmart
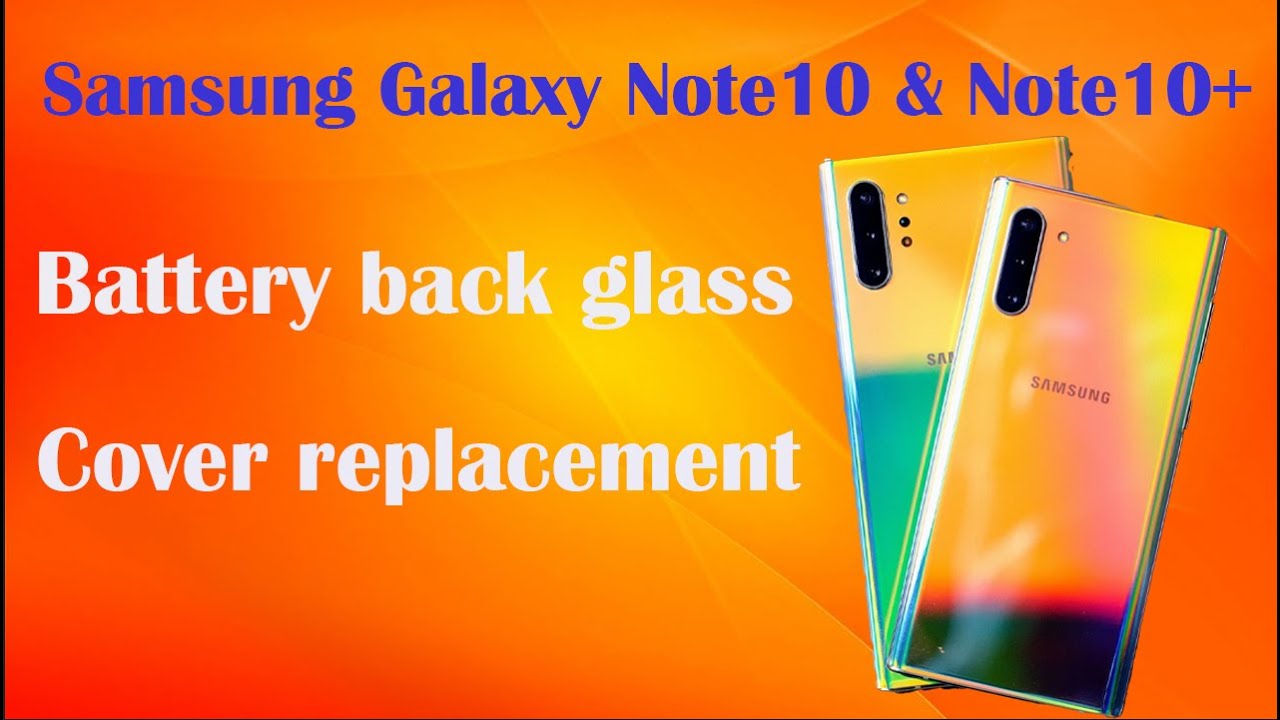
Hello friends welcome to this new tutorial. Today I have here the Samsung Galaxy note, 10 plus note 10 plus, and the problem one is, as you see, the back glass is broken. It's cracked from here, so I'm just going to show you in this video how to replace it. So to replace this back glass, we will need some tools. First, we will need a glass. I got this one from eBay.
I think I paid like 15 for it, and we will need a nice semi. We will need a double sticky adhesive. Sometimes you may not need it, but if you need it, you can buy it from eBay. Something like this. You can pay like seven dollar.
By the way, this one is called the 3?m double sticky adhesive, and we need the plastic like this. Then we will need a heat gun, and we will need a glove all right. So this is the glove I'm putting it yeah. I know it's supposed to be the other side, but this is for the right hand, not for the left anyway. So let's put this to the side, then we're gonna heat up.
The back frame for a couple of minutes like two minutes. It depends on how much your heat gun is hot, because this one has two levels: it has low and high. So if I use high one minute is enough- or maybe I need like more so- let's heat it up all right, so I think it's enough, so how I know if it's enough or not, I will use the IC semi and I will try to make a small gap here on this corner. So I'm just going to insert it like this if it fits inside normal, that's good! If you feel like it's very hard, you may heat it up a little more. So once you answer this IC semi here just try to make a small gap like this.
Don't wiggle, don't pry up just insert the IC semi straight then you're going to use the plastic, and you will insert it here, and you will remove this one, because if you use this one you're going to break your back and now my mind is already broken. So I don't have to worry about it, but in case you are opening the phone for another reason, make sure don't break your back. You know I mean the back of your phone, not the all right. So now I'm going to slide this one all around the edges like this. It may be hard a little, but if it's very tough you can heat up the phone a little more, and you're just going to keep sliding this and make sure you slide this one.
Only on the edges here, don't slide. It doesn't insert this inside because you may cut a cable or something there. You know so make sure you slide this one. Only around the edges don't go deep. As you see, I release this side here, and I release this side.
Okay. So this comes off easy because the phone is opened before, so I think that's why all right! So it's open all right! So now I already see that there is some adhesive here and that's what I'm gonna used to close the phone all right. So now this little piece here, your phone may not come with it. So in case the earphone doesn't come with this. With this camera lenses you may need to transfer this one from here from the broken one to the new one right so to transfer it you're, just going to heat it up and make sure don't touch the lenses with your finger.
You may like to make some smashes there, and you're. Just gonna use this one and you will insert it here, and you will lift this. You will open it gently until you, you remove everything all right, so I'm not gonna. Do that. So now what we're going to do? I will check if the adhesive that I have here is strong, we're going to use it.
We don't have to use the adhesive, but if it peels off easy- and I think this is peeling off easy, so we will have to put a new adhesive as you see. So this is not strong enough to hold the back here, but in case you don't have it. This will be enough because you're going to put the phone you're going to put it in a case in the case we'll keep holding this one until it sticks very well all right. So this one I'm just going to throw it away, and I will show you how to use this double sticky adhesive here. So we're going to take a strip, and we'll put it here from the corner, make sure the double stick.
Adhesive is not overlapping the edges, and we will just make sure it sticks very well here exactly covering the edges, then we will need. We need this cutter to cut adhesive from here. Okay, then, I will put another adhesive here always make sure it's not overlapping this edge here, because it's going to be bothering you once you stick it here for the phone gonna, stick in your hand, all right, so this one is ready. So now we're going to make a small cut here then we're going to put another strip here, the la the last one going to be on this corner. Here I mean on this edge all right.
So now I'm going to use this spatula. I forgot to mention that we're going to need a spider like this, but you can use any tool that is flat to just make sure that the adhesive sticks very well all right. So now I'm gonna, I'm going to uncover the adhesive, because this adhesive has two sides, so the first one is not covered that way. It sticks, but the other one. On the top it's covered I mean, is covered.
I always have to keep fixing my English mistakes all right, all right. So it's now it's sticky. So now it's ready to receive the back glass. So I'm just going to make sure this glass is aligned perfectly. Then I will okay see that there is something here: okay, that's not on the LCD itself, but let me clean this one make sure that the lenses doesn't have anything.
This is the air, the compressed air, and I'm just spraying like this to make sure there is no dust or anything there, because I need the glass to be. The camera has to be alright. So now everything is fine. All right! It's done, so now we can remove this plastic and voil?. You see it's shiny, it's shiny again, all right guys.
I hope that you learned something from this video. If you do, please hit the thumbs up. If you have any questions, leave them in the comment area, and they will make sure I will answer your questions. If not maybe someone who is knowledgeable, he may like to give you an idea. Also, if you are not subscribed, please subscribe for more videos, see you next video and have a wonderful time.
Peace.
Source : iSmart
Phones In This Article

Related Articles


Comments are disabled
Latest Articles


