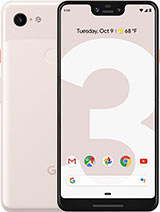
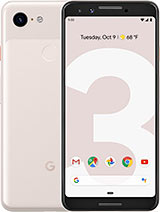
Google Pixel 3 XL Battery Replacement By AverageCanadianTech
Hey there guys how's it going its Ron from average Canadian tech. Here today we got a Google Pixel 3xl in for a battery replacement. We've been getting this phoning quite a bit. Lately I did a screen replacement a few months ago. I did the back glass replacement um like a month ago and uh now we're doing the battery replacement. As you can see, the new battery uh that we're going to be putting into it is right here uh, it's not technically new.
We did to get out of another pixel 3xl that had a broken screen uh, but the battery should be good enough, and obviously the customer is well aware that it is a used battery um. So anyway, we heat up the back glass, as we did for the back glass removal, uh reheat it to about 80 degrees Celsius or 165 Fahrenheit. You can work the playing card in uh this one, I'm going to definitely go more in depth, uh with removing the back glass, because this one is fully glued down. Like you know, factory glue and everything. So as you can see, it is a little trickier than uh.
What was shown in the back glass removal, video that I did a month ago, um a lot of heat, a lot of rubbing alcohol is required, it's incredibly difficult, otherwise, um you're almost definitely going to break the glass. If you don't use like, if you don't keep preheating it, if you don't keep applying more rubbing alcohol, so, as I said, I'm just going to go through the whole process of taking it off. It does take a bit of time it's going to take probably the majority or one of the longer parts of the video in terms of uh steps to take, but um just going to be showing you along like how it would go if you were doing it pretty much, I'm not going to be skipping over really anything important. The only reason I went fast in the previous video for the back glass is because that one uh, thankfully at least, was already done before it looked like, and the backlash came off incredibly easy in both cases. So this one's a more accurate representation if your phone was never worked on before you have to watch out for the fingerprint scanner.
Of course, on the side that you see me on right now, that's not the side where the ribbon goes over. It goes over to the left side, you'll see when the pack comes off, I'm trying to avoid any um. I don't know connections or anything like that. I've done the phone many times before, but uh. Furthermore, I'm always trying to be careful that I don't mess up.
You know charging port ribbon, or maybe the power button ribbon or something like that uh. You could always slice it. If you go too deep around the camera, it does have the camera lens holder, so uh. If you feel resistance there you're just hitting the camera lens holder, it's nothing too fancy, but if you're near the fingerprint scanner and here, and you're feeling resistance, well stop what you're doing you might break it as you can see now. Finally, the back glass is starting to come away, um very slowly at that the right side is starting to pop off and once that's you know of a little more.
We should be able to get more leverage for the left side. As you can see, I am flexing the glass a little just to try and apply pressure to the glue. If I were to flex it any more than what you see me doing here, it will crack um. So don't do that if you're not sure exactly like how much to bend it slicing through the glue on the bottom, for whatever reason they put so much glue on the bottom charging port area or the bottom speaker, so the glue down there is uh way thicker than anywhere else on the uh on the glass so um quite hard to cut through, in my opinion anyway. Now that we're through it, though, we can disconnect the fingerprint scanner, as we did last time, it's just a little latch style connector, so you lift the latch, and you pull out the ribbon cable and then your back glass has finally been uh pulled away.
I'm just going to remove any glue, that's been balled up or is like bunched up. You know, so it doesn't get in the way when we're applying the glass later so right now we need to take out the four screws on that metal silver piece that you see on the right side next to the battery. The battery connector is on that side, so we don't necessarily need to remove the metal and plastic pieces up on the logic board on the top part of the logic board and near the speaker on the bottom uh. We just need to remove this middle section. The metal piece it'll come away just like that.
Put that to the side. Now we have access to the battery, but there is also another connection that we will need to take off and that's the wireless charging pad now there's a couple ways you can do this, honestly. I don't think I did it the right way, but it did work out fine in the end. Anyway, it still works fine, but there are two ways. As I said, you can either take the battery and charging or wireless charging pad out together, uh, given how stuck uh and glued on the wireless charging pad is to the battery I'd probably say this is a better method.
Just uh use a bit of rubbing alcohol under the battery, lift it up as you'll see me do later, but leave the wireless charging pad on. Unlike you see me do here, where I'm actually taking it off um, it's not necessarily damaging the battery, but what had me worried is, as you can see, the wireless charging pad uh like the bottom of it, the plastic kind of peels away and reveals this graphene or whatever graphite material um. As I said, the wireless charging pad was tested after to make sure that it does work um. So this cooler didn't affect its functionality, but again, like you, probably don't want to be ripping stuff off, really anything so just to avoid this in the future, because it happened to both batteries. Um just remove it with the wireless charging pad either way there.
It is uh right there little romp, a little ruffled, but still working, so now we can actually get the battery out uh we're going to start digging in, but before we start doing that, we need to see where all the know, wiring and cables going underneath. As you can see, I almost went out on the wrong side. There would have been a cable sitting directly under there. I would have dug at and possibly ripped um, so it probably would be better to go in from the right side as we're seeing from the other frame, even though the wire is still going there. If you don't go deep, you're not going to hit that wire, also because I've never done a battery replacement.
I failed to realize that this phone does have pull tabs as well. So you literally could uh use the pull tabs at the top here. As you see me finally figuring out uh like an iPhone. Unfortunately, these pull tabs are not as easy as the iPhones, even though the newer iPhones are not that easy either. These are not that easy, um, it's a different kind of like pulse.
It's a different kind of little pull tab, so it definitely is not as fun. It breaks way easier feels way, more stiff, so um yeah not fun, but it did help out a little. I guess in getting the battery loosened up, I mean I guess it loosened up the top part of it, because then it became way easier to remove the bottom as you'll see in a sec gonna push in from the side up there a little don't push too hard, though, because, as you see I'm putting pressure on the motherboard, you don't want to damage that either way. Now the battery is finally popping out there, we go didn't even damage any of the ribbons underneath heck yeah. That battery is no good.
Now we throw the new slash used battery in connect it all up, get the wireless charging pad back on top of it after I get more glue off from the bottom speaker, all right now, the wireless charging pad. So it's not going to stick anymore. Unfortunately, we kind of took the glue off earlier, but as long as it's in the same place as long as it's sitting there connected, I mean it should do its wireless charging thing and function normally uh. Once everything is connected up uh now we can put that metal piece back on top get its four screws back in just going to speed through this part, like always, there we go now. We just gotta connect up the fingerprint scanner and uh put the back glass back on if you're having trouble, because I know I did put the fingerprint scanner back up onto the motherboard or connecting it, I should say, might help just to heat up the back glass and push out the fingerprint scanner and do it separately from the back glass.
In this case, I did get lucky enough to get it on without having to do that, but I know I had a bit of trouble uh getting it on. It took quite a while anyway, that's on there, so that's pretty much how you do a Google Pixel 3 XL battery replacement, not that difficult really at all. It is a little trickier than some phones, but uh definitely doable in my opinion. So, as you see, we did charge it up a little there uh it's turning on like normal, we'll just make sure it does boot up uh but yeah, guys, hopefully uh you enjoyed the video if you liked it feel free to like and subscribe if you didn't like it for whatever reason feel free to. Let me know why, in the comments it always does help out a lot too um yeah we're just going to test it out real quick hope.
You guys have a good one: stay safe and peace.
Source : AverageCanadianTech


