Google Pixel 3 Back Glass Replacement | How To By Tech Hobbies
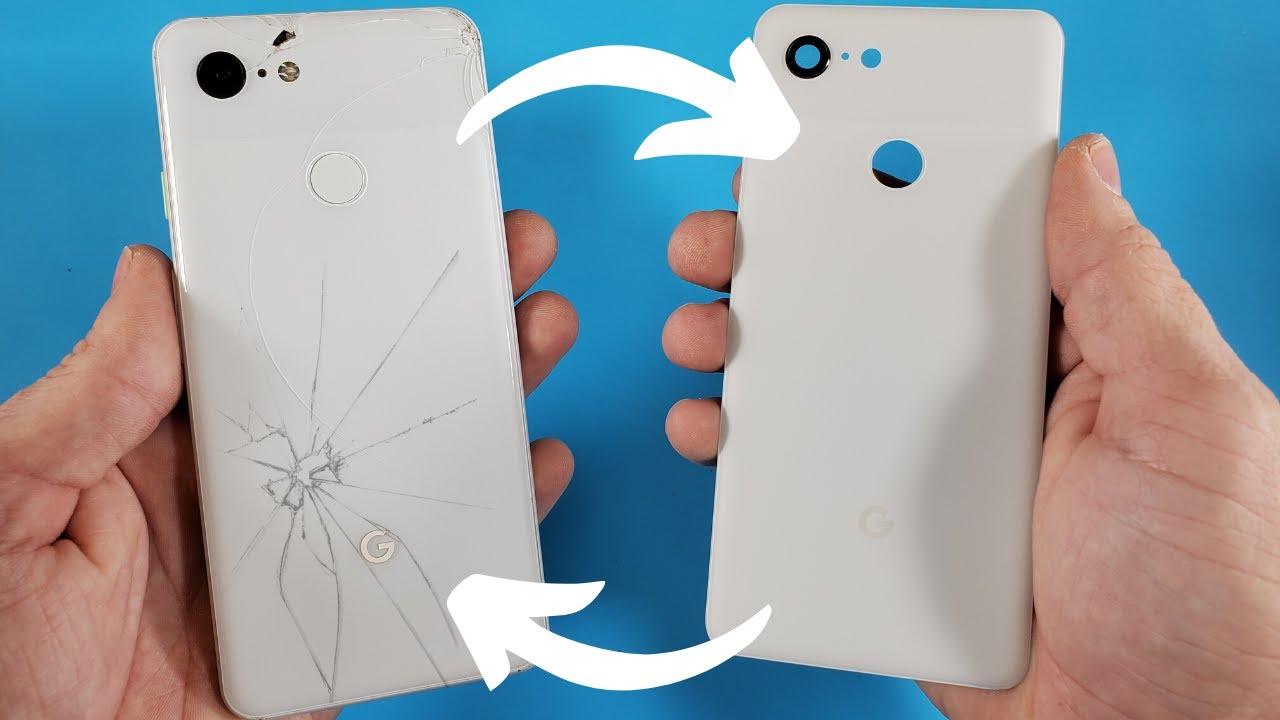
Hello YouTube welcome back to another repair video today, I'll be replacing the back glass on a Google Pixel three. For the most part, this is a fairly simple job to do as long as you take your time and be patient. If you decide to do this repair on your own, all the tools and replacement parts using this video will be listed down below. So before we start prying open the glass. We will need to heat it up so that the adhesive is weakened, I like to use a heat gun, but a hairdryer will do the job as well on this phone. Specifically, we only have an adhesive strip running along the edge when applying heat, avoid holding it in one place for too long so that you do not damage any internal parts.
The goal is to get the back glass hot to the touch, so that you cannot keep your finger on it for more than a second or two once we are done with that, we can go ahead and start prying off the glass in order to do that, I'll be using a thin metal pry tool in a blank plastic card. Plastic playing cards will work as well, normally I recommend to start off with a metal, pry tool and then work the rest of the way with the plastic card. The reason being is that you risk damaging or scratching the housing with the metal pry tool. It all depends on how comfortable you are using, as you can see, to start just prime between the glass and the housing. Slowly push your way back and forth into it until you have cut through the adhesive once you have cut through a bit, you can slide the plastic card in as well.
Whenever you come up to a crack, and you are unable to pass through just pull out the pry tool and repeat the same step as a safety precaution. It is always a good idea to wear gloves and safety glasses, especially if it is your first time doing it when you get to the left side of the back. There's a ribbon cable running along there for the fingerprint sensor, so you want to be extra careful and stay closer to the edge. I will switch to the plastic card just to be safe. Now all I have to do is cut my way through the top area.
If you need to reapply heat, feel free to do so using the same previous instructions since I've cut through most of the adhesive I'm going to gently pull the back open slightly by him, be careful not to pull it off completely so that you do not rip the fingerprint sensor. Ribbon. Cable gently move the back glass to the sides so that we can remove the cover for the fingerprint sensor, connector simply remove the two screws and unclip it next. We can go ahead and clean up the rest of the glass and glue remaining on the back of the phone in order to get the remaining adhesive residue left behind I'll, be using a plastic and metal spider to scrape it off or wherever it comes off easy I just like to roll it off with my thumb or finger again when using something metal be careful not to damage the housing. The remaining residue I would just clean it up with some rubbing.
Alcohol I recommend using a higher concentrate, since it makes it easier to clean, and it evaporates quickly avoiding any water damage using a cloth or rag dab a little on and clean away after we get the back of the phone nice and clean. We can remove the camera lens cover in the flash. Diffuser from the old class apply a little of heat, and they both should pry off pretty easily the new back glass that I ordered already has a camera lens cover installed. So I will not be installing this one back. If you need to install the old one back, just clean off the adhesive, if you need to and apply a new one on, I will also leave a link below for that, because most of the glue remained on the flash, diffuser I just installed it.
The way it is. The last thing we will need to remove is the fingerprint sensor using the same steps, apply some heat and carefully pry up from each side. If you end up needing to place new adhesives for any of the parts, this double-sided adhesive strip will work just fine line up the sensor onto the new glass and firmly press so that adheres properly. Seeing we have all the difficult part done with. All we have to do now is connected the fingerprint sensor back on screw the cover on and remove the plastic of the adhesive strip, starting from the top line, the top of the glass with the top edge of the housing and work.
Your way down be sure to apply lots of good pressure along the edge and there you have it folks, all done with a fresh look to it depending on how well of a job you do, the phone will still be somewhat water resistant, though I do not guarantee factory IP ratings. Thank you for watching this video I hope it was helpful. If you have any questions, please feel free to comment below, and I will do my best to reply smash that like button and if you haven't already please subscribe for more future videos, thanks.
Source : Tech Hobbies
Phones In This Article

Related Articles


Comments are disabled
Latest Articles


