Galaxy A51 Camera Review and Feature Walkthrough By Jonathan Casey
What's up everybody, my name is Jonathan Casey case you guys, don't know me. If you do know me welcome back to the channel today we're going to be talking about the galaxy, a 51 in specific the cameras. I'm gonna, give you like the camera walk through or a camera review, but first I want to show you some sample images and some video clips that way. You know what this camera is capable of capturing so make sure you stay tuned until after all the samples get through. If you want the walkthrough in the review, so let's not waste any more time and dive straight into it. Oh, by the way, this was shot on the 51 in 4k using the front-facing camera.
So let me know what you think of the quality down below all right. So first things. First, let's go ahead and discuss the hardware. The a51 features a quad camera set up on the back I. Guess if you own the phone, then you probably already know that the quad setup consists of a 48 megapixel main camera.
It's a half inch sensor with a pixel size of 0.8. Micron has an aperture of f2, and it uses PDA For phase detection autofocus in just like the s20 ultra. The other camera is an ultra-wide at 12 millimeters, with an aperture of f-22. Next up is a 5 megapixel macro camera with the pixel size of 1.1, 2 microns and an aperture of f28 4. Lastly, there's a dedicated depth camera, which is used for live focus on the front.
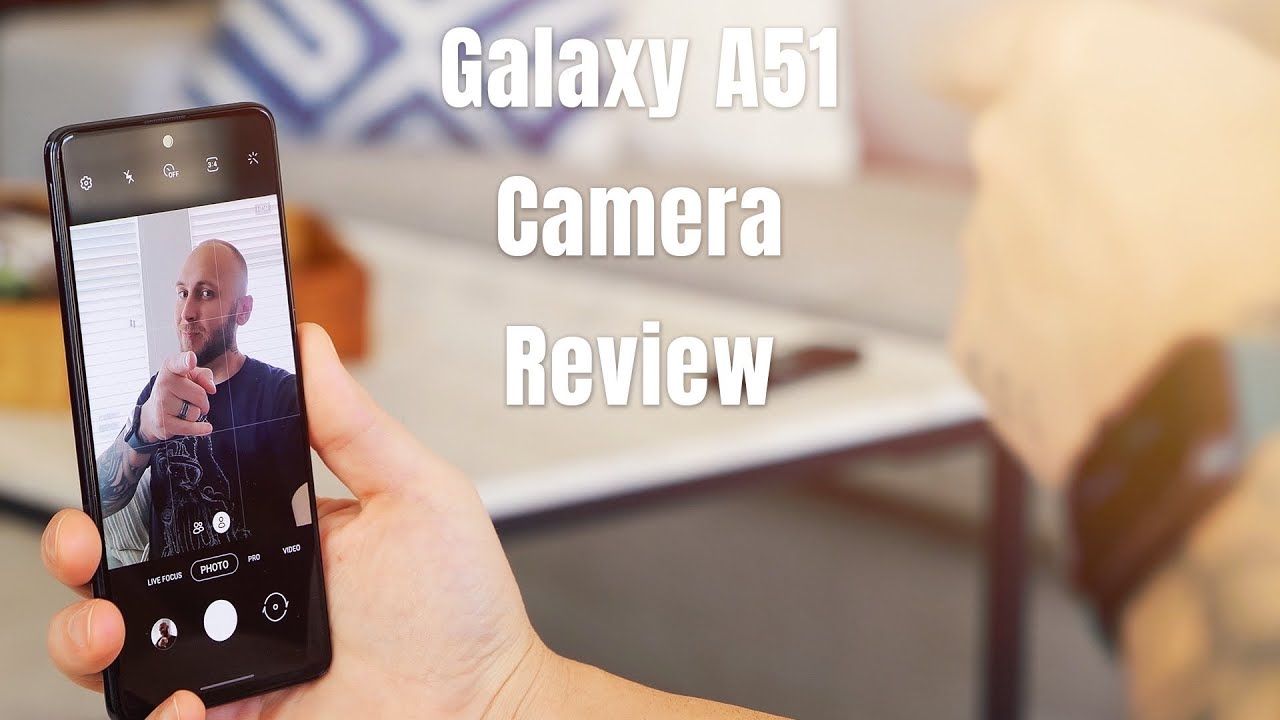
We have a 32, megapixel wide camera. Interesting fact, for you, the sensor size is only a hair smaller than the galaxy s.2000 try coming in at 1, / 2 point 8 inches when I saw that I found it pretty interesting, considering the s20 ultra has probably the best front-facing camera on any phone, alright. So with the hardware out of the way, let's go ahead and dive into the camera software. The first thing I want to talk about is the overall interface whenever you're, just in the main photo mode as soon as you open up the camera app starting at the bottom on the far left, we have access to our gallery. So this is gonna.
Show you your most recent photo as like a preview and then, if you tap on it, it's going to pull up your gallery. So then you can scroll through all the pictures that you've taken. If we go back next to the gallery, button is a shutter button if you're in the standard photo mode like so and then next to that we have the ability to switch to the front-facing camera, which is like a circle with two arrows and that's how you switch to the front and then right above that we have our different modes starting at the far left. We have live focus. This is going to give you that portrait mode effect that you know the iPhone was really known for when it first came out and next to that we have our photo mode.
Then we have pro mode. Unfortunately, pro mode is not available in video only for photo, but it's going to give you all the controls that you've grown to love when it comes to Samsung's implementation of a pro mode. Next, to that we have video course self-explanatory. This is gonna, be your video mode setting, and we're gonna. Come back to that, and we're going to dive -.
What makes this unique, and then we have a more tab, and this is gonna, be all the other modes available like panorama, you guys know what that is, then we have macro. This is gonna. Take advantage of that built-in or dedicated macro camera. Then we have food going back to the macro. Real quick I forgot to mention a macro mode does not have autofocus.
So keep that in mind. You actually have to your know, work the camera a little getting close enough in order to get a focused image. Then we have food so for all the foodies out there you go, then we have night mode. This is gonna. Give you like a long exposure.
So if you're doing something in low lights and the standard mode just isn't working out for you use night mode. Also, night mode is available on the front-facing camera. When it comes to the a51, which is awesome next to night mode. We have super slow motion. I believe this is at 960 frames per second, if not it's at 480, regardless it doesn't look very good, and I personally wouldn't use it, but I would use the regular slow motion which is done in 240 frames per second I believe at 1080p, and it looks pretty good, especially if you're in good lighting and then lastly, we have hyperlapse pretty self-explanatory.
If you're trying to do like a walking, time-lapse hyperlapse will come in clutch and then let's go ahead and go back to photo above the modes. We have the ability to switch to the standard wide and then the ultra-wide and then on the far right. We have the scene optimizer, which can be toggled on and off just by tapping on that. So if you notice that your colors are kind of funky, and maybe it's doing something weird two skin tones try to toggle off scene optimizer and then retake the photo, you might get better results at the very top. We have starting at the far right the ability to assign different filters in camera.
So when you take the photo with these filters turned on it's going to be baked into the image and then next to that we have Beauty mode, and you can toggle it on and off. If you toggle it on, you have access to skin smoothness, you can do various tones for the skin. You can do jawline improvements, I, don't know, I, don't really use it. So I can't tell you how good it works and then, lastly, we have eyes. So if you wanted to make your eyes bigger, I guess for a selfie image or make your friends eyes bigger, you could do that right there in camera, just remember it will be baked in my personal recommendation is to use third-party software to accomplish.
Any beauty affects that you want to do next to the beauty, mode and filter toggle. You have your aspect ratios, so if you tap on that, you're going to see an option for 3 by 4 and 48 megapixels. This is gonna. Give you the full resolution of the sensor. However, if you want better low-light results, just tap on 3 by 4 and that's gonna.
Take the 48 megapixel photo and then compress it to 12, megapixels and ultimately compressing a lot of that noise, and then you have 9 by 16 1 by 1 in full. Just remember. All of these other aspect ratios will affect the resolution of your image. If you go to the timer, you have 2 seconds 5 seconds in 10 seconds and then, of course you have your options for flash go ahead and dive into the settings. Some of the things that I want to quickly touch on are the scene optimizer, which I showed you can be toggled on and off right here.
But if you want to do it within the Settings app you could do so, then you have shot suggestions which is really cool. So if I toggle, that, on it's going to put a little circle in the center of the frame and another circle is gonna pop up on the frame and once you align those two circles, it means that you have framed your photo correctly, and it will turn yellow it's. It's really neat for people that don't know how to frame images or understand things like the rule of thirds. It might help you out, especially in like a landscape photo, but I just usually leave it on, because even for me, sometimes the images that it suggests that I take really have come out pretty good. So going back into the settings, we have the QR code scanner, you can change what happens whenever you long press the shutter button, so right now or by default, is usually on take a picture of me.
It might be on burst, shot actually a burst shot. So if you hold down the shutter, it's going to take a bunch of shots, but you could change that too. Just to have it take a single picture, or you can create a GIF. If we go into the save options, we have the option to save HE F pictures, which is high efficiency, image format, photos. This means that it's going to give you better compression with smaller file sizes.
The downside to that is all computers and all other smartphones or tablets may not support that image format. But if you have a modern phone or a modern computer or modern tablets, chances are you're, going to be just fine, so I just leave mine on and then the ultra-wide lens correction I always leave that on. If we keep going down, we have, you know H settings for HDR. We have pictures as previewed, which means, if you're taking a selfie, for example. However, you see yourself in your display, that's how the image is going to come out versus flipping it sometimes, so we have the option for grid lines.
So if you wanted the rule of thirds always on your display, you can turn that on, and now you can see we have the rule of third lines and to wrap it up. We have location tags, shooting methods which is various ways to trigger the shutter button at the very top. We have the volume key so by default. If you press the volume down button, it's going to either take a photo or start a video recording, but you can change it to zoom, or you can change it to just you know, controlling your volume, I usually leave it on take picture or record video and then right below that we have voice control, which is how you're able to trigger the shutter using your voice. So you can say things like smile, cheese capture or shoot, and then it will automatically take a photo or start a video recording.
Although that's, we have the floating shutter button. So if I toggle that on and then go back to the main camera interface here, you can see it puts up a second shutter button and I can drag and put it anywhere on the display to make triggering the shutter just a little easier. Let's go ahead and dive back into the settings, scroll all the way down to shooting methods, and I'm going to go ahead and toggle off the floating shutter button and the last one is show palm. If you're big into taking selfies then show your palm is going to come in clutch specifically when using the front-facing camera. As soon as the camera detects your palm, it will automatically trigger the shutter, so you could be further away from the camera, and you can have it on a tripod if you want to get like a full body shot honestly, there's a lot more I could talk about when it comes to all the different modes inside this camera.
But if I tried I'd be here all day. So if there's a lot of interest or requests, I will put together a camera tips and tricks videos. So let me know: if that's something that's you know piques your interest, but now let's go ahead and move on with video beginning with the main interface moving over. The video mode is as simple as just swiping over to video, or you can just tap on the name where it says video either way they both work so starting at the bottom from left to right. We have quick access to the gallery.
We have our record button, and then we have our toggle for the front-facing camera then moving up, we have our various modes, and then we have the ability to switch to the wide angle and to the standard wide. One thing I forgot to mention when we were talking about the macro mode, is that video does not work when using the dedicated macro camera kind of bummer like I. Don't know why we can't shoot video using the macro, camera I think that'd be kind of cool, maybe they can push it out in the update. I, don't know, but at the time of this video does not work with macro. In case you were wondering going above the lens selection or the camera selection.
We have our top row of icons, starting at the right. We have a doodle, so if you wanted to doodle a little while you are shooting some video, you can do that. Obviously you can see I, never use it. Next, to that we have our aspect ratios 9 by 16 is the default aspect ratio and whenever you flip it to landscape, it's going to become sixteen by nine. If you wanted to do something more Instagram friendly one by one, is always the best aspect ratio for that, and then you have full, which is going to take up the full width of the display.
I, usually just keep mine on nine by 16 and 16 by 9, then we have super steady, video super steady, video only works in 1080p, but if you're looking for some silky smooth video enable that and then chase your kids around or chase your ROG around your goldfish whatever you have it's going to be super stable. Next to super steady video, we have our flash, so you can have it automatically turn on whenever it feels the need to turn on doesn't really work this way in video, but for stills you can have it like that, and then we have the ability to turn it on like a flashlight. So it stays on all the time more appropriate for video, but I never use it. So I'm going to go ahead and toggle it off and then let's go ahead and dive into the settings, beginning with the rear video size of resolutions. So in sixteen by nine we have access to 3840 by 2160 or 4k UHD.
Then we have 1920 by 1080, and then we have 720p you'll notice that you do not have 60 frames per second in any of these modes, which is kind of weird and in case you're wondering none of them are 24 frames per second they're all 30. So bear that in mind. Then, if you wanted to shoot in a different aspect, ratio like use the full width of the display it peaks at 2400 by 1080, and if you wanted to use that Instagram friendly mode or one by you're, looking at 1440 by 1440. My suggestion is just shooting, 4k and then crop into the aspect ratio that you need to crop into. Just make sure you shoot wide enough that you can actually do all that cropping without losing anything that you want it into frame.
Let's go ahead and back out and look at the front-facing video size. So you can see it maxes out at 3840 by 2160, and all the other resolutions are the same as well and the same thing with the aspect ratios again: no 60 frames per second here kind of weird, but the fact that it has 4k on the front-facing camera at this price point is kind of cool. So let's go ahead and back up we have high efficiency, video codec, which is just like Ha F, but this is Ha C. So it's the same concept, though it's going to give you better compression in smaller file sizes. The downside is all phones, tablets and computers may not be compatible with this codec.
So if you're trying to share a video, they may not be able to view it depending on whatever computer or device they're using, but most modern phones and most modern computers are capable of viewing this type of codec. So now you know, then we have video stabilization, which is turned off because it does not work in 4k. Then we have pictures as previewed same thing as with stills. However, you shoot it is how it's going to look in terms of perspective. Of course, then we have red lines same thing and pretty much everything else down here is the exact same as when in stills mode.
The a51 has a surprisingly great camera for the price coming in at 399 dollars here in the US I. Believe it's one of the better smartphone cameras in this price range. Well, it's not! I phone SE or pixel 3 a quality I think it brings a nice balance of features and quality. Having the ability to use live focus without the human face makes that mode much more usable than the iPhone SE s portrait mode plus having a dedicated pro mode for photos and the ability to use night mode with the standard. Ultra-wide and front-facing cameras really add to the functionality of the a51.
Even the macro camera is fun to play with, even though it doesn't have autofocus, it would have been cool to see 4k 60 on the 51, but that could be a process or limitation. In any case, I personally, like the cameras and I, think that most other people will too so, if you're in the market for the 51, or you're. Looking at the 51 as your next phone and cameras are the most important thing to you, I, don't think you're going to be disappointed. Let me know what you guys think of the 51 and if you want to see more, a 51 camera videos like the tips and tricks that I mentioned earlier. Let me know by hitting that thumbs up button subscribe for more videos, just like this, and I'm gonna talk to you, Swedish meatballs in the next.
Source : Jonathan Casey
Phones In This Article


Related Articles


Comments are disabled
Latest Articles


