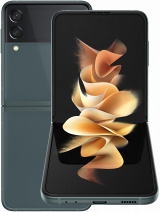
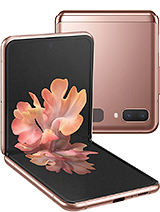
Destroyed Samsung Z Flip Folding Phone Restoration - Most Expensive Phone To Repair By Hugh Jeffreys
Hi guys welcome back to another huge Jefferies video in this video we're going to be restoring this destroyed, Samsung, Galaxy Z, flip this folding phone has an almost dead display, smashed back, broken camera lens and won't charge via the USB port, requiring it to be wirelessly, charged with an abundance of broken z, flips online. What does it take to repair one like this and, more importantly, what would it cost? You won't believe how much a replacement display cost me for this phone. I imported this particular phone from the US, which cost me 254 Australian dollars. After all, the shipping costs and eBay taxes for a phone Samsung still sells for 1500. This sounds pretty cheap included was nothing more than the phone itself powering up the phone. I felt the vibration, but no picture appeared.
This phone was described as having a discolored screen that goes black, so this was expected. I couldn't get the display to light up properly enough for the camera to see it, but in the listing photos you can see two black blobs at the point where the display folds these fractures to the display are what has killed the screen upon closer inspection. I noticed that the rear display also didn't function and that the back panel was loose opening it up. You can see someone has been inside and hasn't reconnected, the cable for the back display we'll be replacing this anyway, but I wanted to see whether it worked reconnecting the cable. It worked just fine to fix this.
The flip I'll be requiring a new display assembly rear display with glass, along with a new charging port. These are all brand new Samsung service parts and were the only ones I could find online after hours of searching find out at the end, how much these parts cost and my thoughts on foldable phones to begin. I'm going to heat up the lower portion of our Galaxy Z, flip at 120 degrees, for a couple of minutes, after which I can use a suction cup, to create a gap for a plastic pick to insert at the bottom of the phone. I can then work it around loosening the adhesive holding on this lower glass plate after working the pick all the way around the perimeter. This glass panel can simply be removed from the phone.
Typically, you would repeat the same process for the top half. However, as mine isn't stuck down, I can simply lift it up and disconnect the display cable proceeding. I can start unfastening all the Phillips screws holding the antenna and metal shield in place, after which I can simply lift them out of the phone. I can then disconnect the first battery and move down to the lower half of the phone where I'll disconnect the other. Removing the wireless charging module will give us access to the speaker, which we'll need to remove to gain access to the charging port after getting it out of our way.
There are several cables we'll need to disconnect, as well as lift on the charging port to get the last cable connecting underneath with that out of our way, it's time to get out this lower battery, I started by using some plastic picks, although that wasn't working, so I applied some alcohol to the plastic picks and allowed it to run underneath the battery. This helps significantly in softening the adhesive holding it down in place. I could then use the picks to pry up at the battery and get it fully removed from the phone. This battery was manufactured in late 2019, moving up to the top portion of the phone I'll, remove the sim card tray and start disconnecting all the flex cables connecting to our motherboard, after which I can lift and remove the motherboard from the phone. This dual layer board is packing.
A snapdragon 855 plus with eight gigs of ram and 256 gigs of storage. Next to come out is our second battery, which is significantly smaller than the last one preceding we'll need to get out our vibration motor. I applied some alcohol to loosen the adhesive holding it in place and used a pair of tweezers to lift it out. The last thing to come out is this rubber piece covering up the interconnect cables with our z-flip disassembled. We can see the common parts can easily come out.
However, the hinge and display's inner workings are still hidden as the display comes as one whole assembly. This is as far as we need to take it, but I'm sure you're wondering how the display works, so I'm going to take it a bit further before we start reassembling I'll start by removing the plastic bezel around the display. It's only held in with really weak adhesive and comes off very easy with that. Out of the way, it's time to get the whole screen removed. It's held in with some adhesive on the top and bottom sections, and just a word of warning.
I would never do this to a working display, but as ours is broken, it doesn't matter if we damage it more to get underneath the display itself. I'll just use some plastic picks and wiggle it around to separate the display from the frame with the screen removed. You can see just how springy it is letting go of the display in a closed state. It will fly right open. It's definitely pretty amazing that they can make a display fold just like this.
However, it's now time to start reassembling, our new display comes with the frame and screen already attached. This is a good thing, as it means we're not going to damage the new display, trying to line it up and make sure it folds in the correct way. I'll start by installing the new charging port into our new screen assembly. By connecting the cable on the bottom and removing the protective film over the adhesive pressing it down back into place, I can connect the display cable, removing some protective film. I can install the battery with a few new adhesive strips pressing it down into place.
There are a couple of cables that I'll need to connect to the charging port. Before I can reinstall the speaker and its appropriate screws up at the top of the phone I'll remove some more plastic protective film on our new display being very careful of one of the flex cables as it's taped to this film, I can then prep the second battery by installing a new piece of adhesive and reinstall it into our phone. Next up, I can reinstall the rubber grommet over the interconnect cables and get our vibration motor reinstalled. I applied some liquid adhesive here to hold it firmly in place. There's some more plastic protective films I'll need to remove before we can install our motherboard carefully routing it around all the flex cables.
We can seat it down into position and reconnect all the flex cables. Returning to the lower half, I can reinstall the wireless charging module and the antenna at the top of the phone reconnecting the two batteries. It's time to test out this phone, removing the rubber border around the display. We can test out and see our phone successfully powers on after testing out some functions of the phone. It's now time to get it fully.
Reassembled one of the brackets was badly bent by an incompetent repair technician who opened this phone prior to me. So I'll bend it back as best I can with the bracket straightened. We can reinstall it into our z-flip and secure it down into place with the several Phillips head screws. Turning our attention to the lower glass panel I'll need to take off all the old adhesive that was securing it down into place. I couldn't find any new replacement adhesive, so, unfortunately we're going to have to use more liquid adhesive.
I wouldn't advise doing this. Unless you have no other option, it will hold it down. Just fine, however, the adhesive can be messy and may seep out the sides, I'll press down the lower glass panel into place and wipe off any excess after it dries now. All that's left to do is to connect the new top glass panel to the phone after reconnecting the flex cable. I can position it and press it down into place with the hardware side of things all good to go.
The last thing I'll need to do is power up the phone and fix the software sim lock on this device entering the correct unlock code. Will network unlock this device and with that we're done so this? Is it a once destroyed Galaxy Z. Flip has been restored into fully working condition in terms of cost the parts totaled 1033 dollars with the most expensive part being the display coming in at 895 factoring in the initial price of the phone we spent 1 287 a mere 213 saving of a brand-new phone. In fact, Samsung offers a display replacement for only 840 dollars, which is cheaper than doing it yourself. Repairing this foldable phone has brought to light some major issues.
Parts are not only hard to come by, but extremely expensive. The bigger issue is the technology itself. The concept is cool, but impractical, given just how fragile the display is. Not only does it scratch easily, but they have a tendency to break a quick look on places like eBay reveal loads of Galaxy Z, flips with broken screens, most of them damaged where the display folds I owned another z-flip, but returned it due to it not reading sim cards. Its display had micro cracks where the display folded, which caused the touch not to work in that area.
In reality, unless the price of displays massively drop a lot of these broken foldable phones are just going to end up as e-waste. Foldable phones are kind of like exotic cars. They look nice cost loads and are a nightmare when it comes to repairs, and on that note this has been a huge Jeffries video if you like what you saw hit that subscribe button and consider checking out the phone restoration playlist for more videos. Just like this one and if you're looking for any tips or what tools I used to repair devices be sure to check out my website, link for which is down the description. That's all for this video, and I'll catch.
You guys next time.
Source : Hugh Jeffreys


![☘️ [Price] Cover For Alcatel 1SE 2020 Case Soft Silicone Back Case for Alcatel 1SE 2020 1 SE Review](https://img.youtube.com/vi/lWKAJbUdcHI/maxresdefault.jpg )


