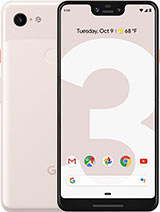
Top Pixel 3 XL Camera Tips & Tricks. After the update. Google Camera version 6.1.021.220943556 By In Depth Tech Reviews
Welcome back, you and I really want to thank everyone. Watch at my previous video and subscribed to my newly created a channel that made me more excited and committed to publish more videos. So in today's video I'm going to walk you through Google's camera features on the pixel 3xl. These features really change the way I take photos on my phone, so the first thing I will start with here is adjusting depth of field on portrait photos. So, let's start by taking a quick photo of myself. So as you can see, the bouquet effect here in the background.
So if you tap the small edit button right here, then tap it again, you will see a depth, a slider and, as you move it, you will start noticing the difference. When you move it all the way to the right, it will be more aggressive and vice versa. Also, you can tap to change the focus either on the background or the subject. The other cool thing you can do with portrait shots is the color pop filter. So, as you can see, it makes the subject in color and the background in black and white I personally, like this filter and I use it a lot.
If you may know that Google had color pop filter for a long time. However, it used to only happen if Google Assistant automatically created a photo for you as a suggestion which never happened to me. So I'm really happy that it's available now, and here is another back camera sample of the color pop filter. So next up is top shot. So here is how it works.
It simply captures a bunch of photos even before you hit the shutter button and suggests the best one for you. The idea here is to make sure that you avoid photos with closed eyes or missing the shot, with a moving object and I can't believe how fast it is. So let me show you an example here. The first thing you need to do is to activate the motion using the circular icon at the top, so I will blink really, really fast and snap a shot. As you can see, the photo looks really awful, so I will swipe up, and we'll see here a timeline with all the shots taken, tap the timeline and after a second it moves to the recommended one and to be fair, it always gets the best shot.
It also recommends other ones, or you can swipe over the timeline to pick the photo yourself. If you may know a re stickers that was released last year with the pixel to excel lunch, it's now called playground. It's an argumentative feature that allows you to add characters or objects to your footage. So I will show you some code examples here. If you swipe to the far right and the choose playground, give it a second to load, then tap on this icon face, and you will get a bunch of characters like superheroes over here, Star Wars or even more.
If it's a greyed out, it means that it needs to be downloaded just tap on it, and it will give you the option to download play. Emoji has all the characters and objects you can get, and you also have these funny stickers. We'll start by choosing this poor little kit, so let me adjust the placement and the size of her here. You go so as you can see it interacts by waving at me. So let me take a photo, and you can also take a video by holding down the shutter key.
The other option is to add text, and that's my favorite, sometimes I, add annotations to explain something in the shot or even text bubbles to create some funny shots. So I don't need to use any other app to achieve this I. Just do it right from the camera before even is snapping the shot. It gives you a lot of styles and colors to choose from so let's try a real scenario here. I will add the word Xbox on top of my Xbox controller I will give it the style and the color I want and adjust it to fit the size and place, and, let's add another one for my plant over here, the best part of it.
It sticks where you keep it. If you move the camera at the stage where it should be so let me show you some footage I took with the playground, so one last thing: the characters can even interact with each other. Google sense is now integrated directly in the camera and no longer a separate app, which is much easier to use. So I will start here. With this business card, I took from a restaurant, I will simply put it behind the camera and, as you see, it immediately figures out the phone number so tap on the call icon, and you were ready to make the call.
It also detects email addresses and if you need more, just hit the lens icon, and you will have a plenty of options. It will show you this color circles and if you hit it, you will be able to locate the place on the map, see photos of it or even create a contact with the details. You can also copy text which I usually do when I need to copy text from a screenshot I took before I open my photo and I see a little lens icon when I tap it. It detects the text and allow me to copy the text I want, which saves me a lot of time. It also detects more codes or even products and suggests sellers for it.
But I found this last one needs improvement as it doesn't work for me most of the time motion autofocus. It makes you focus on photos and videos, always right. It looks the focus on any moving object as I'm showing you here now you can use external mic while recording videos. So if you want to vlog, or you are recording in noisy environments, external mics will be helpful when I need to use an external mic. I block my boy, a mic to the dongle and then connect it to the phone.
A new icon will appear which will allow you to swap between mics super red zone is a new feature introduced with the pixel three XL, where it uses your hand, shakes to take multiple shots which will allow the camera to replace the distorted pixels in the shot with better ones. But what if you are using a tripod? If that's the case, the lens will do the movement itself, as I will show you here notice. How stable is my tripod when I zoom in you will see the picture moving. This is not my first time to talk about the nitrite, but in this video I will show you how it works. It simply takes multiple shots and the keeps the lens open for more time to grab as much light as possible.
In addition to AI, to identify the colors of objects to activate jump to more and the tap Night side so to test it, I will switch off the lights where I don't even see anything around even before taking the shot. I can see my controller on the phone screen. If I swap to a normal camera, it will suggest the nitrite for me. So let's hit the shutter key, and they take a shot and see the results. So, as you can see here, it took about five to six seconds to finish, but the results are worth waiting.
So thank you for watching guys and I will end my video with some stunning Night side shots I took earlier. So please don't forget to subscribe and hit the middle icon.
Source : In Depth Tech Reviews


